If you're selling, or even giving away, digital products on your WooCommerce store (e.g. Audio/Video files, Zip files, eBooks, PDF's etc…), it's a great idea to offload those resources onto a third party, like Amazon S3 (Amazon Simple Storage Service), which is part of AWS (Amazon Web Services).
Offloading your products to a service like S3 means that your hosting disk space and bandwidth wont be impacted when customers purchase and download your products. If your products are attracting a large number of downloads, or if your products are quite large in size, this can be a huge saving in terms of hosting costs. Using a service like Amazon S3 isn't free, but it will be cheaper than paying for extra disk space and/or bandwidth from your hosting provider.
In this post I'm going to run through the steps to setting up your Amazon S3 service and WooCommerce products so that everything works smoothly and securely. Logging into AWS for the first time can be very intimidating, but with these easy to follow steps, you'll have everything setup and configured in no time at all! So let's get started…
Steps we’ll be performing
01. Setting up AWS
– Create AWS Account
– Setting up Groups & Users in AWS IAM (AWS Identity and Access Management)
– Setting up S3 Buckets
– Uploading your files to S3
02. Setting up WooCommerce
– Installing Amazon S3 plugin
– Setting up Digital Products to use your S3 files
AWS products we’ll use
Amazon S3
Amazon Simple Storage Service (Amazon S3) is an object storage service that offers industry-leading scalability, data availability, security, and performance. This means customers of all sizes and industries can use it to store and protect any amount of data for a range of use cases, such as websites, mobile applications, backup and restore.
AWS Identity and Access Management (IAM)
AWS Identity and Access Management (IAM) enables you to manage access to AWS services and resources securely. Using IAM, you can create and manage AWS users and groups, and use permissions to allow and deny their access to AWS resources.
01. Setting up AWS
1.1. Create AWS Account
Go to https://aws.amazon.com
Create an AWS Account if you don’t have one, using the Create an AWS Account button.
If you already have an account, login by clicking the Sign In link or by clicking AWS Management Console under the My Account menu option.

1.2. Setup IAM Groups & Users
AWS Identity and Access Management (IAM) enables you to manage access to AWS services and resources securely. Using IAM, you can create and manage AWS users and groups, and use permissions to allow and deny their access to AWS resources.
Select IAM under Security, Identity, & Compliance in the Services menu. Alternatively, you can also type IAM in the search field at the top-left of the page and click on the IAM service when it displays in the search results.

Once on the Identity and Access Management (IAM) screen, select Users from the left-hand menu to display your list of AWS Users. If this is the first time setting up any users in your AWS account, then this list will obviously be empty to start with.
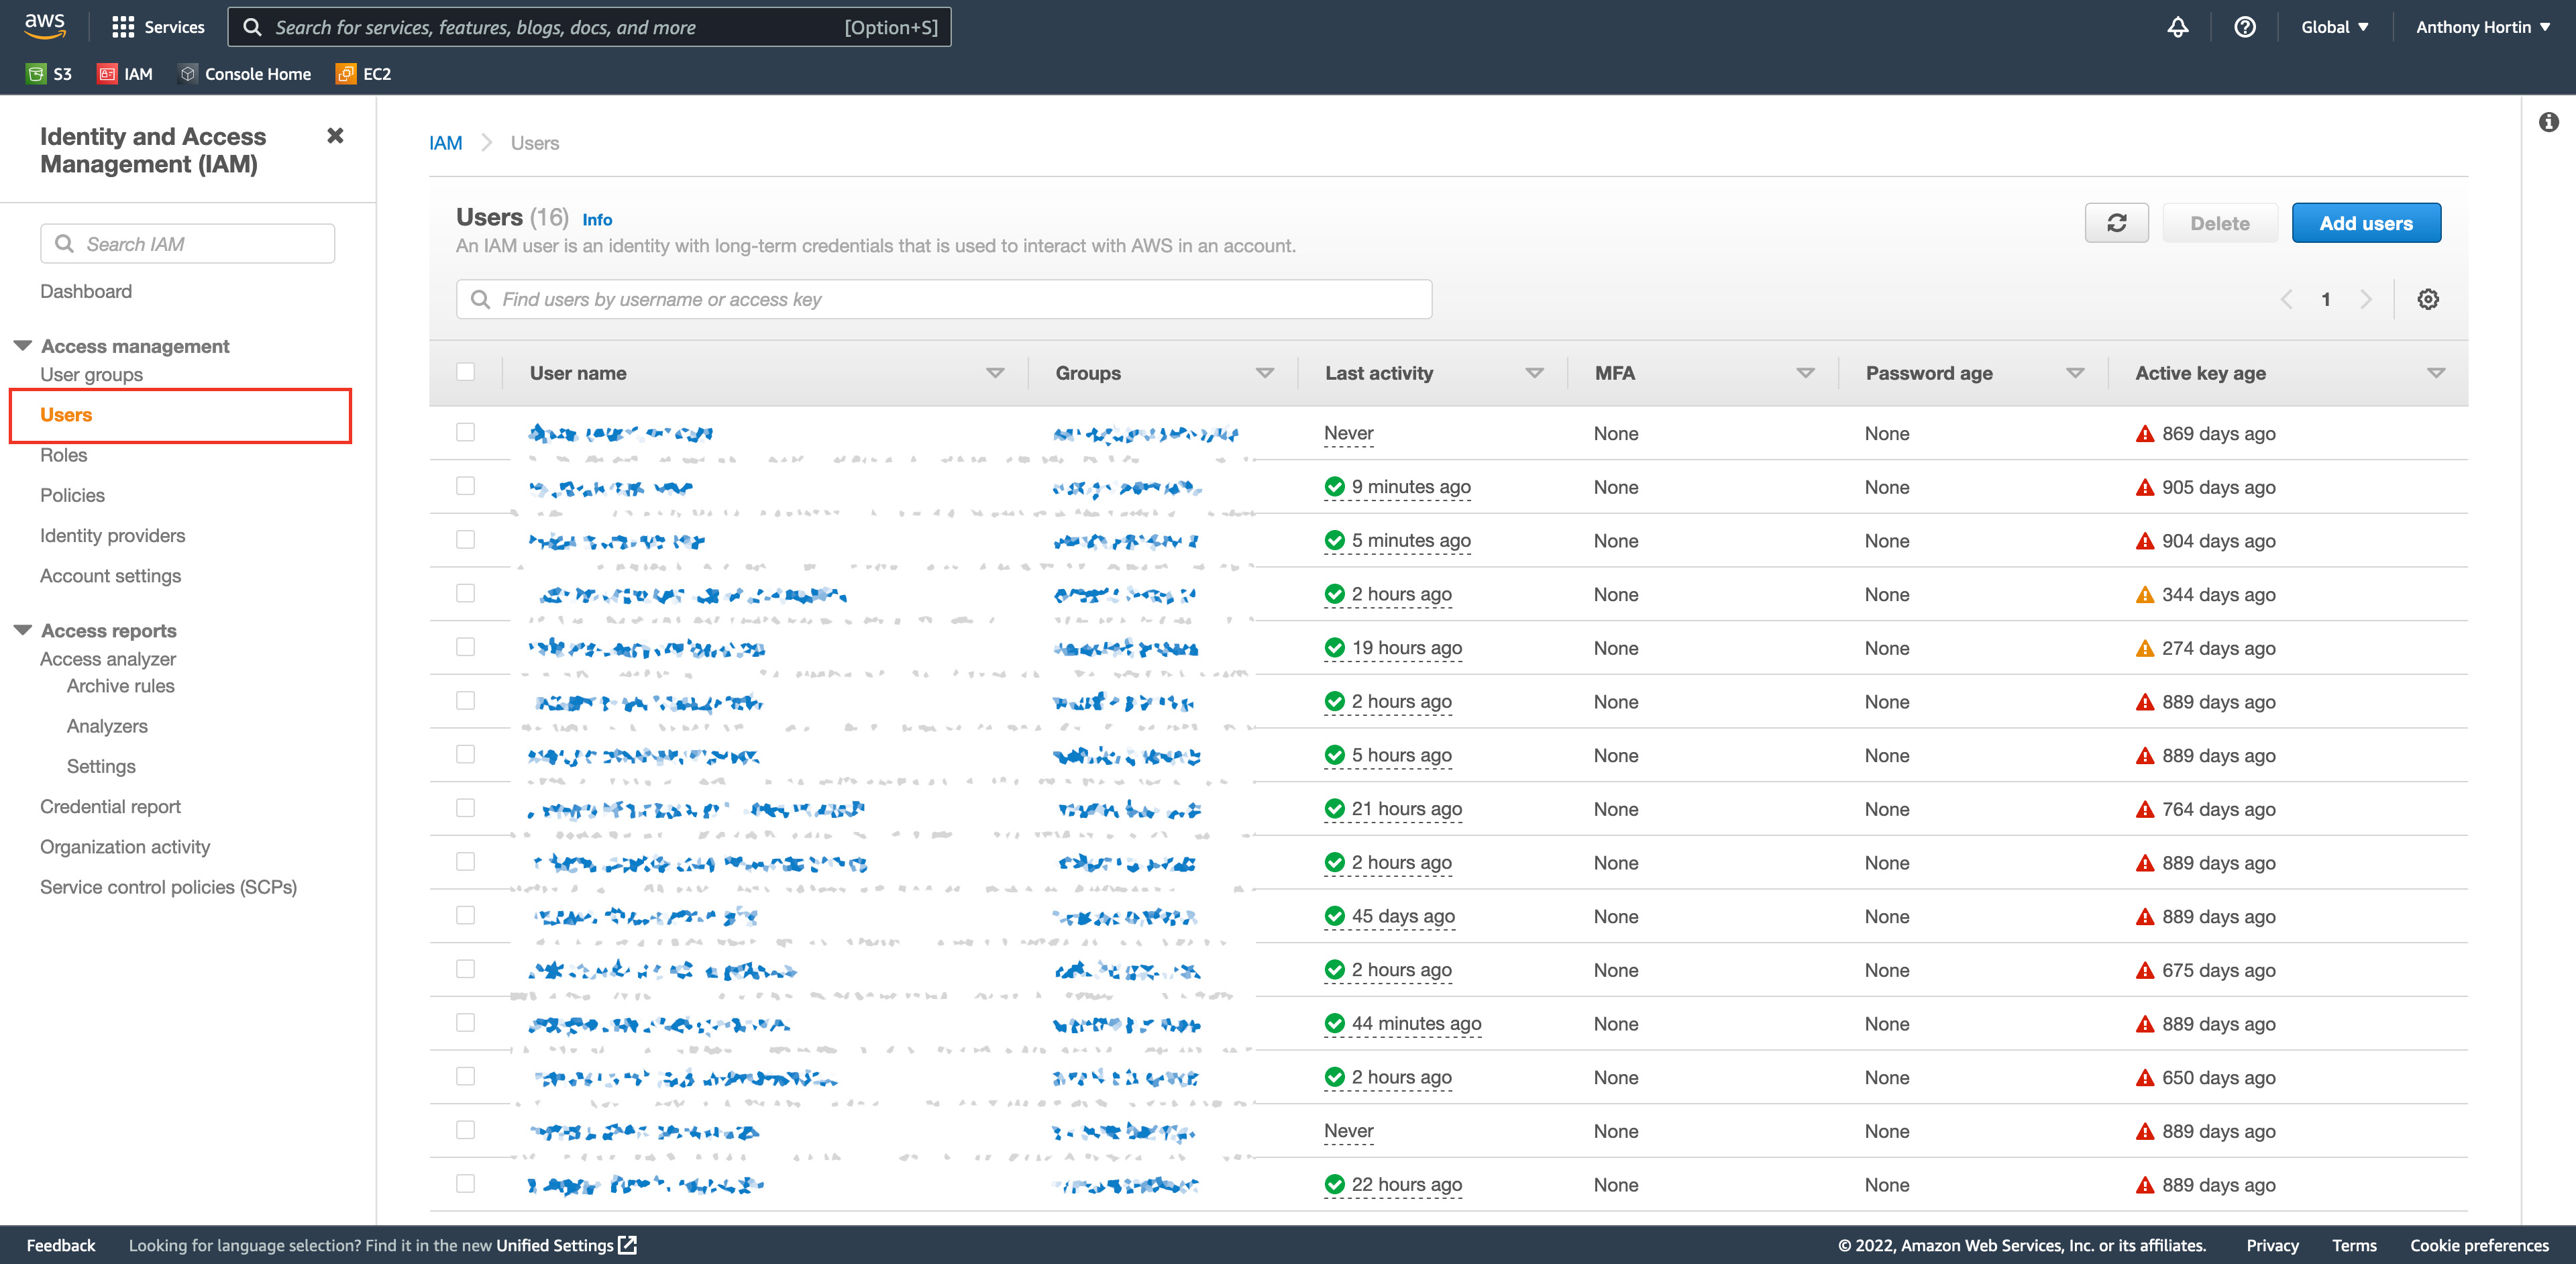
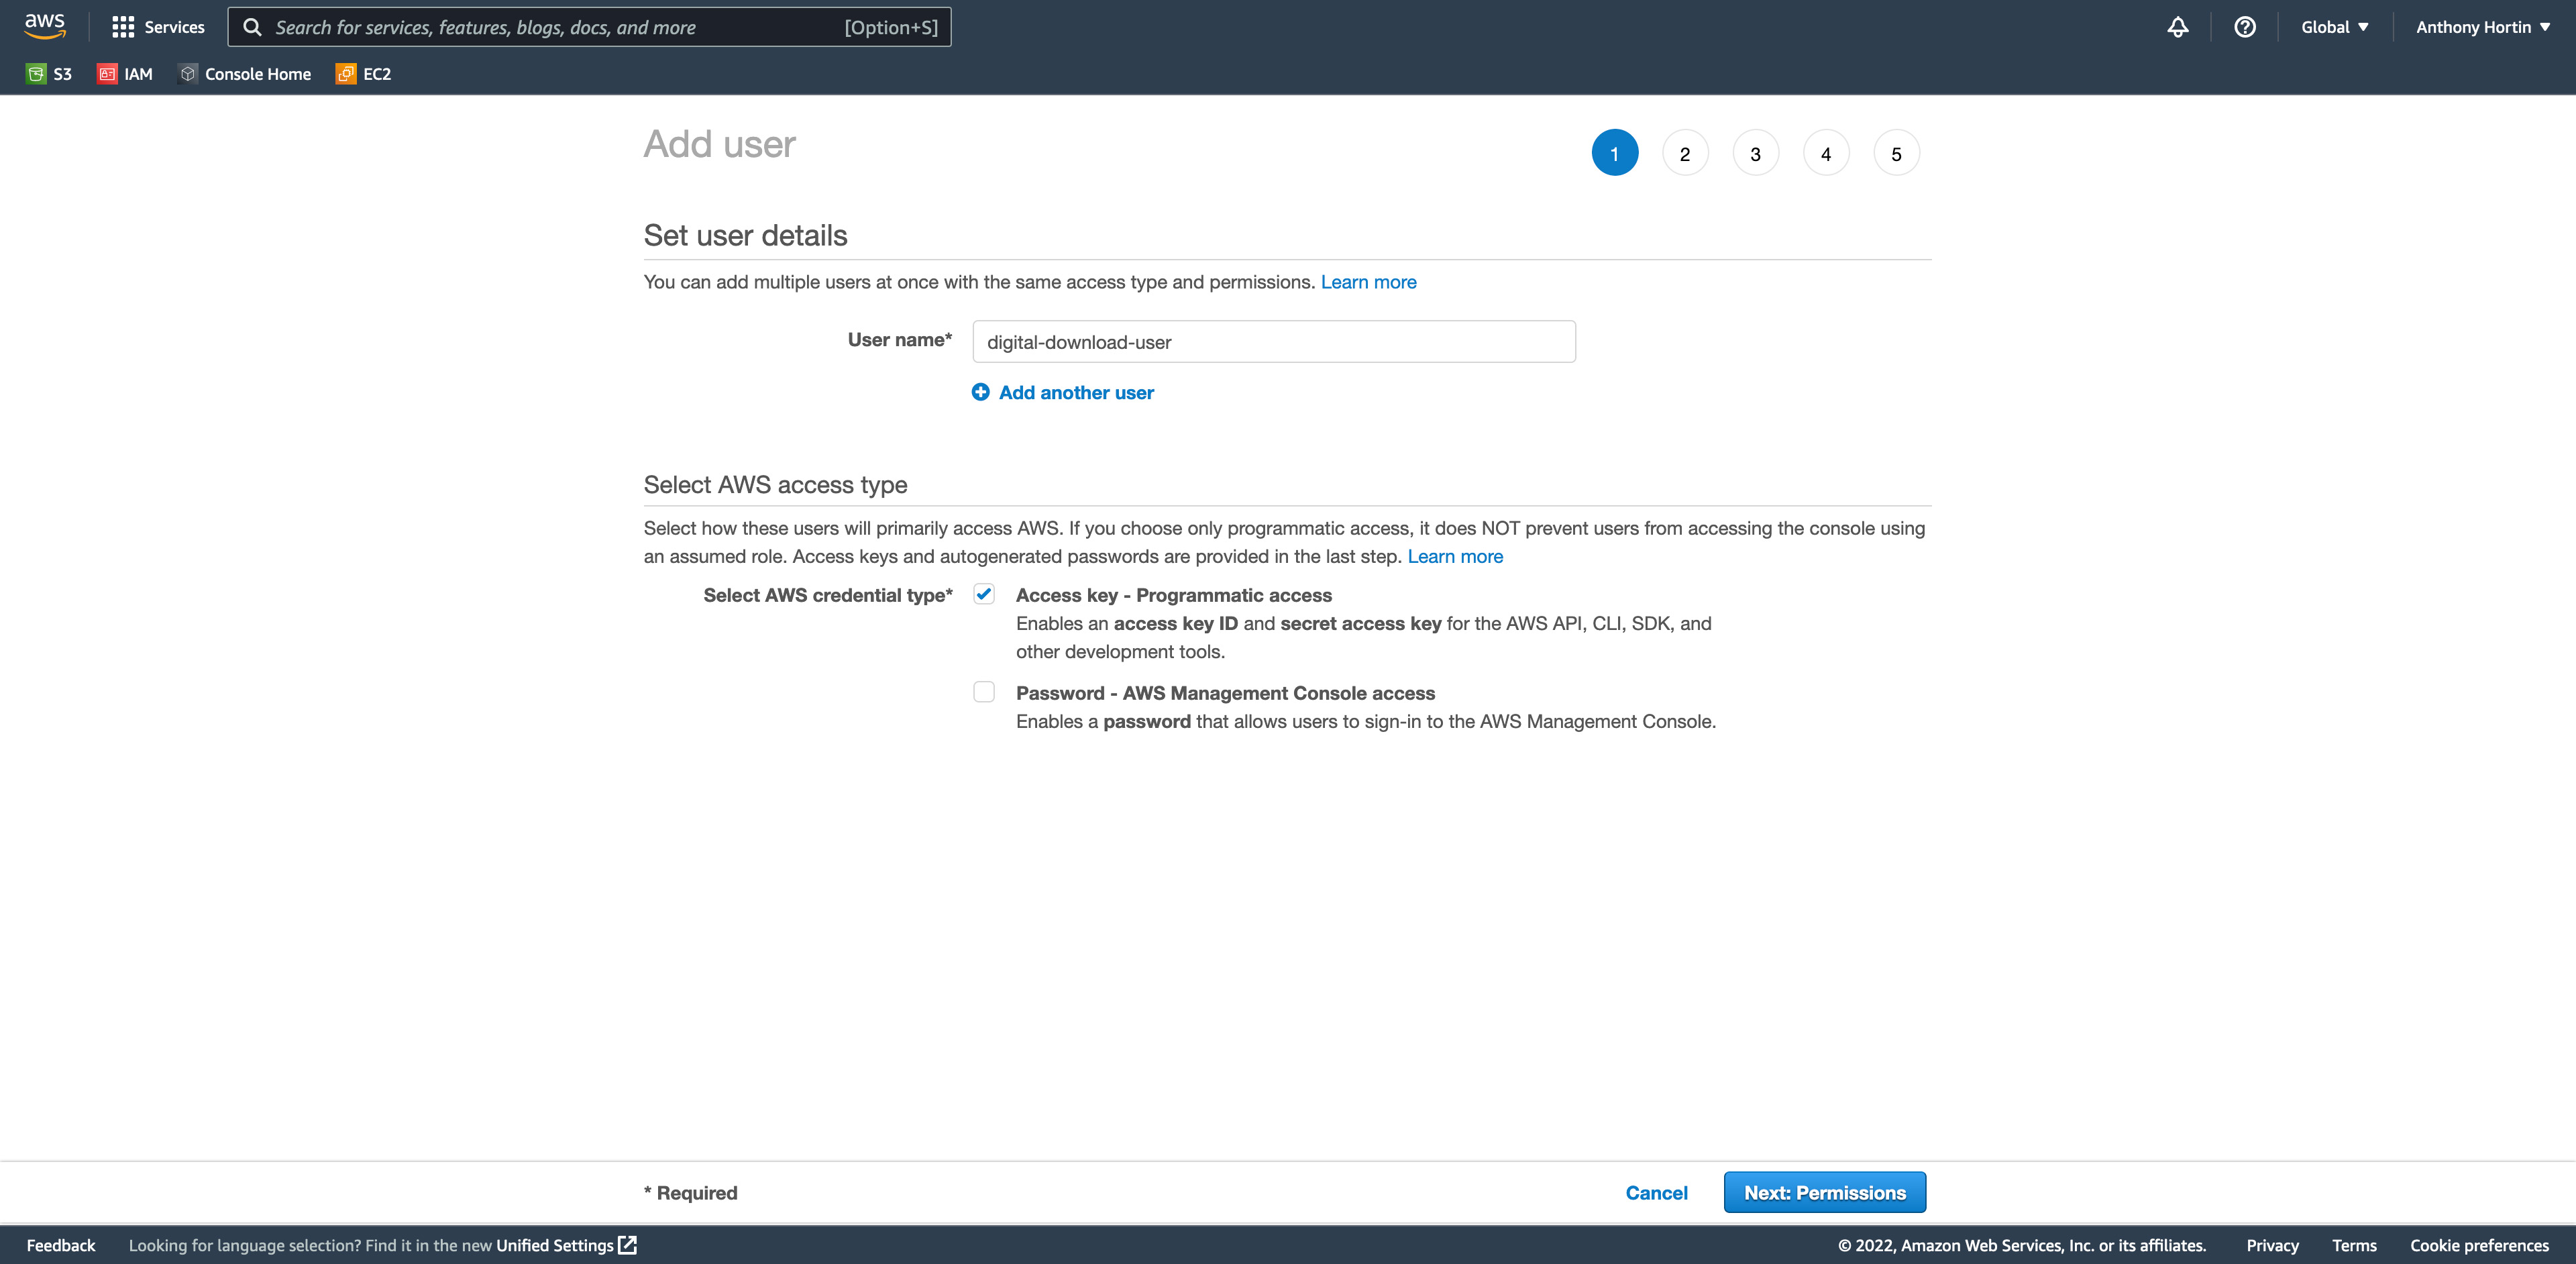
Click the Add users button to add a new IAM User.
Enter the User name and select Access Key – Programmatic access. User names can only contain alphanumeric characters, or the following special characters: _+=,.@-
Click the Next: Permissions button to continue to the next screen.
If this is your first time setting up Users, you'll be prompted to create a Group and add a Policy to it. Using groups is a best-practice way to manage users' permissions by job functions, AWS service access, or your custom permissions.
If you’ve previously created a group, you can also select it from the displayed list of Groups instead of creating a new one, if appropriate. Since we’re setting this up from scratch, click the Create group button to create a new Group.
In the Create group popup, enter a name for the Group. In the Filter policies search field, type s3 to filter Amazon S3 policies.
Tick the checkbox next to AmazonS3ReadOnlyAccess policy. This policy provides read only access to all buckets via the AWS Management Console.
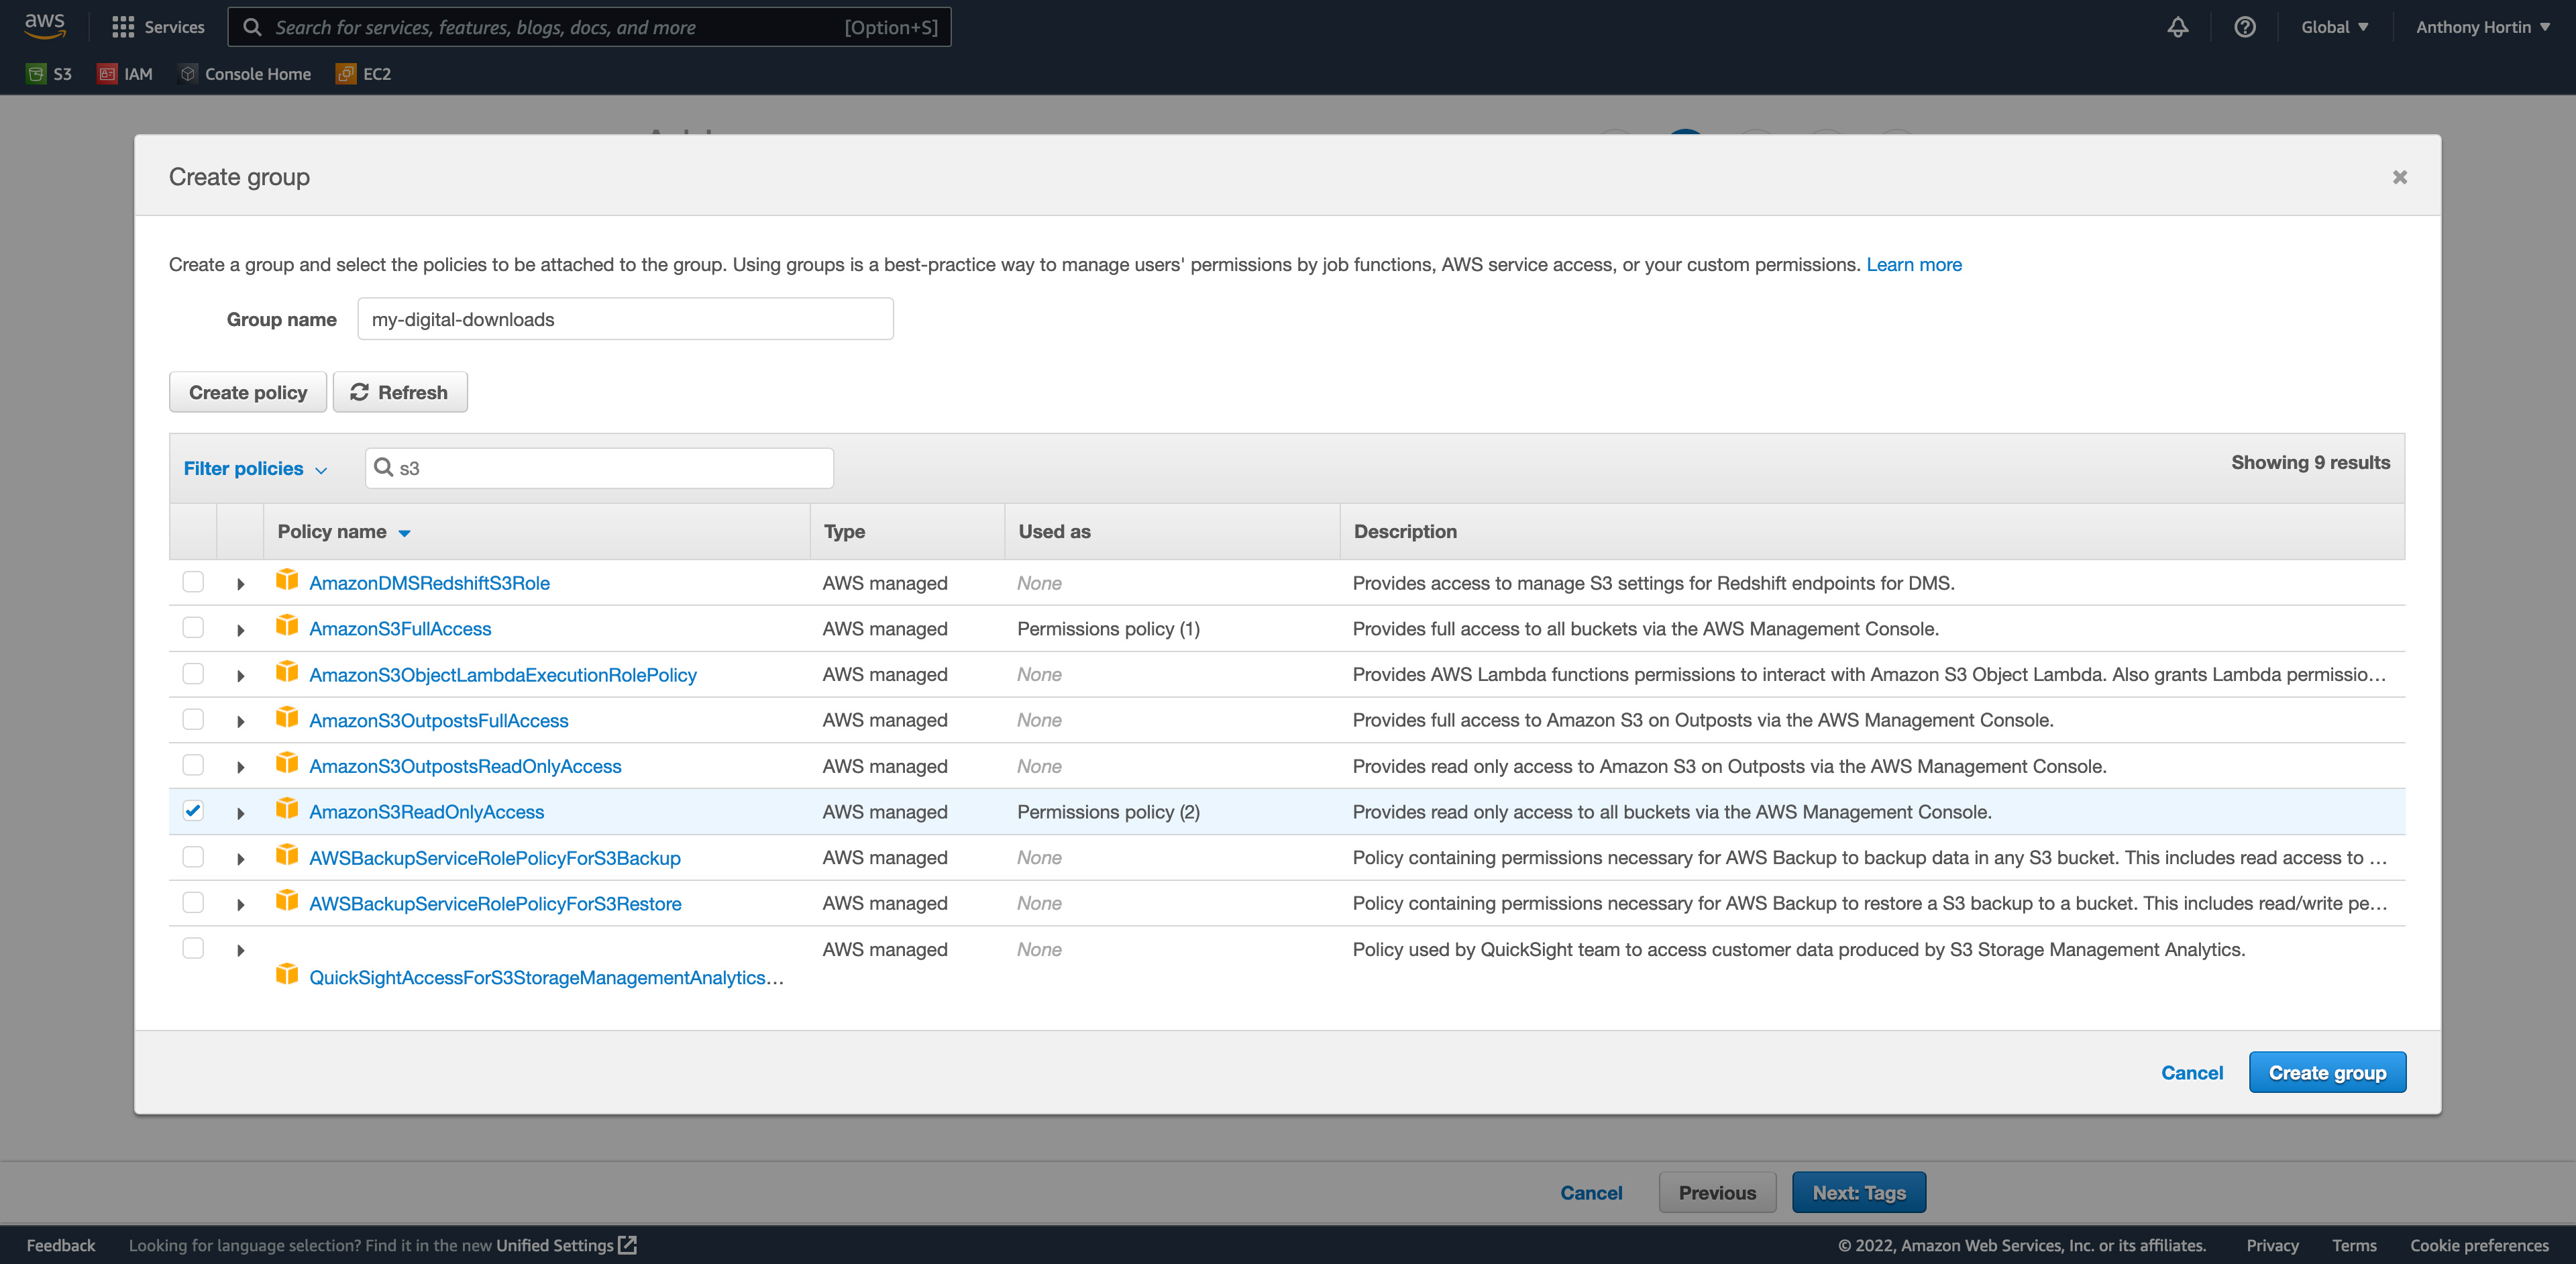
Click the Create group button to return to the Add User page.
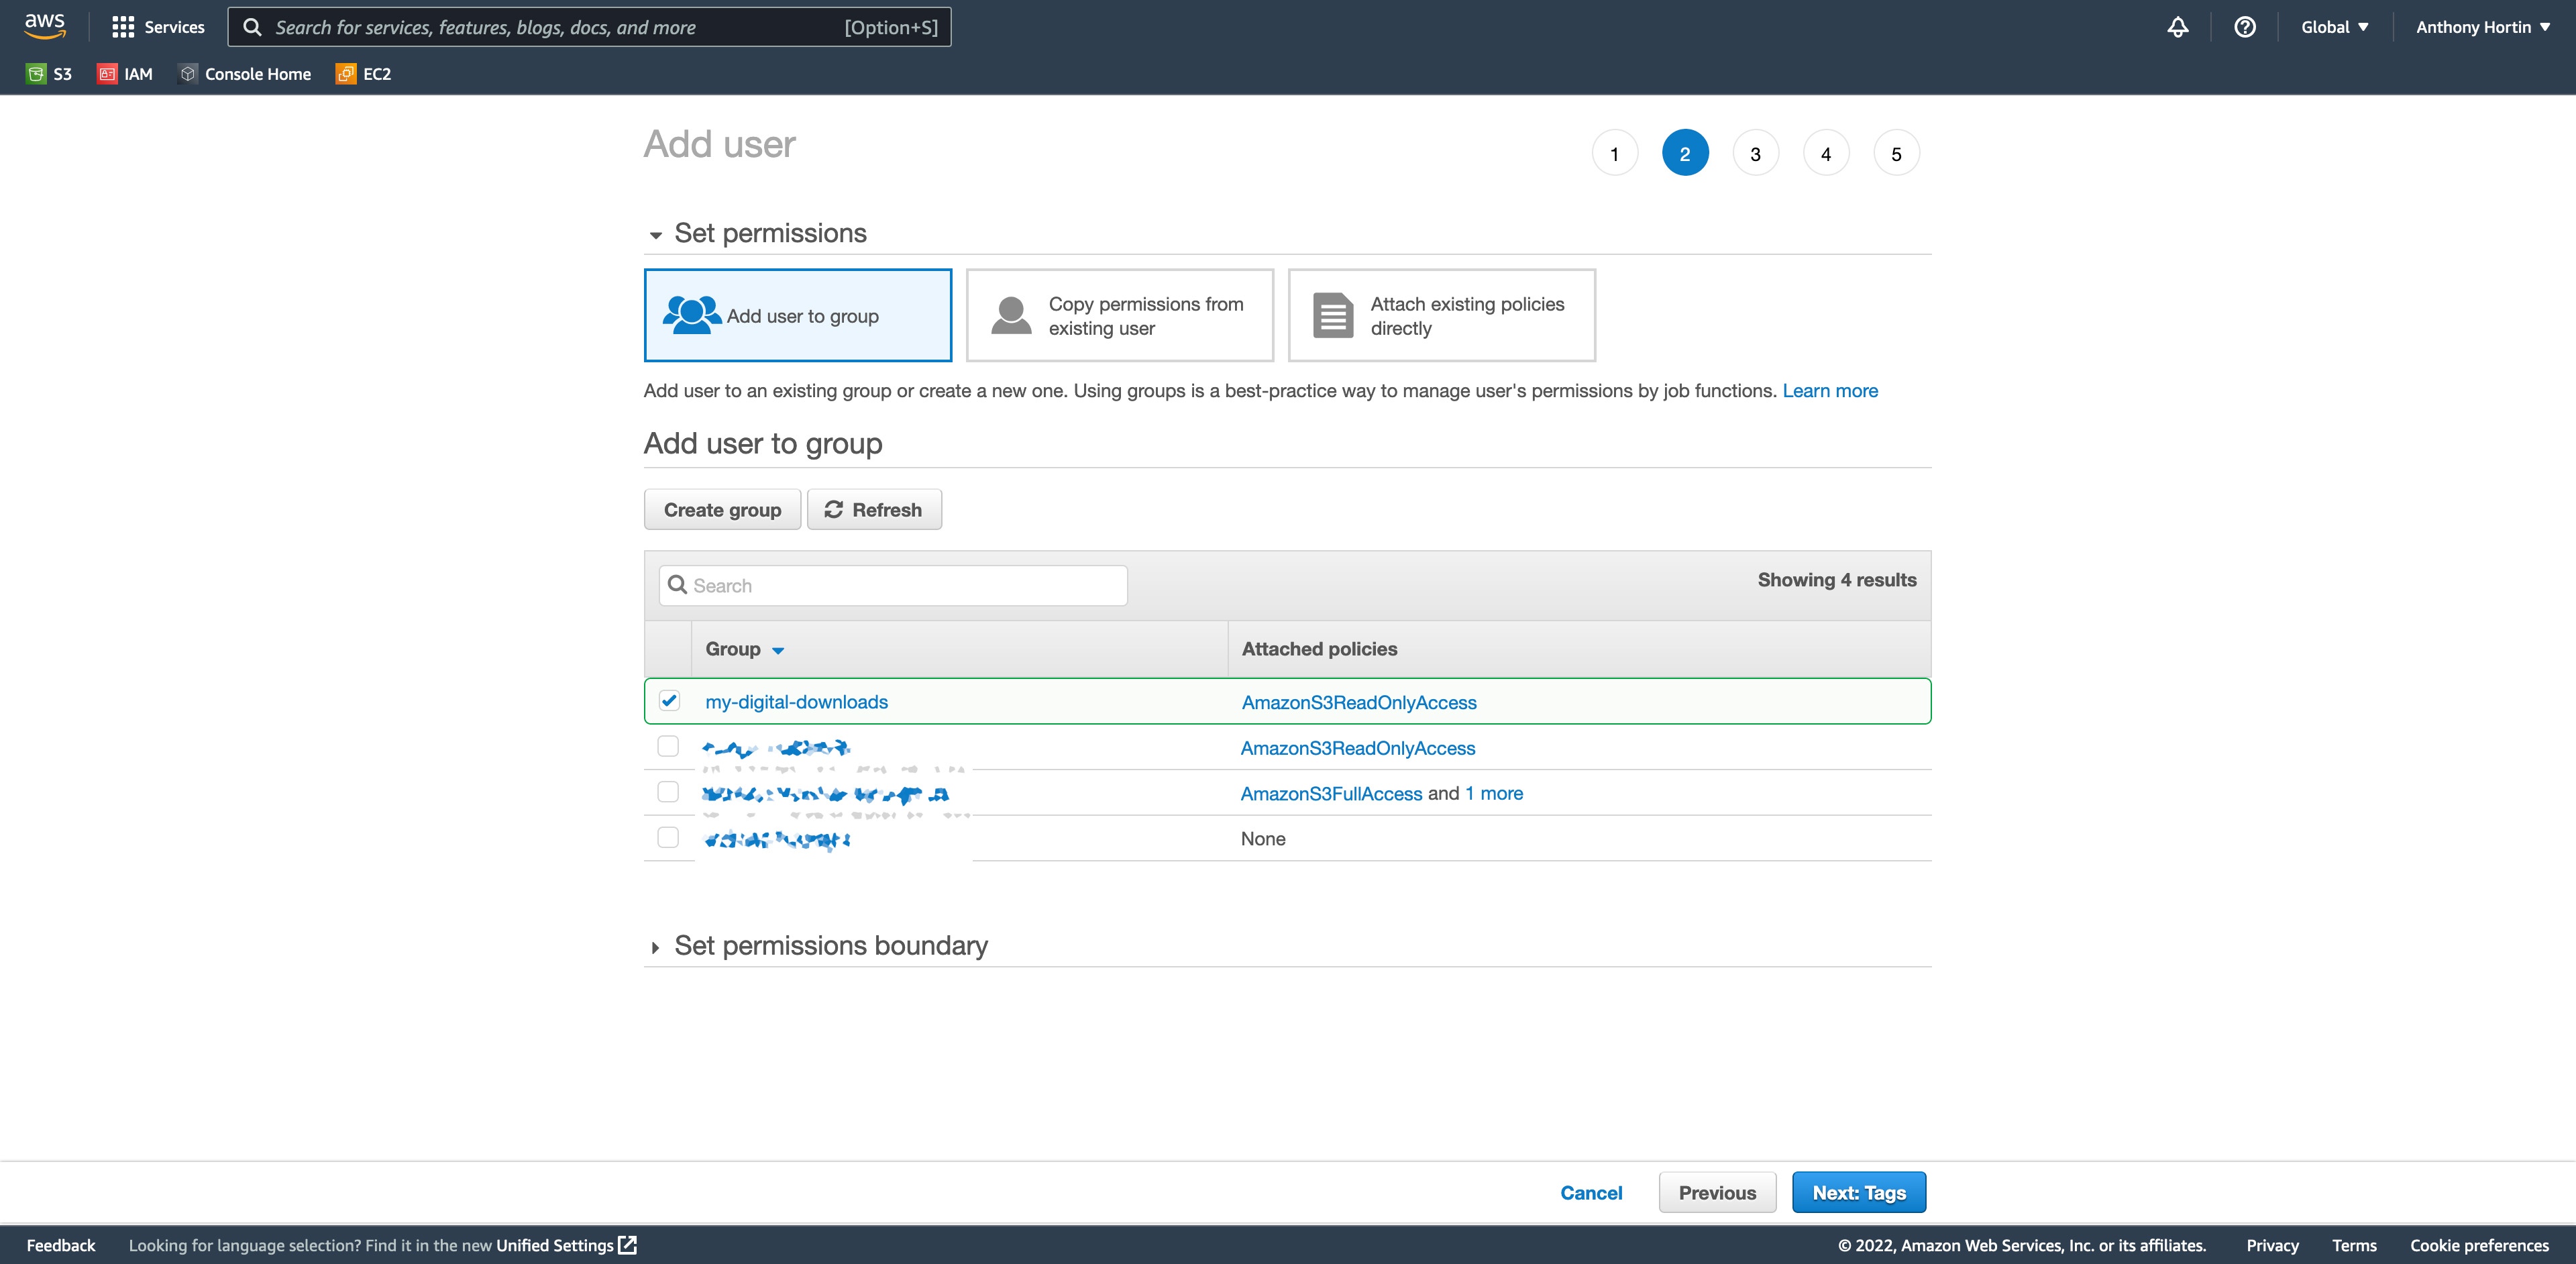
Back on the Add user page your new group that you just created, will be selected. Click the Next: Tags button to continue to the next screen.
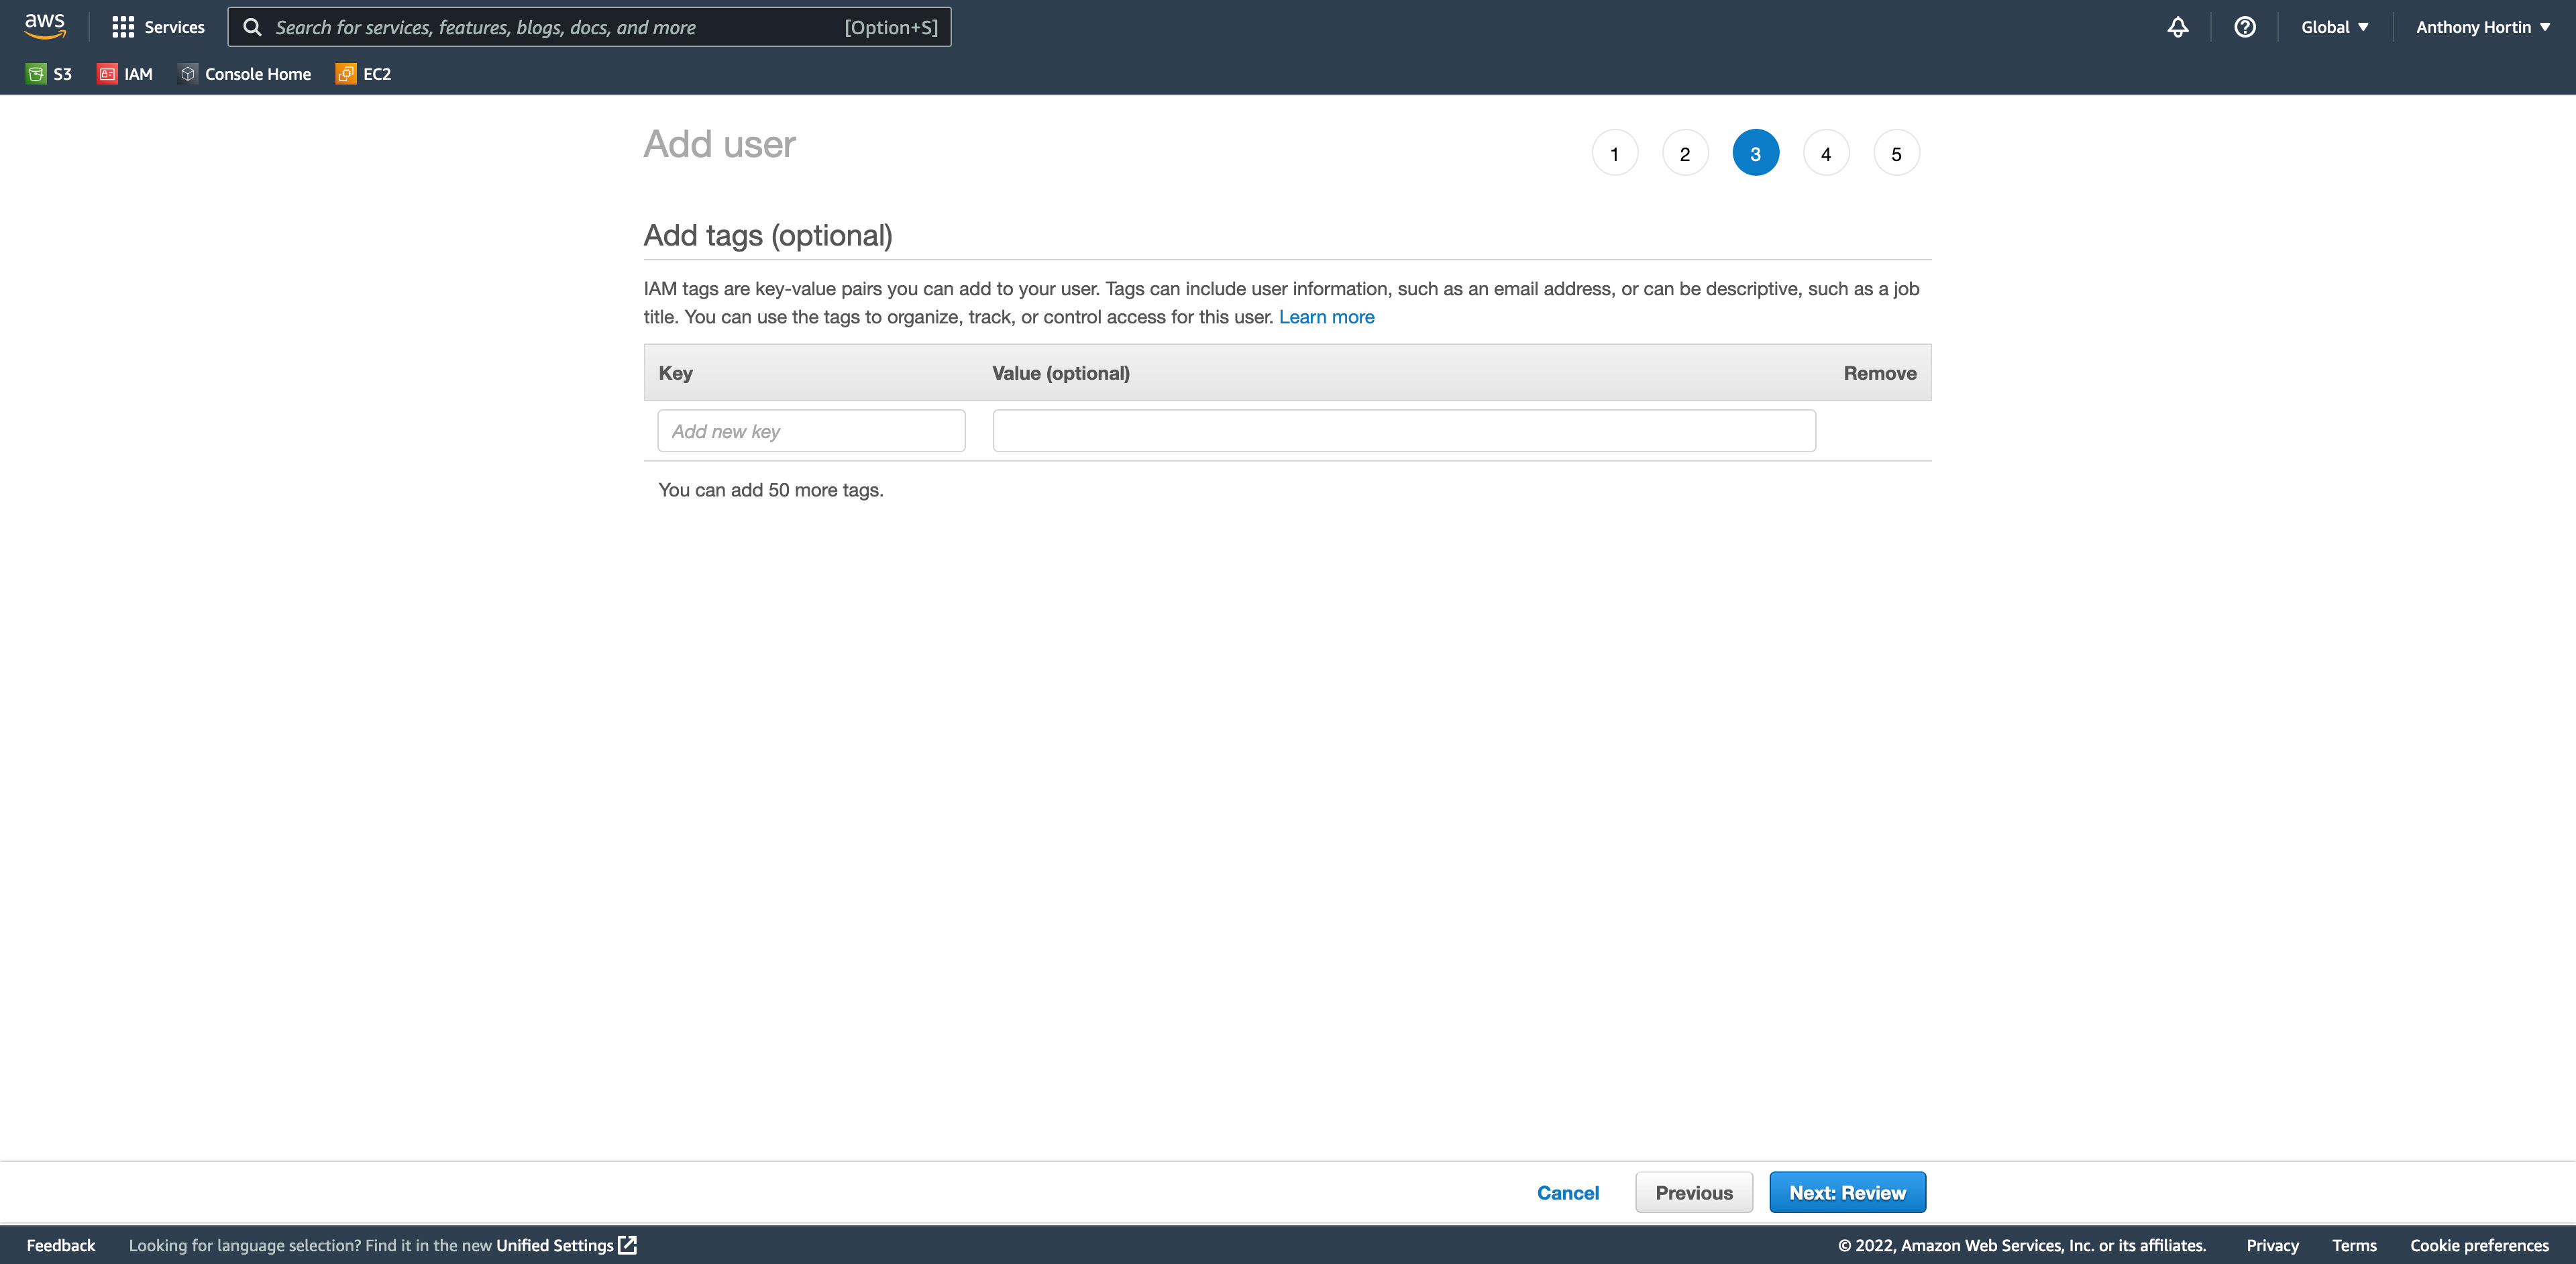
IAM tags are key-value pairs you can add to your user. Tags can include user information, such as an email address, or can be descriptive, such as a job title.
There’s no need to add Tags unless you really want to, so just click the Next: Review button to continue to the next screen.
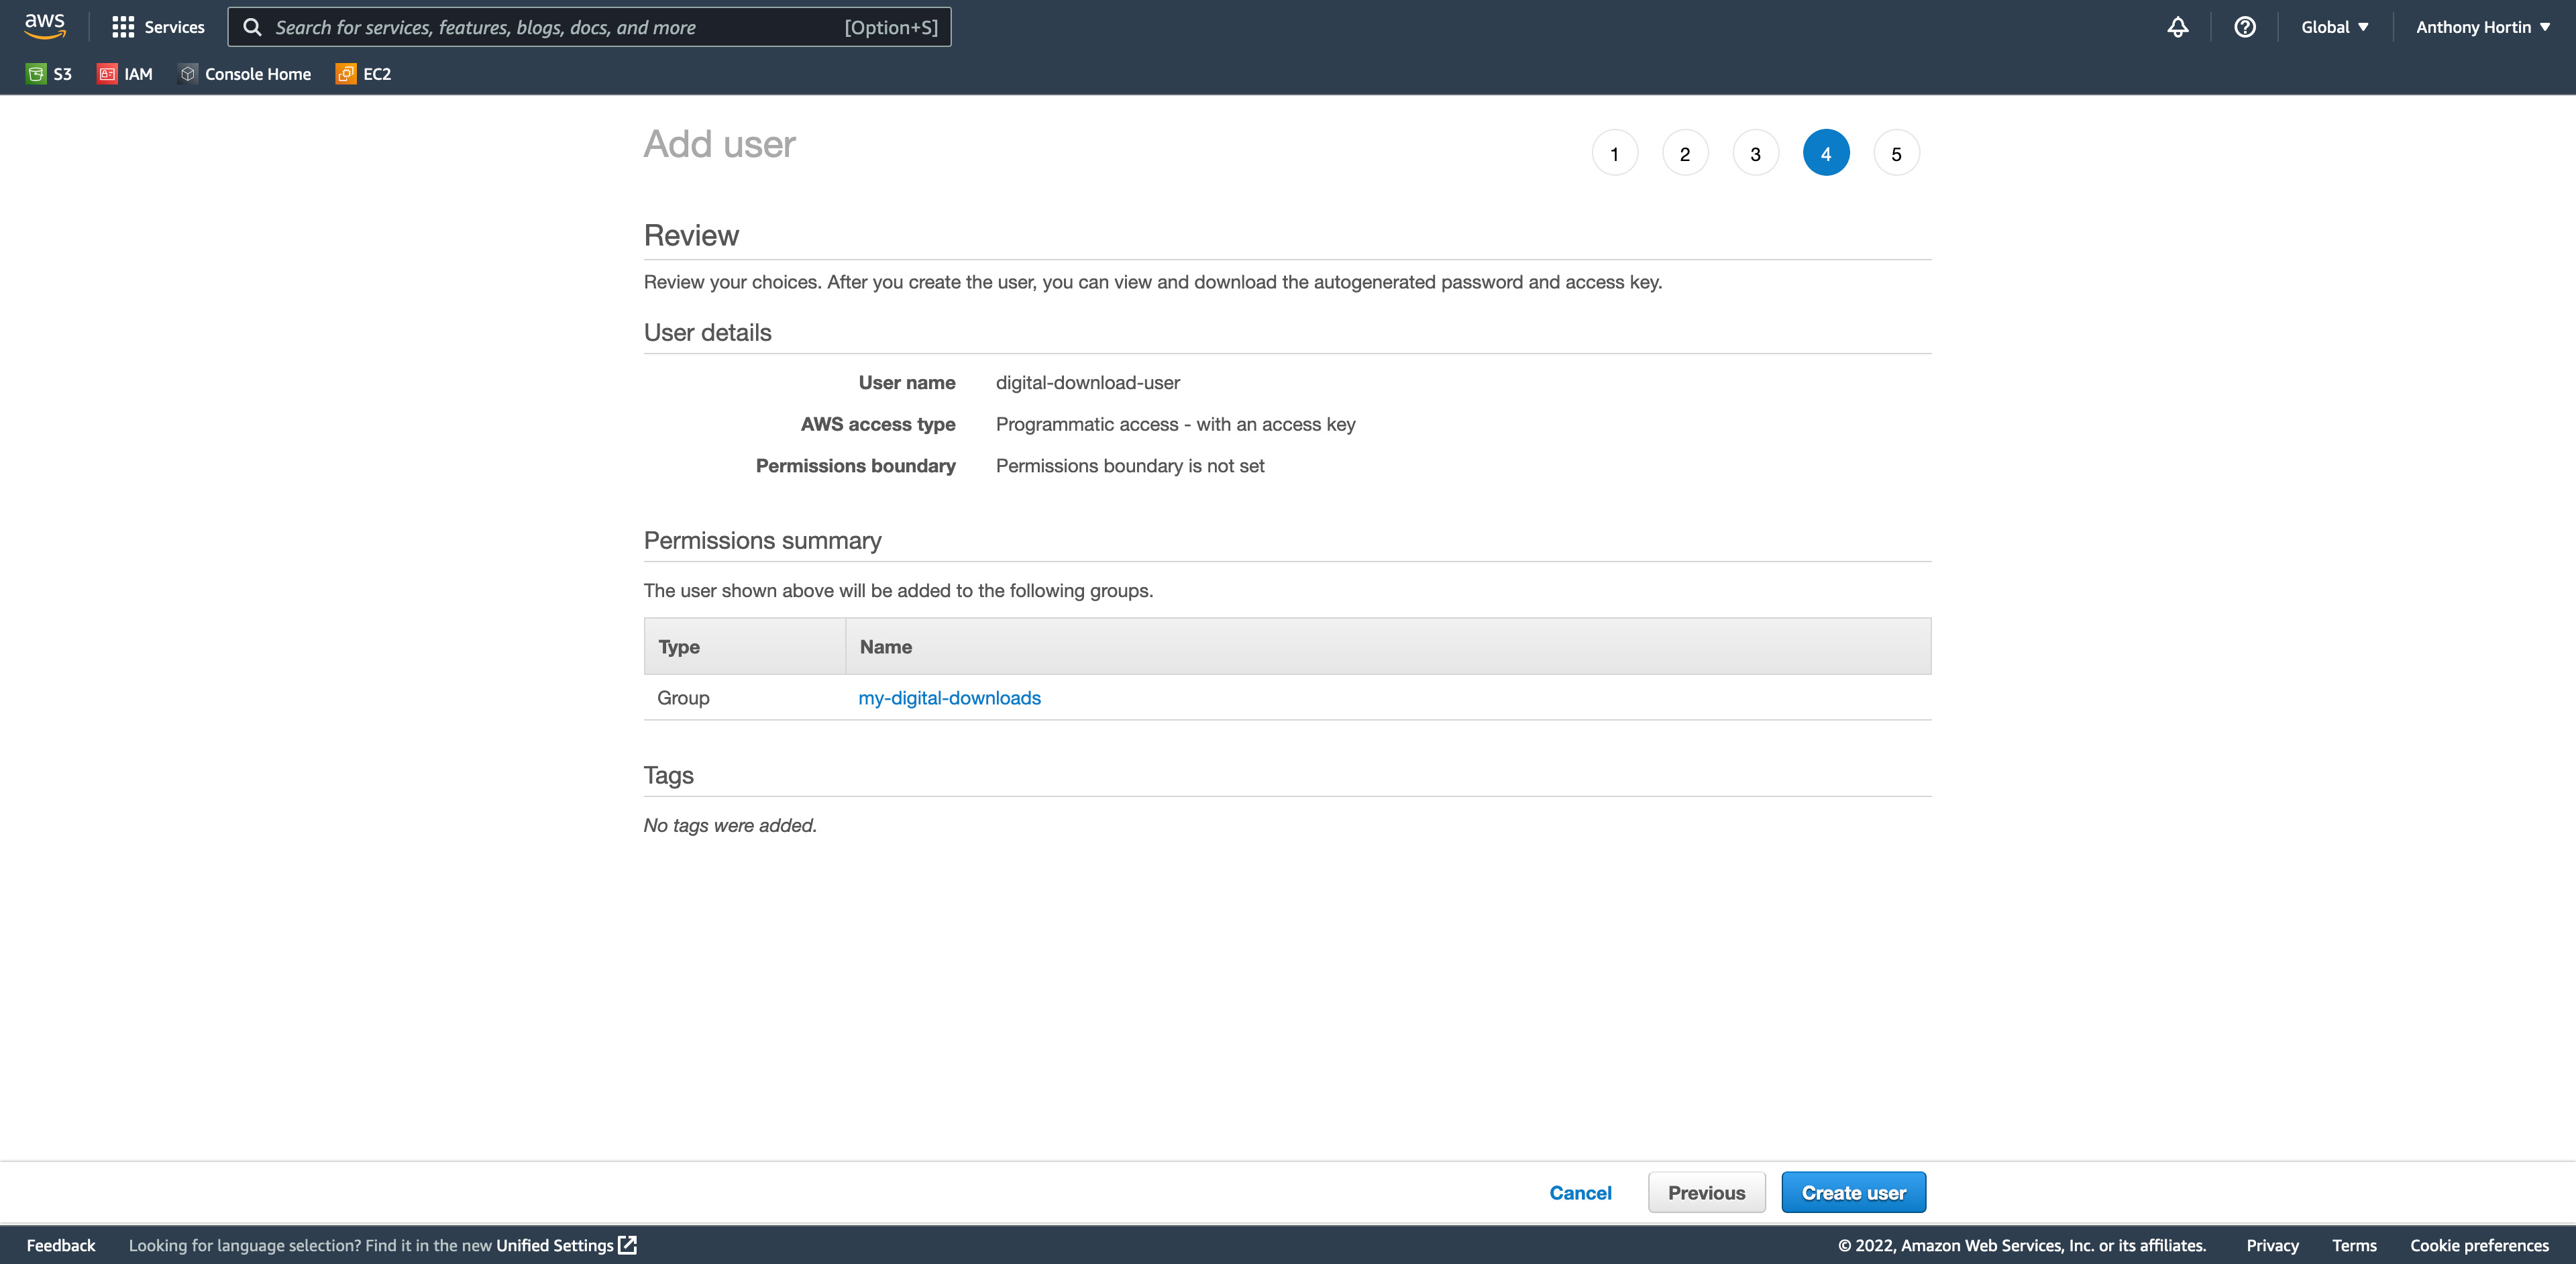
The review screen is where you can review all your choices. If you’re happy with your review, click the Create user button.
After creating the user, you’re shown the user security credentials. The Access key ID and Secret access key are like the username/password for your user so keep them secret and copy them to a safe location as we’ll need them shortly. You can download a CSV file containing your user security credentials by clicking the Download .csv button. Rather than having a unencrypted text file containing this important information though, you're better off copying these details to a Password Manager like 1Password or LastPass.
This screen is the only time you'll be able to download the user security credentials csv file, or view both the Access key ID and Secret access key, so make sure you record this information somewhere safe and secure.

Click the Close button to return to the Users screen where you can see your new User that you just created.
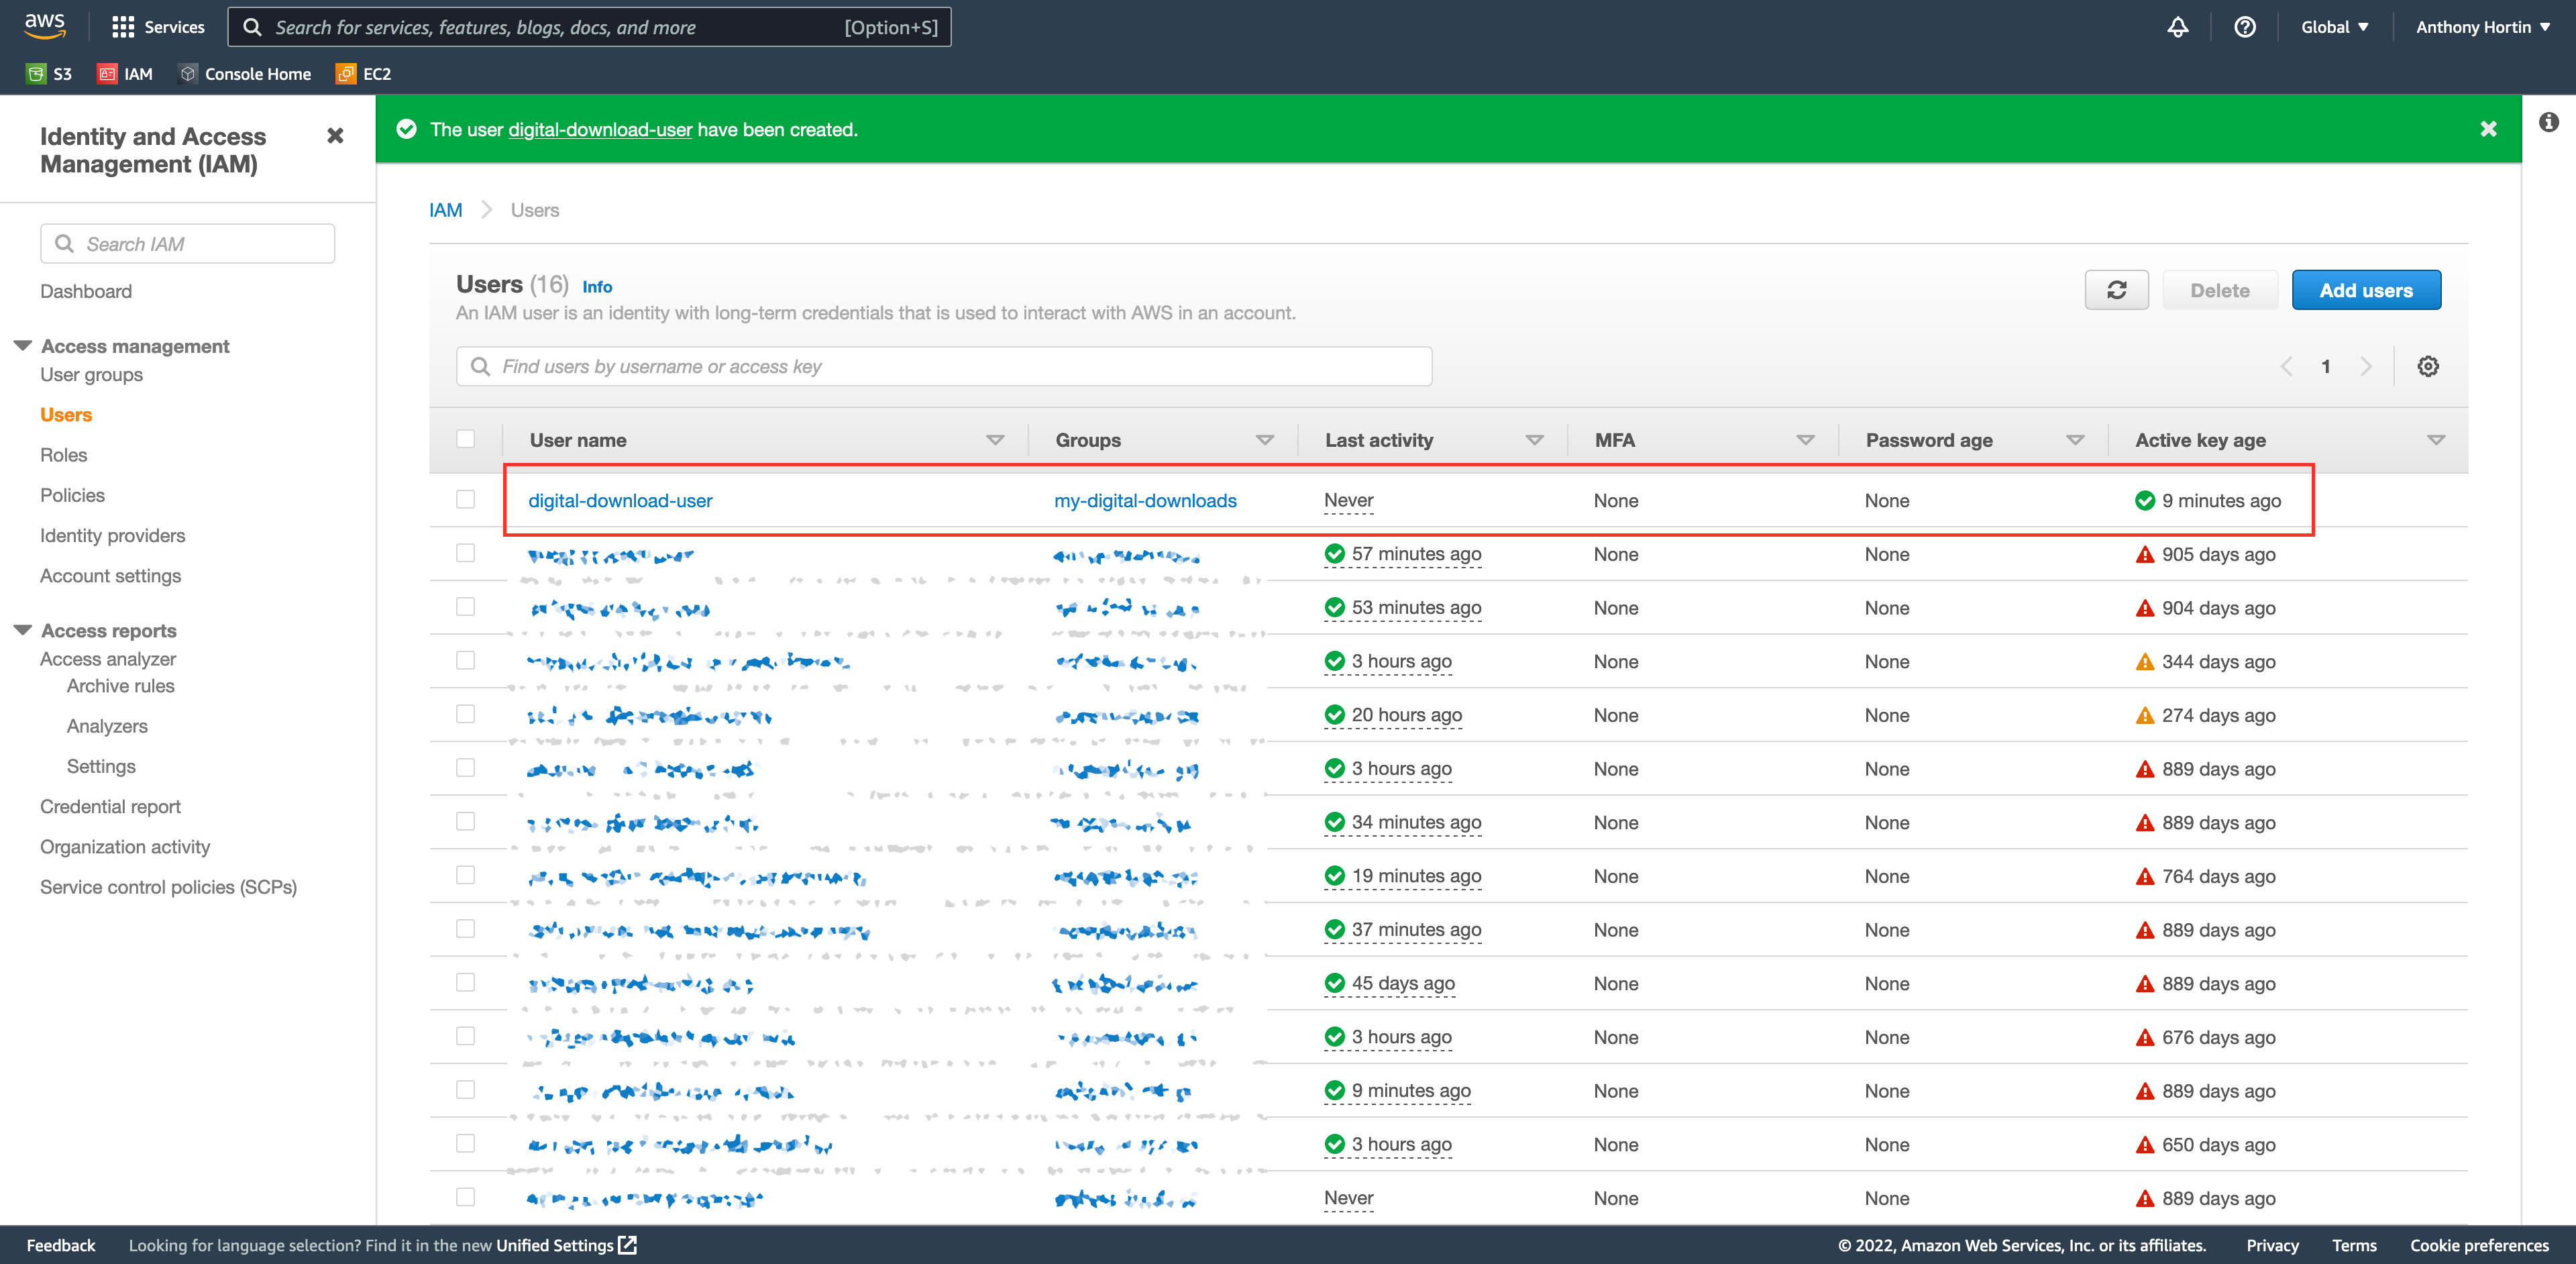
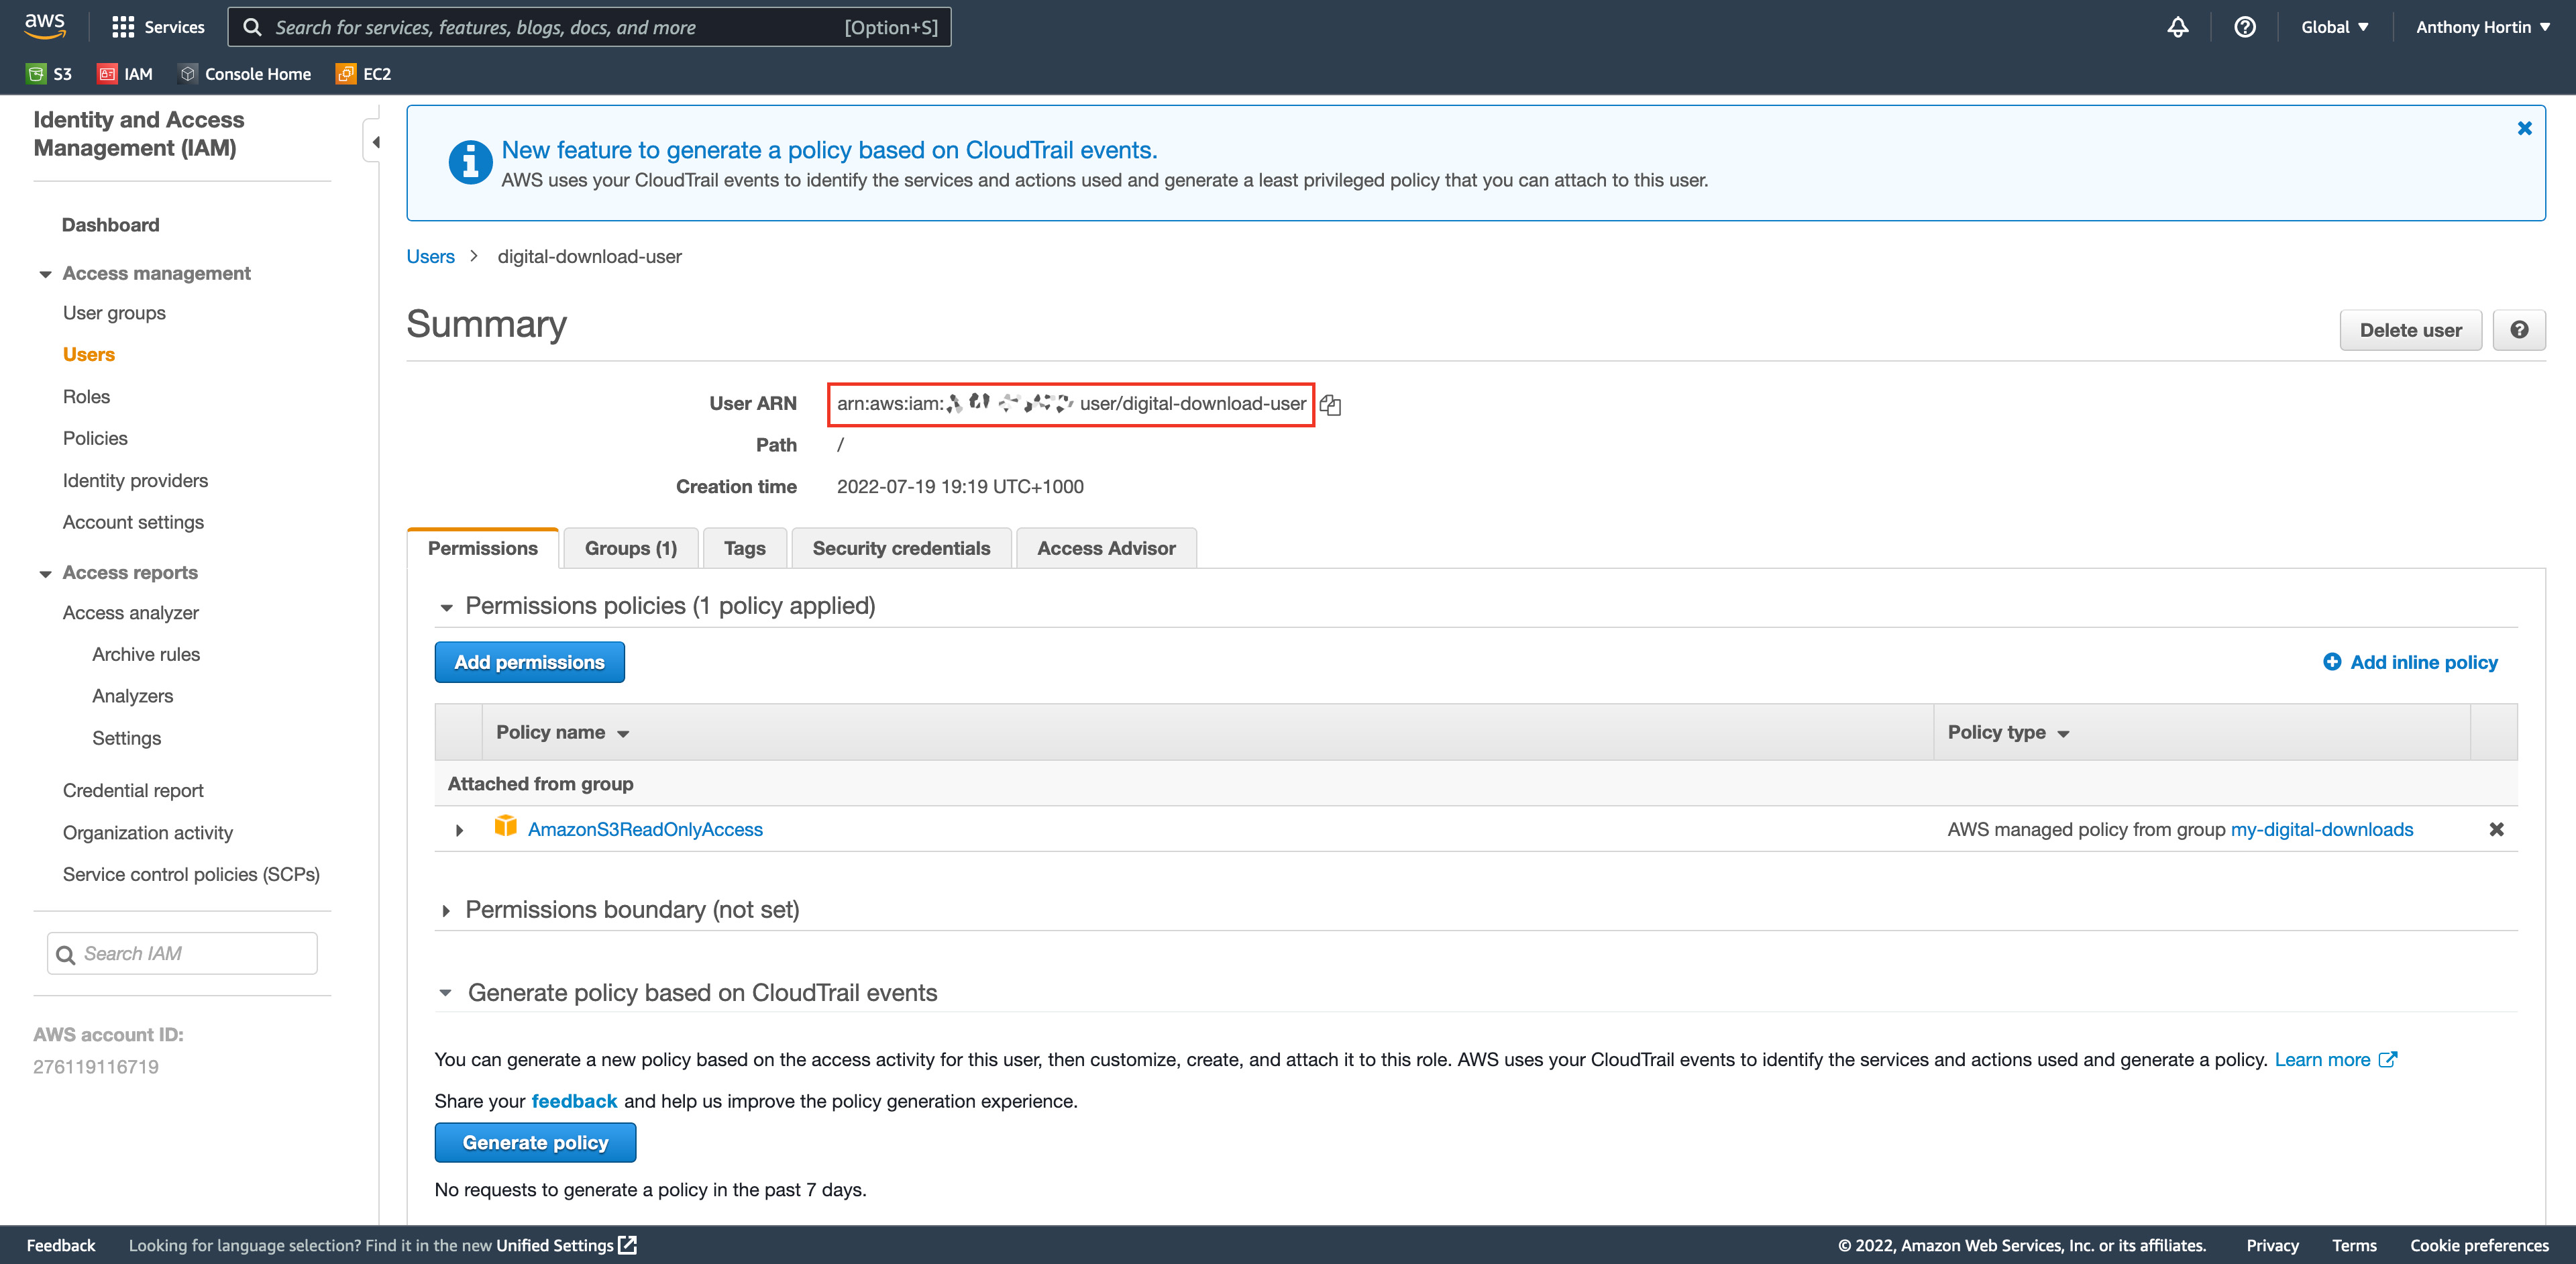
Click on the new user you just created and copy the User ARN (Amazon Resource Name) at the top of the page. We’ll need that a little later on.
1.3. Setup S3 Buckets
Next, we need to Setup our S3 Buckets which is where we'll be storing our files. Amazon Simple Storage Service (Amazon S3) is an object storage service offering industry-leading scalability, data availability, security, and performance.
Select S3 under Storage in the Services menu. Alternatively, you can also type S3 in the search field at the top-left of the page and click on the S3 service when it displays in the search results.
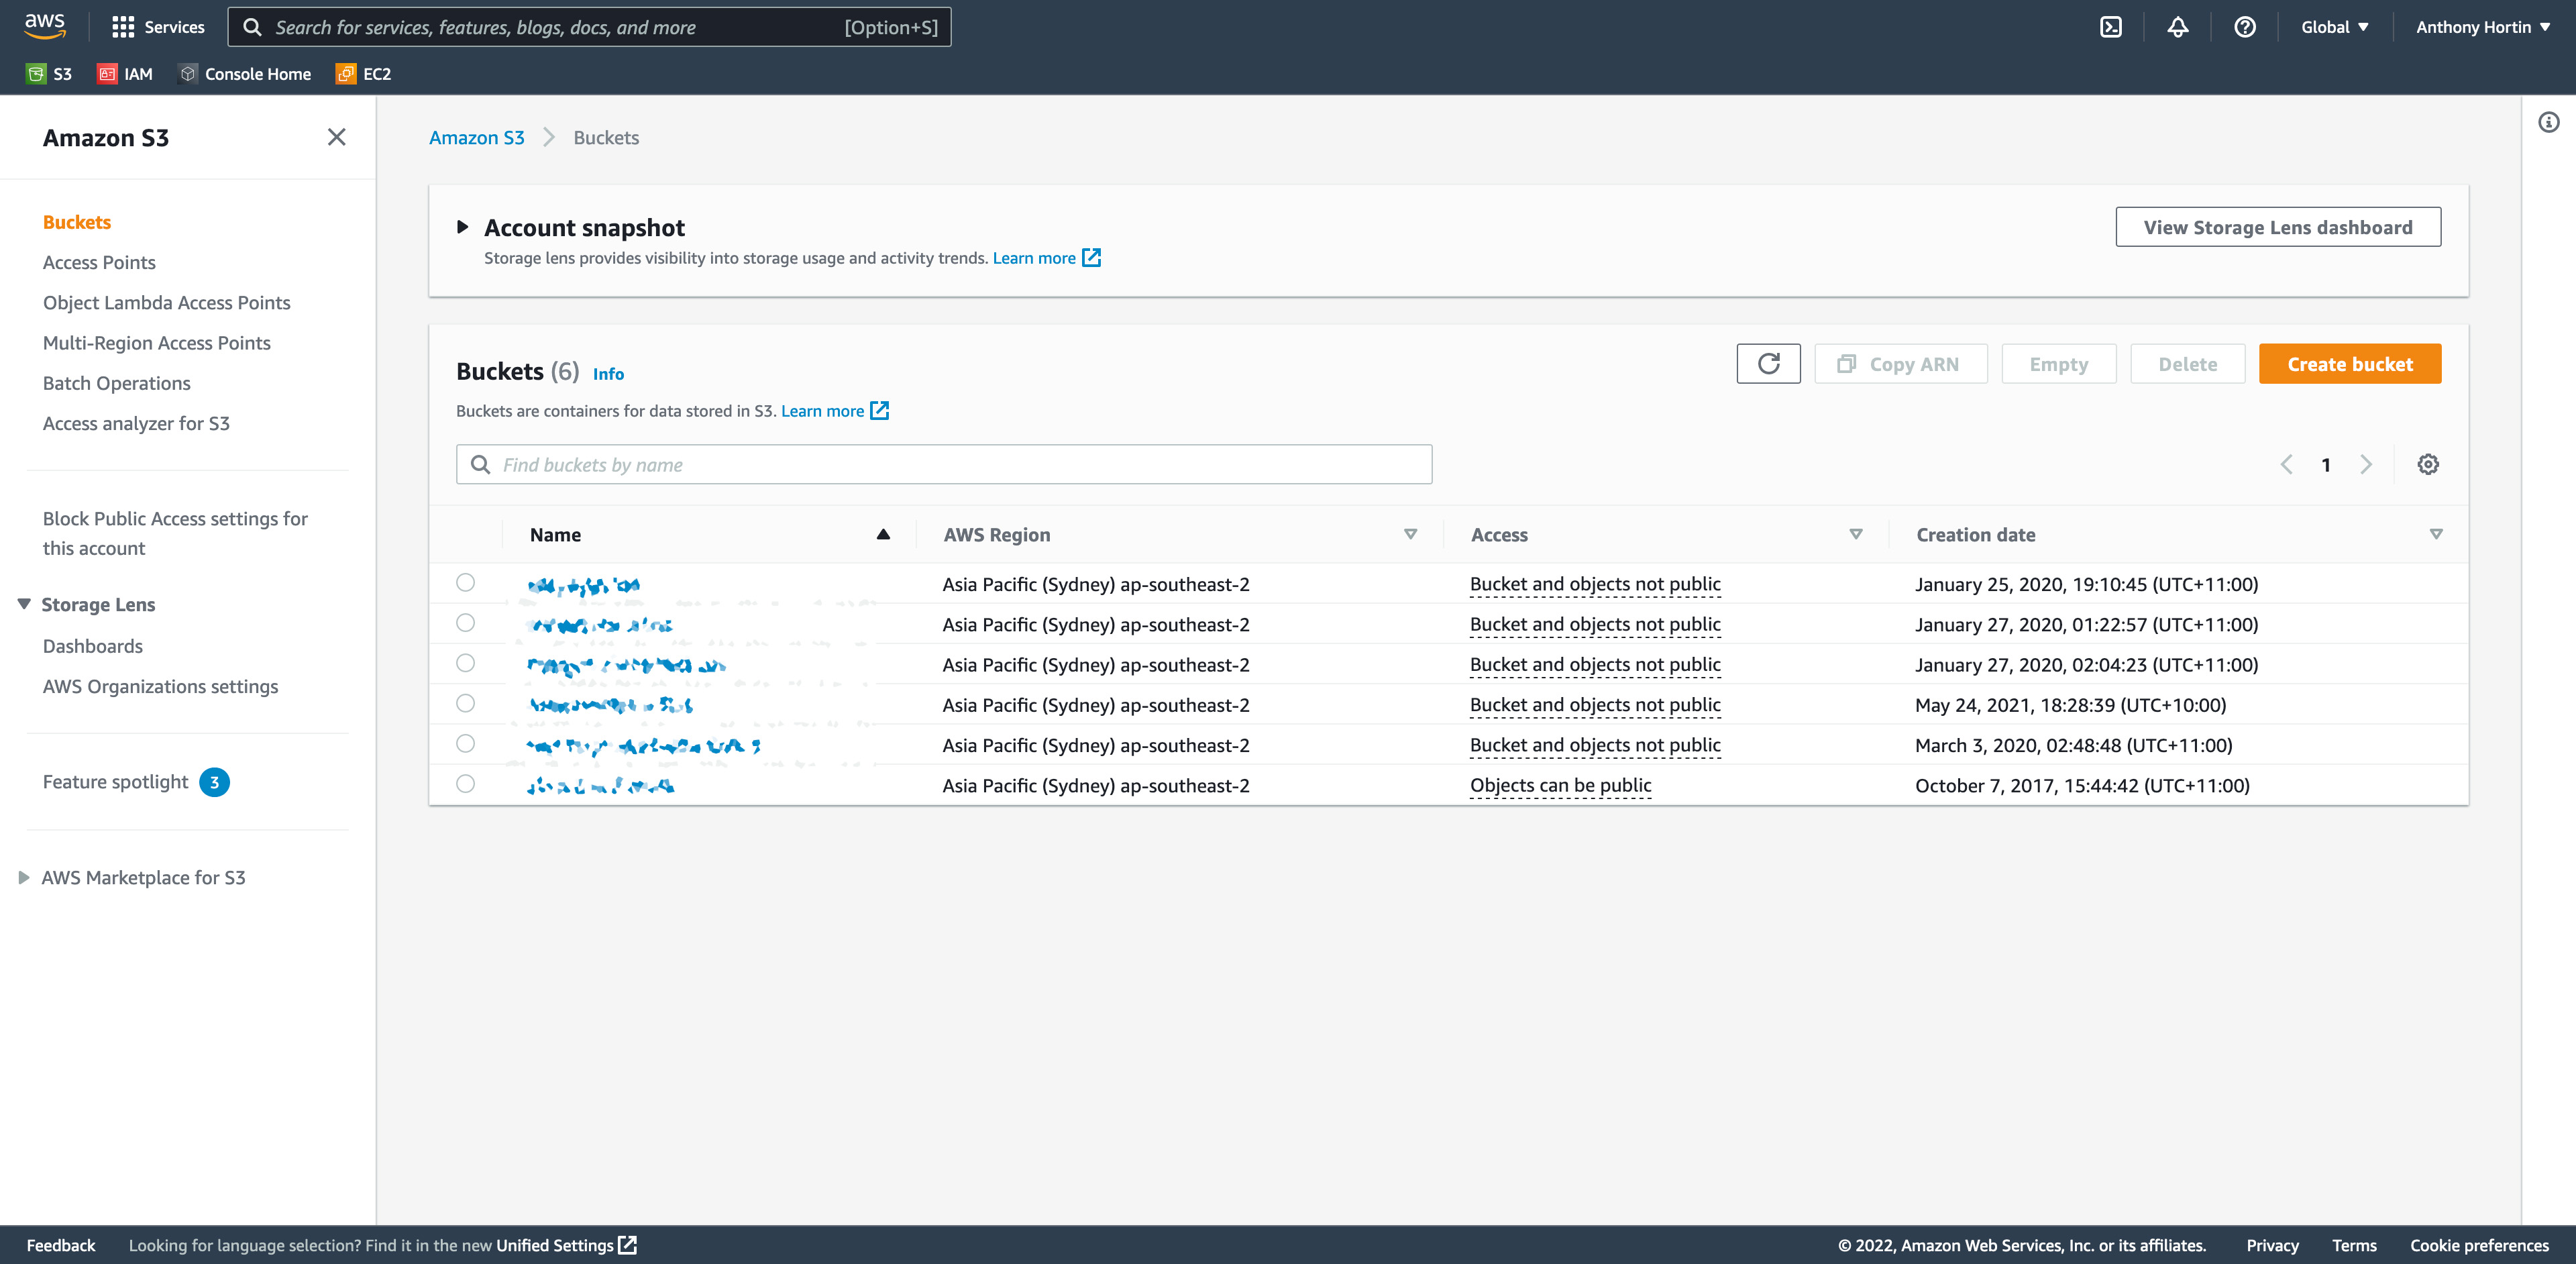
After selecting S3 you’re shown a list of your S3 Buckets, if there are any. Obviously, if this is your first time in here, your list will be empty.
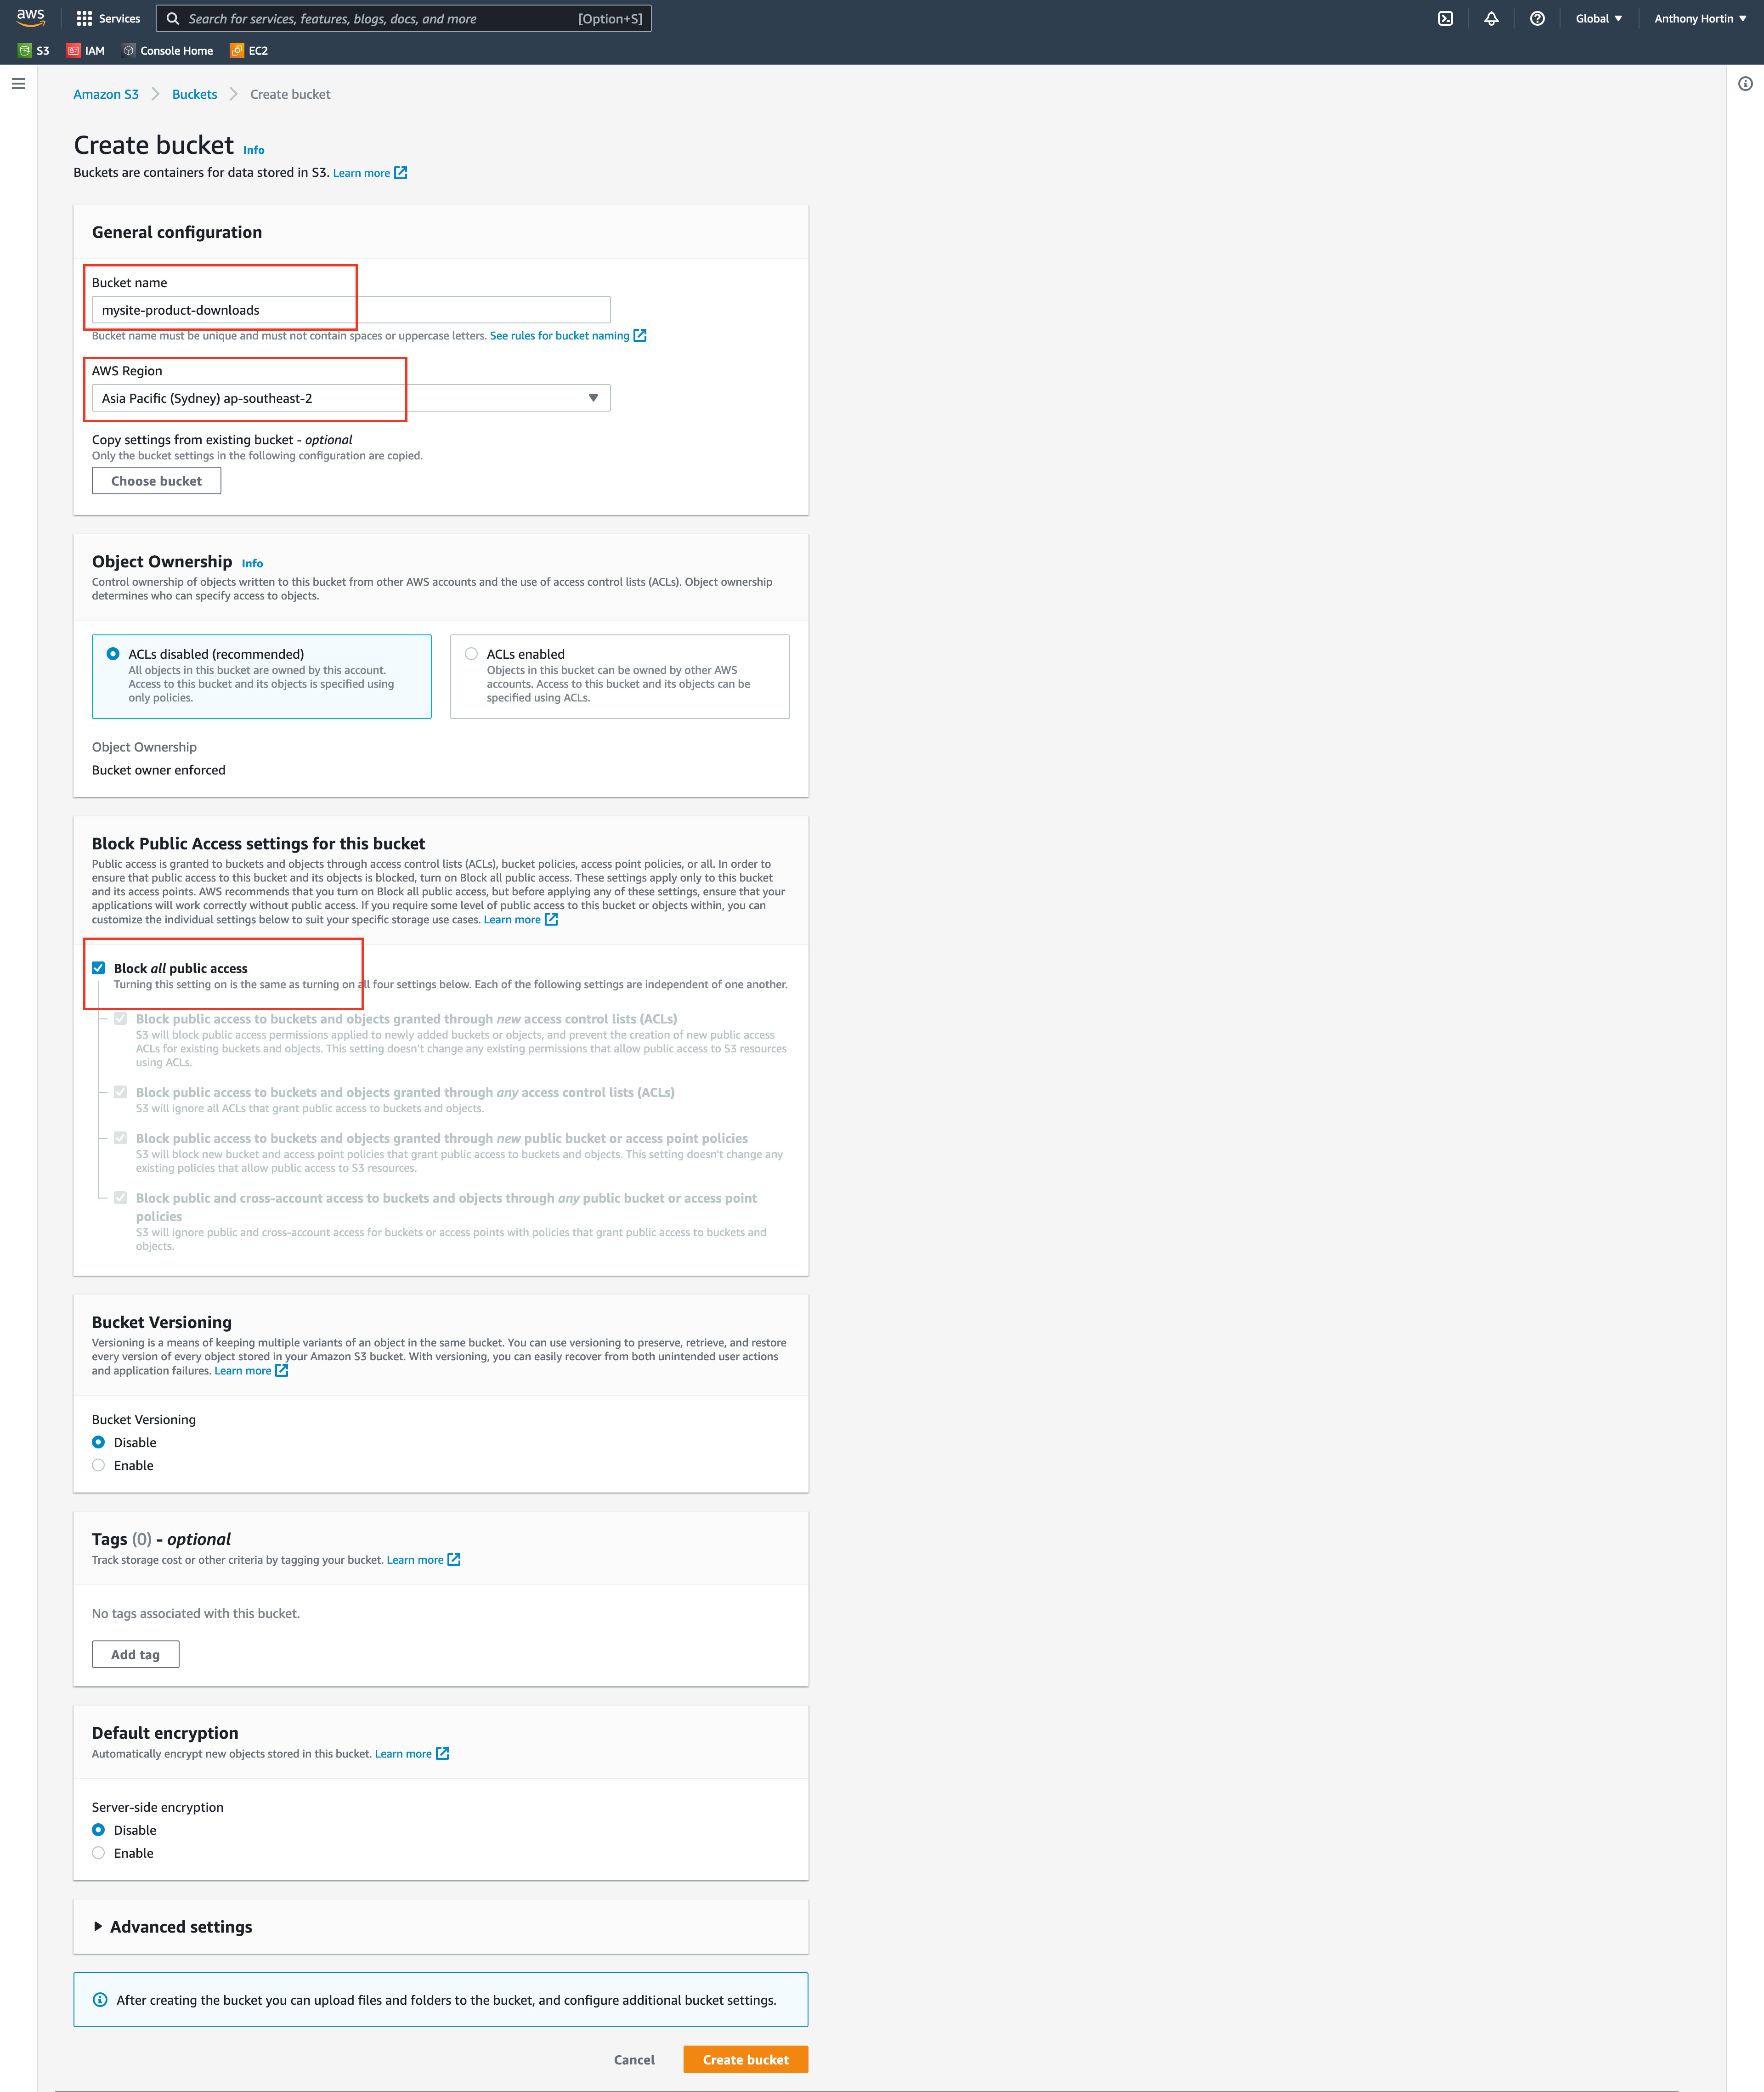
Click the Create bucket button to create a new bucket.
Enter a name for the S3 bucket. The bucket name must be unique across all existing bucket names in Amazon S3.
Select the bucket Region. A good tip is to select a Region where most of your customers reside.
In the Block Public Access settings for this bucket section, ensure the Block all public access checkbox is ticked. This should be ticked by default. This step is important as you don't want anyone who isn't authorised, to be able to access your files.
Click the Create bucket button to continue to the next screen.
Your new Bucket will appear in your list of Buckets.
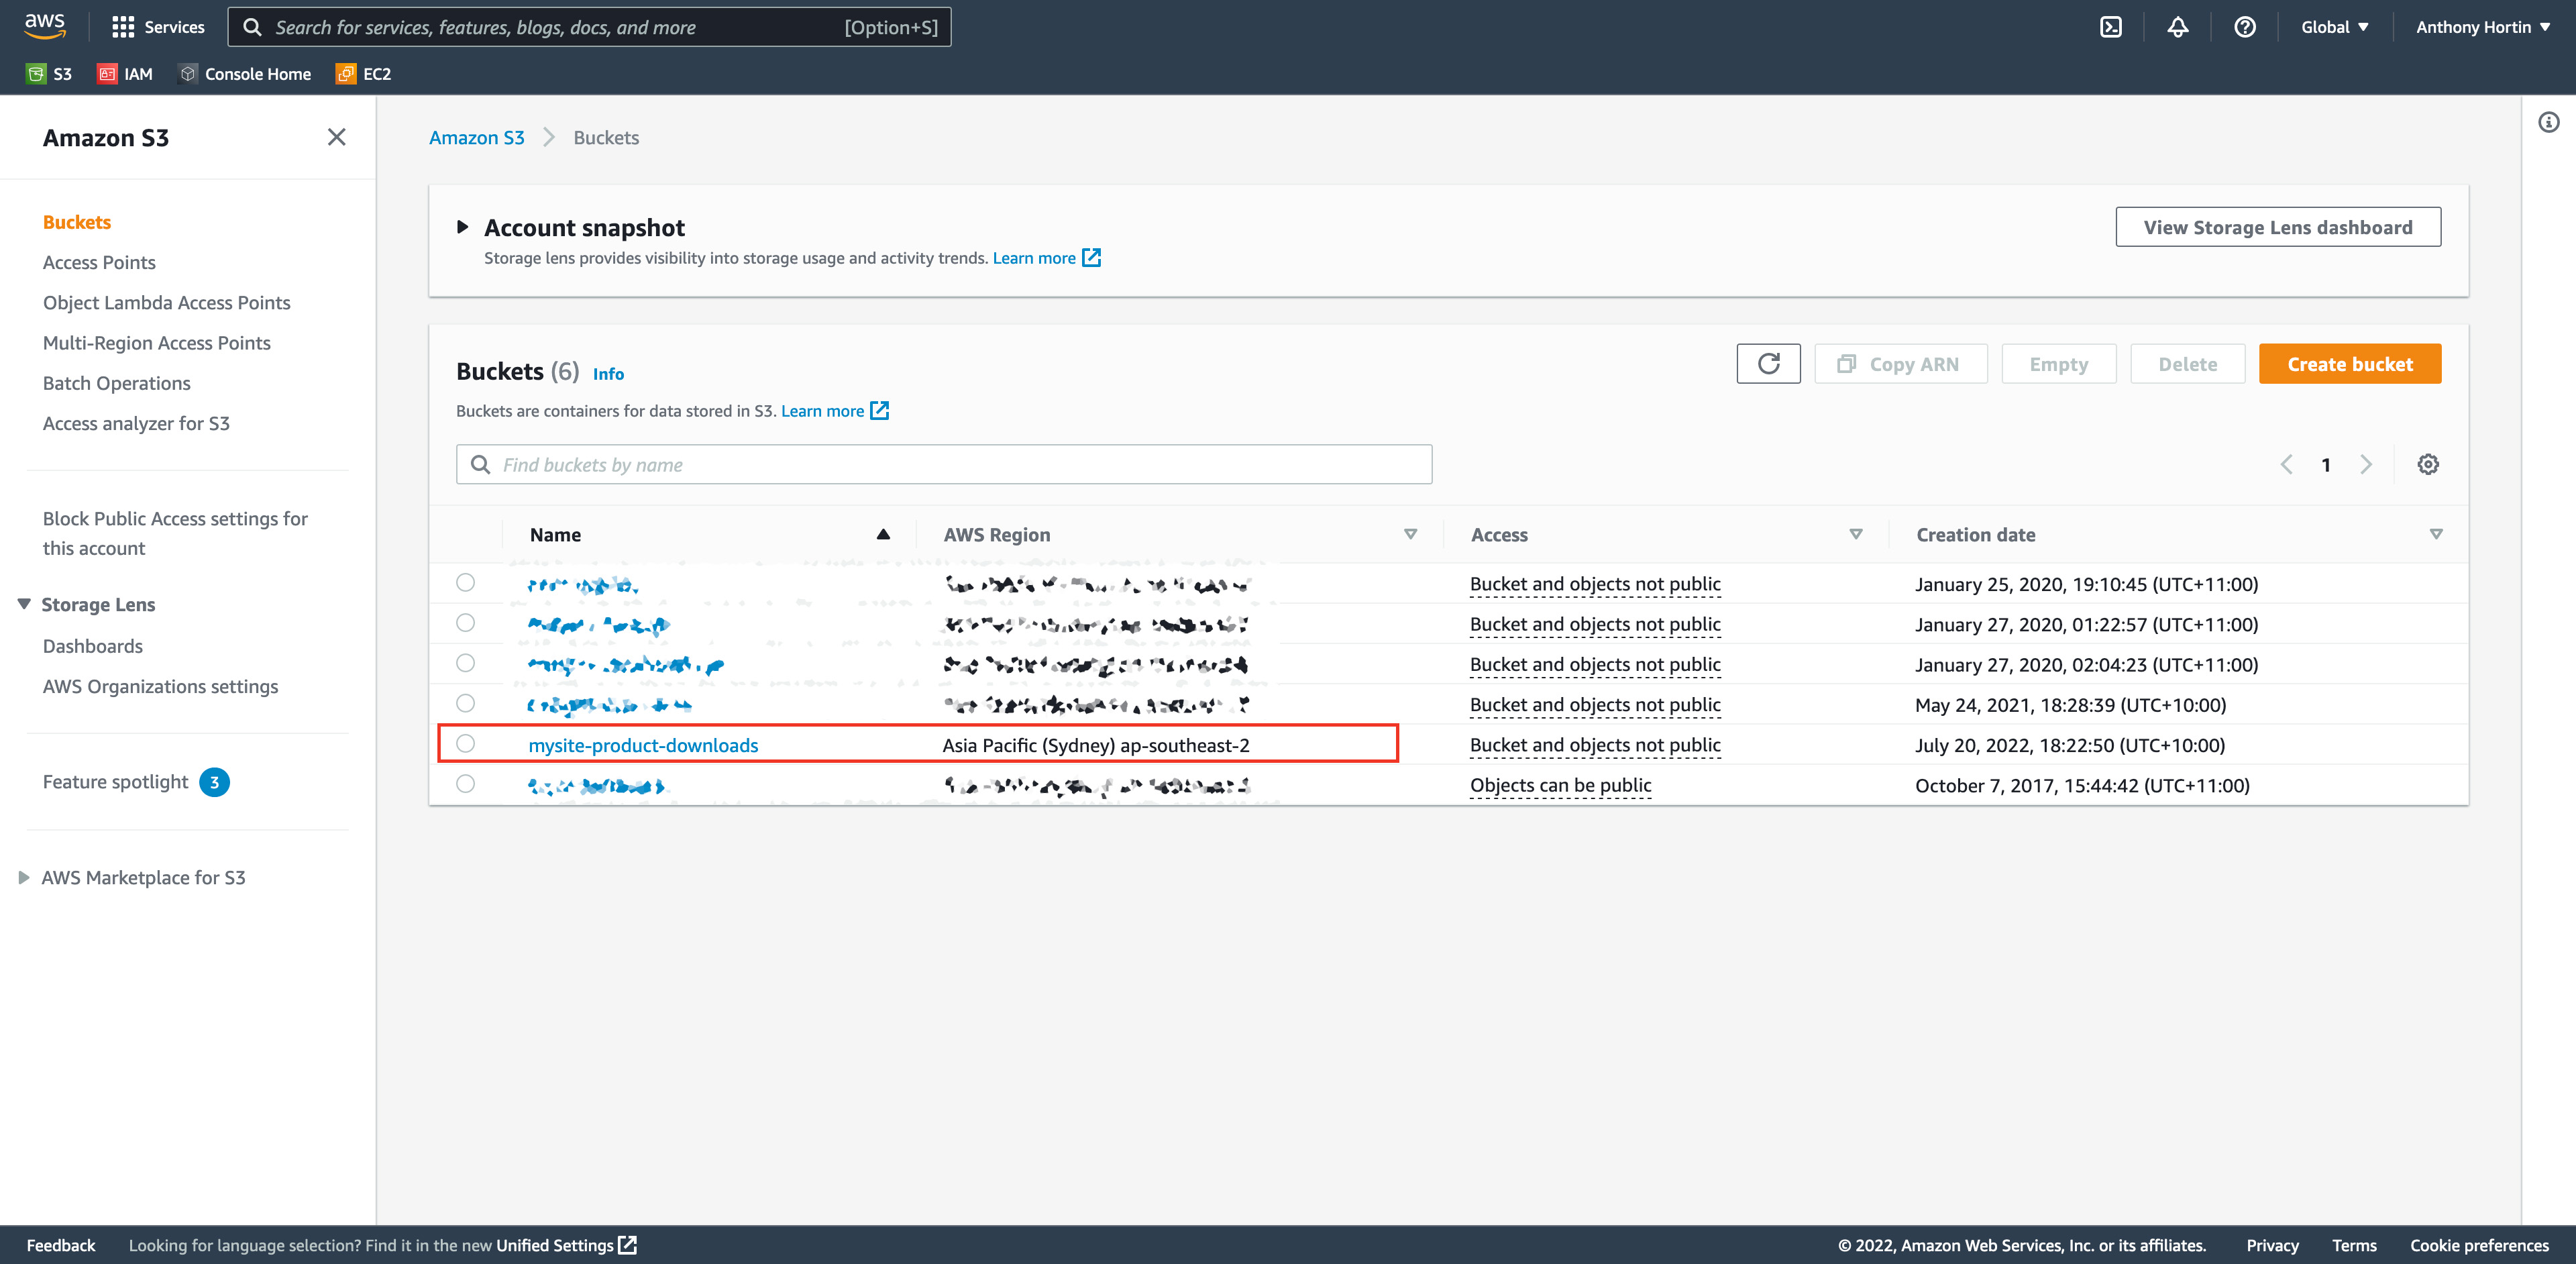
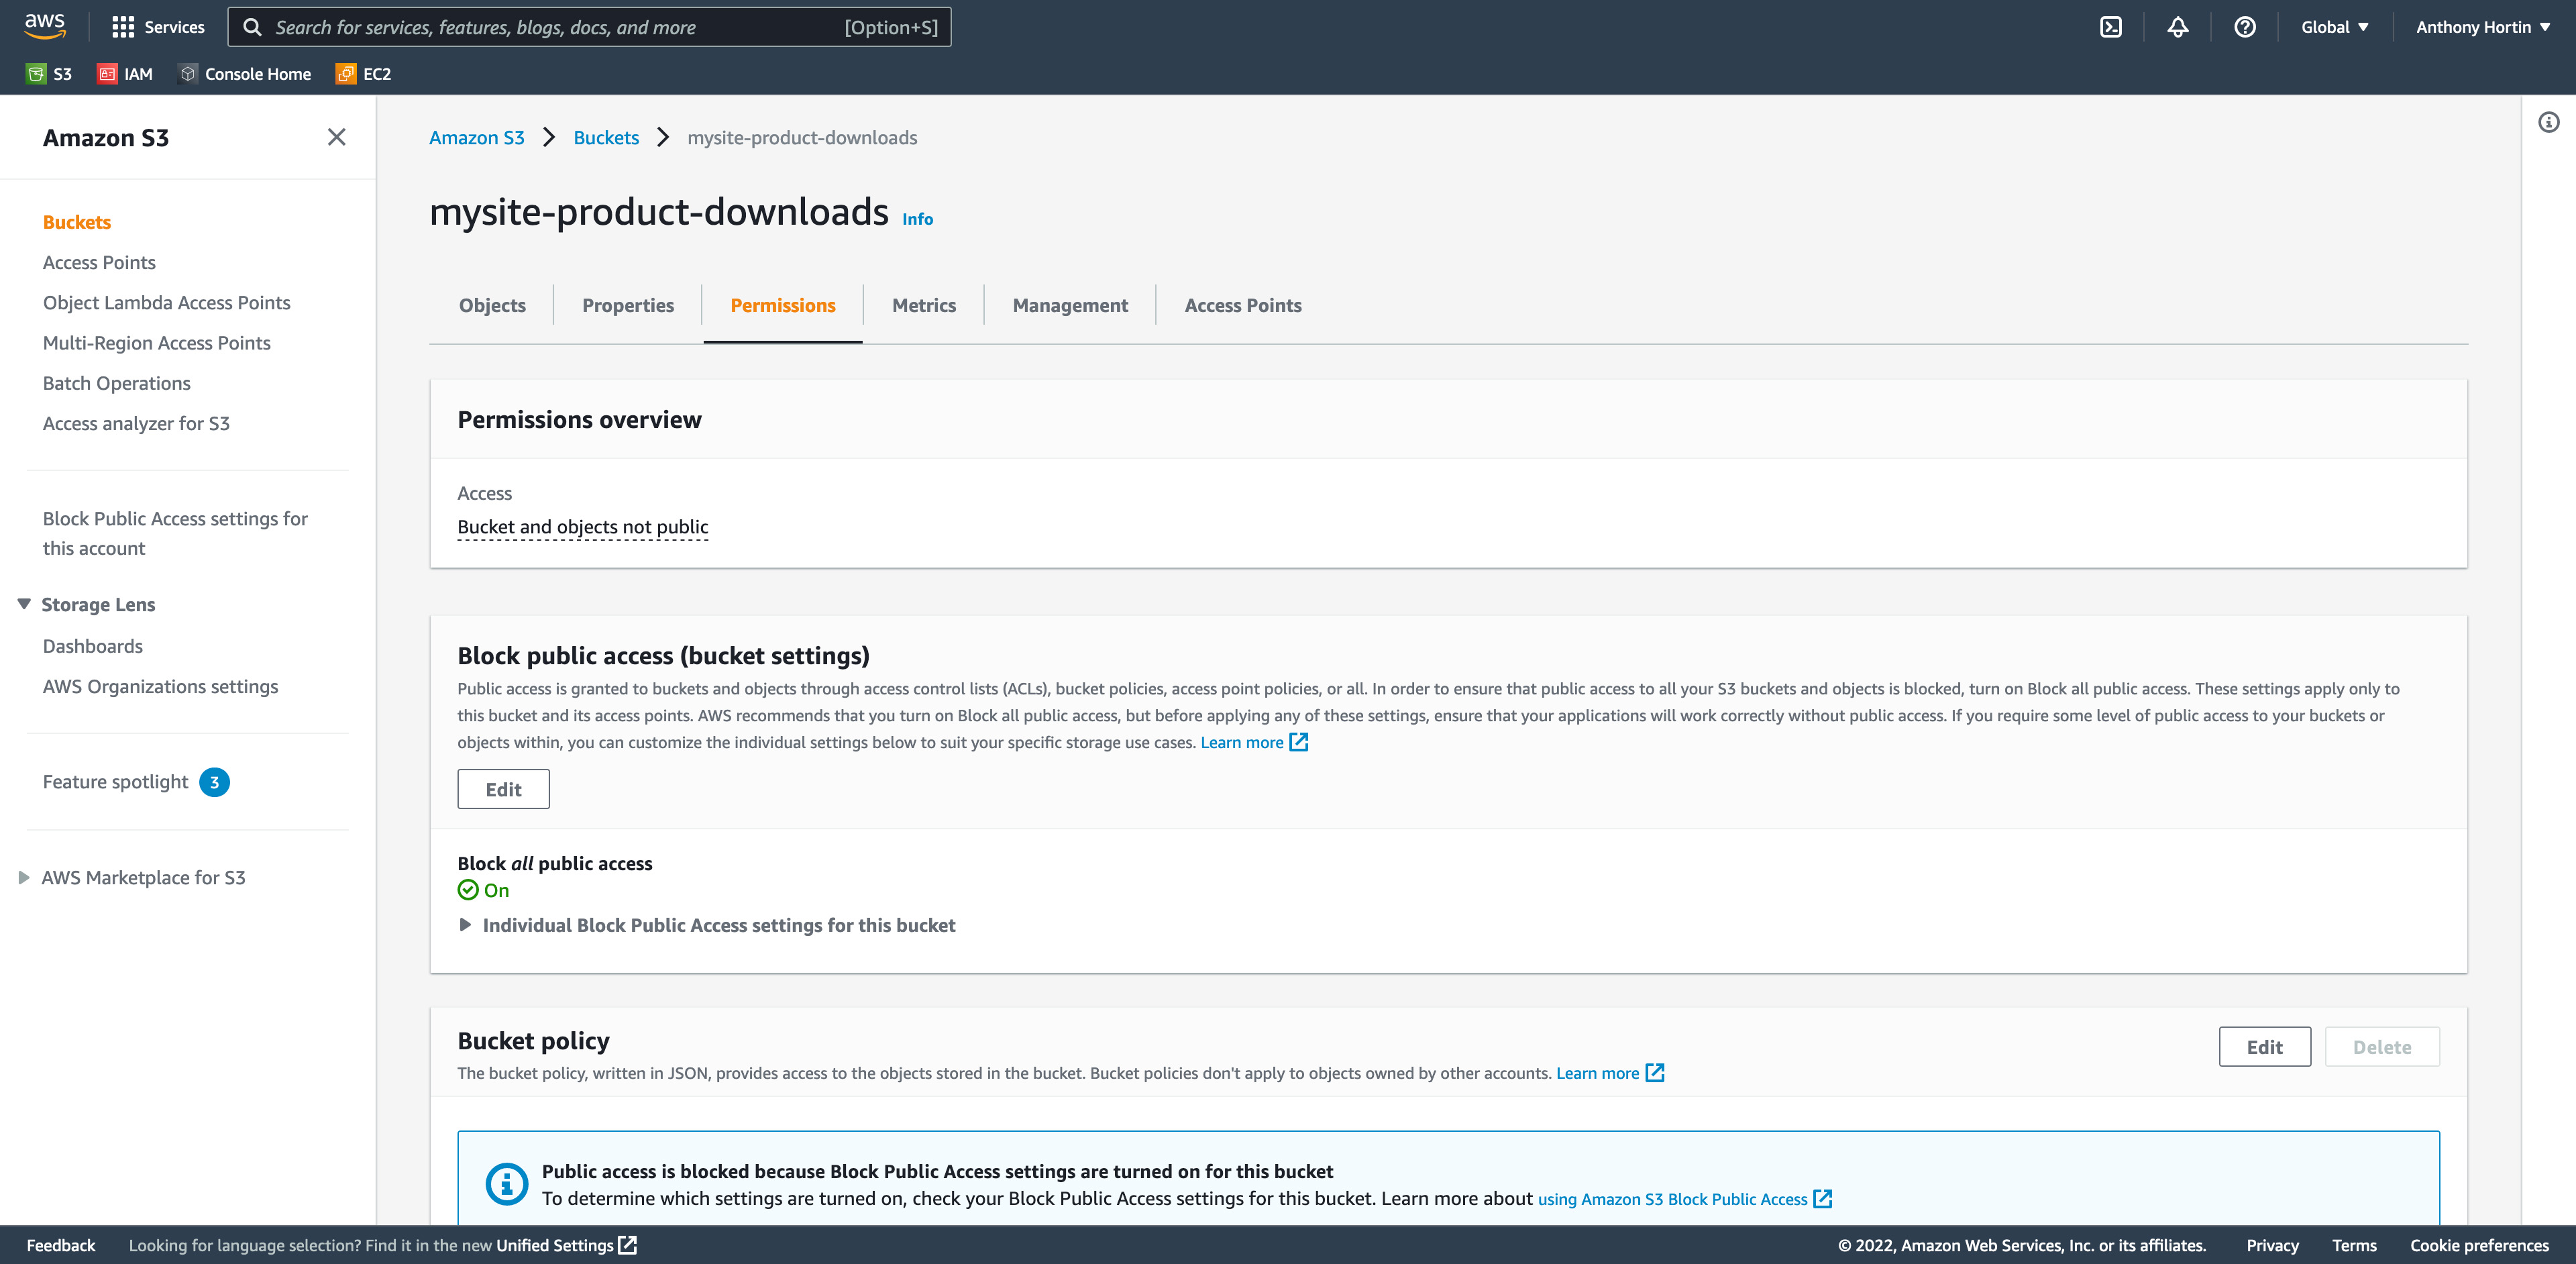
Next we’re going to setup your S3 Bucket Permissions. Click on your new bucket name that you just created and then click the Permissions tab.
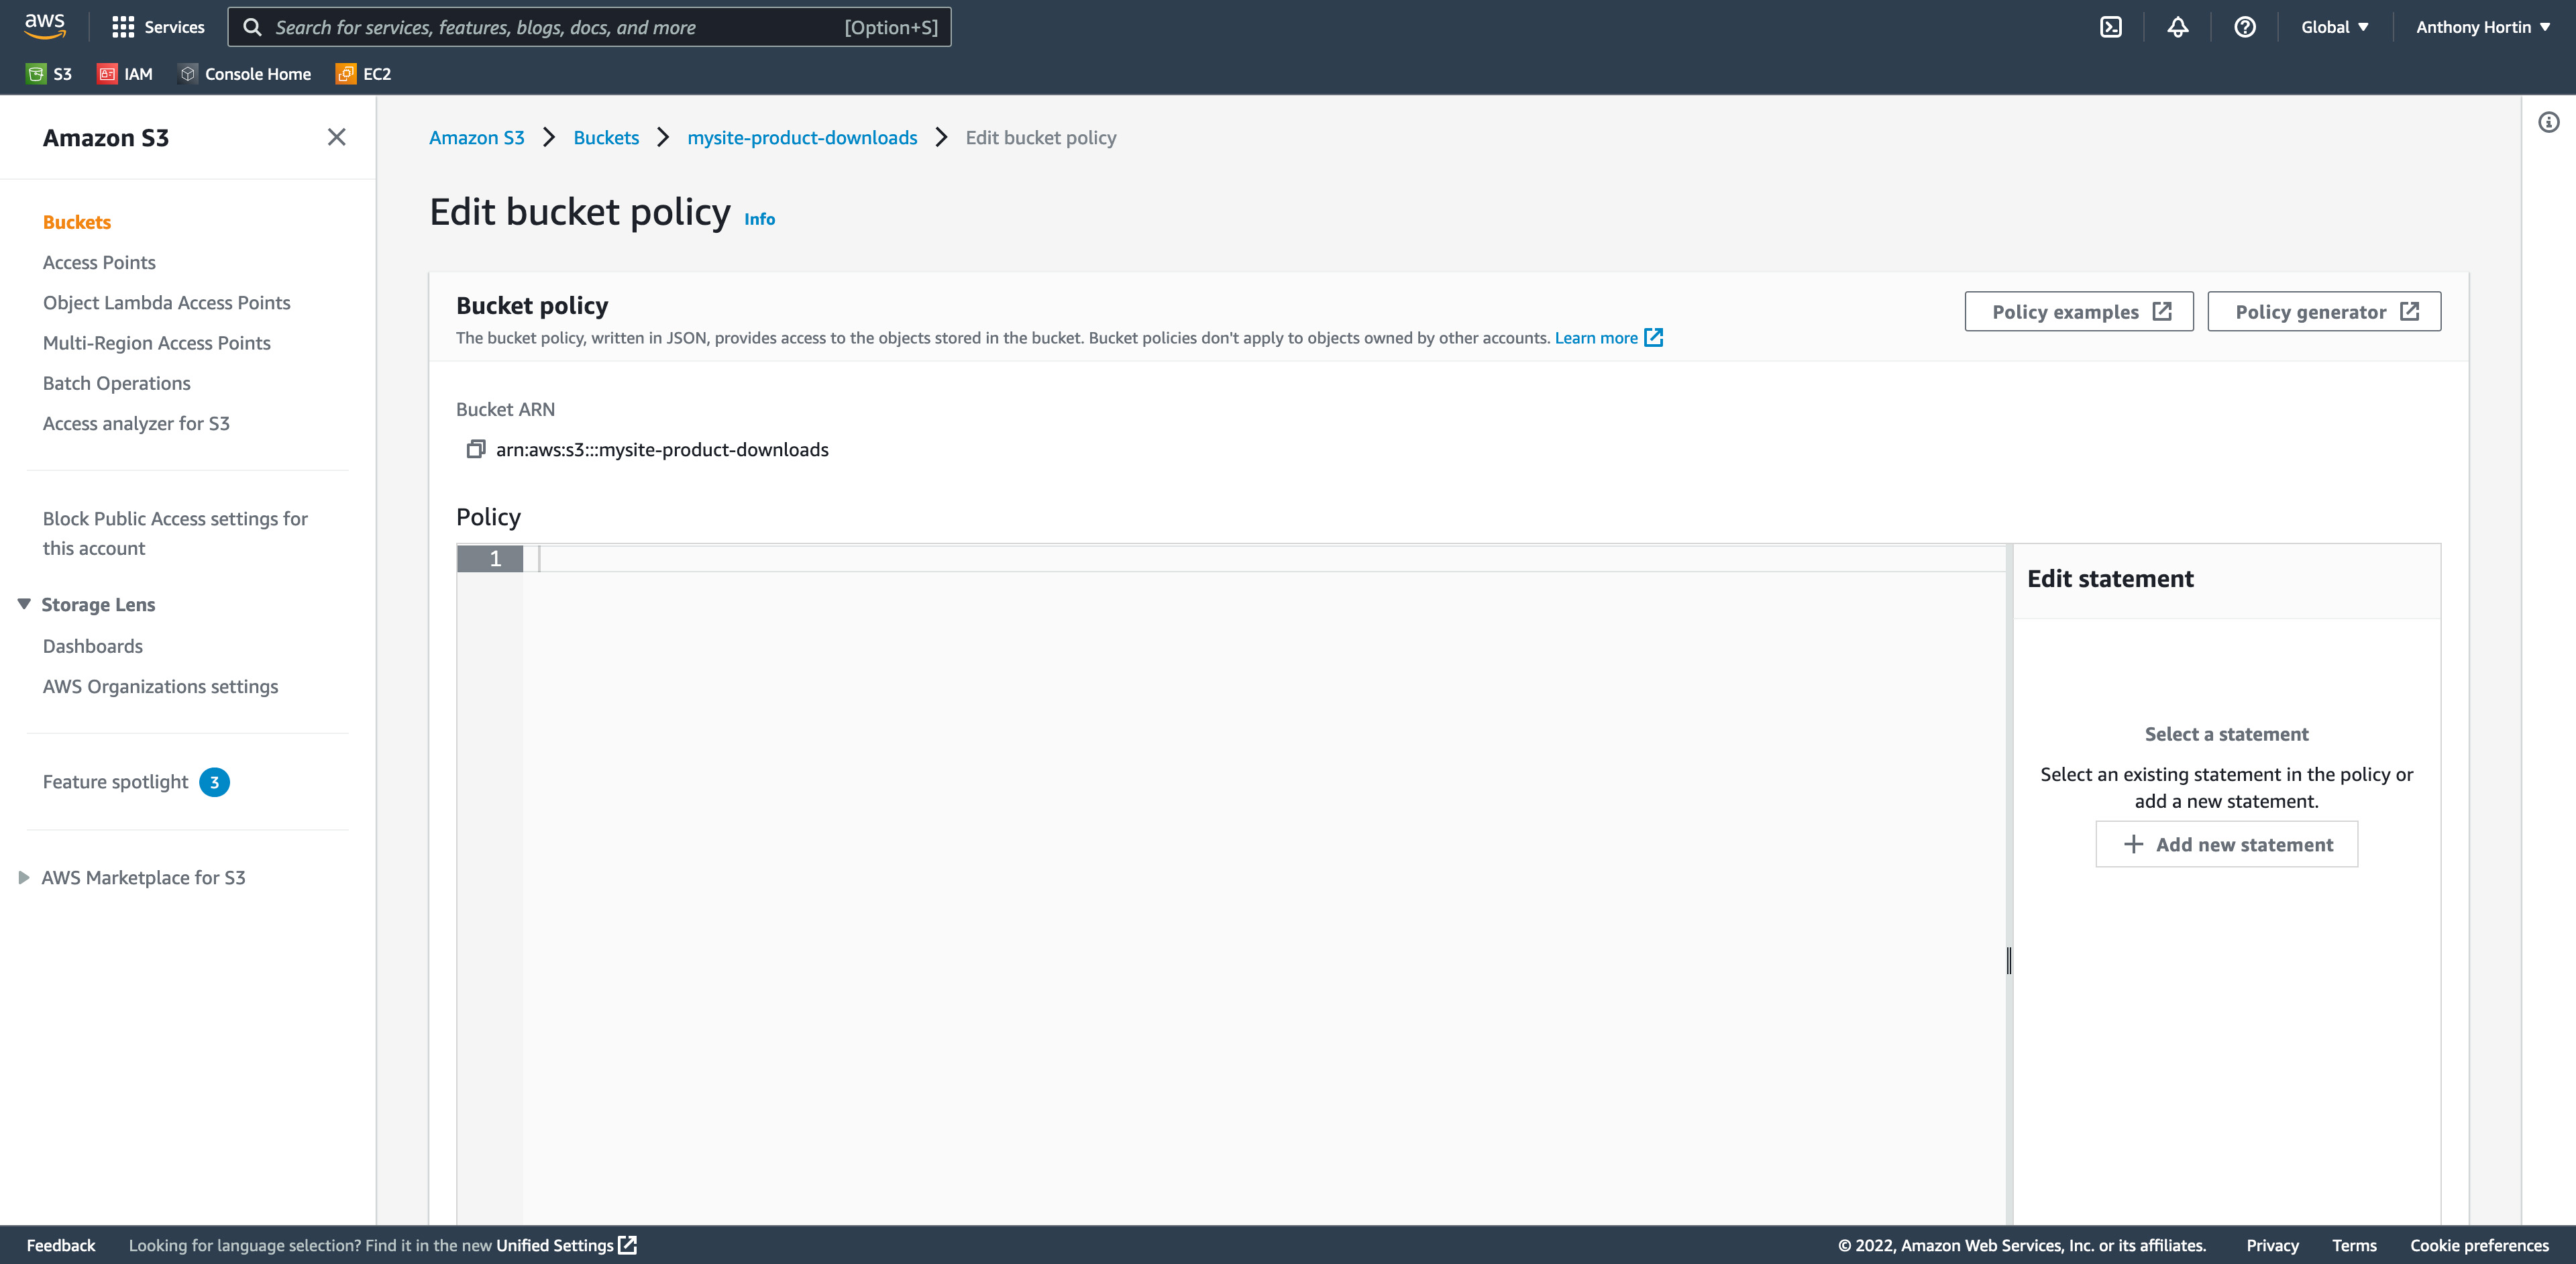
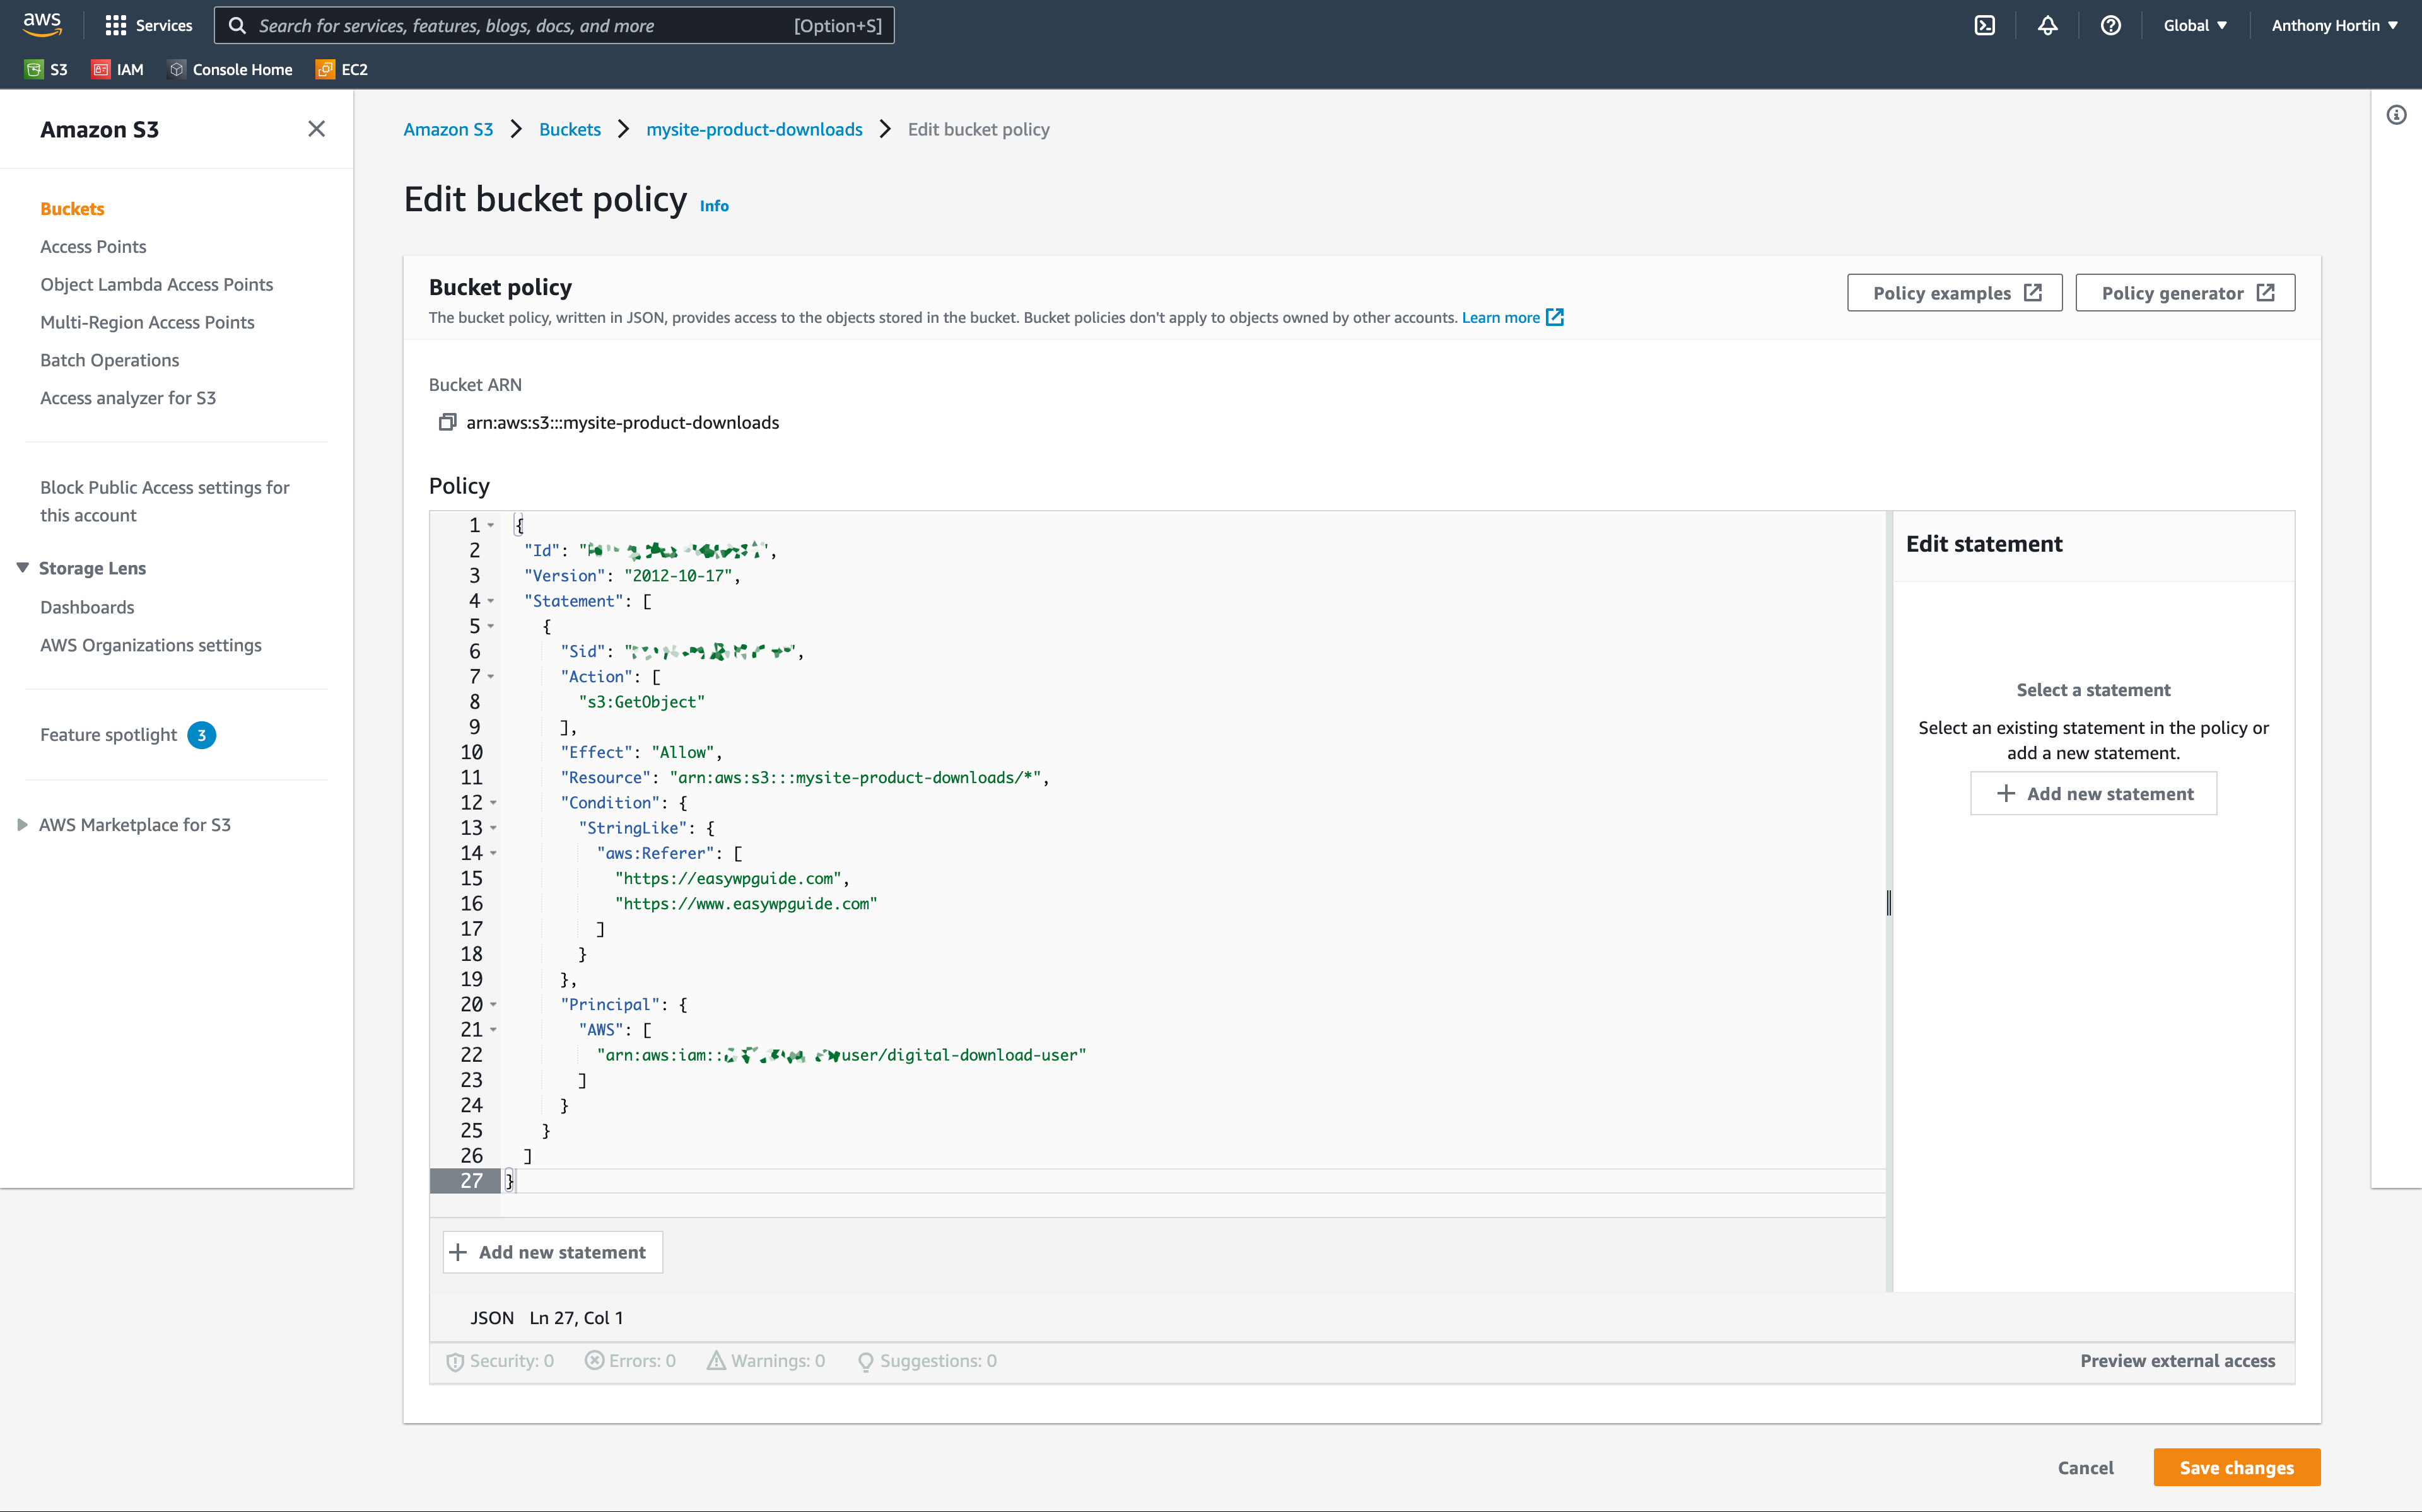
On the Permissions tab click the Edit button in the Bucket policy section. A bucket policy is a resource-based AWS Identity and Access Management (IAM) policy. You add a bucket policy to a bucket to grant AWS accounts or IAM users, access to your buckets and the objects in it.
To create our Bucket Policy, we’ll use the AWS Policy Generator.
On the Edit bucket Policy page, click the Policy generator button. We'll use Amazon's Policy generator tool to help generate the policy that we need for your bucket. The Policy generator will open in a new tab.
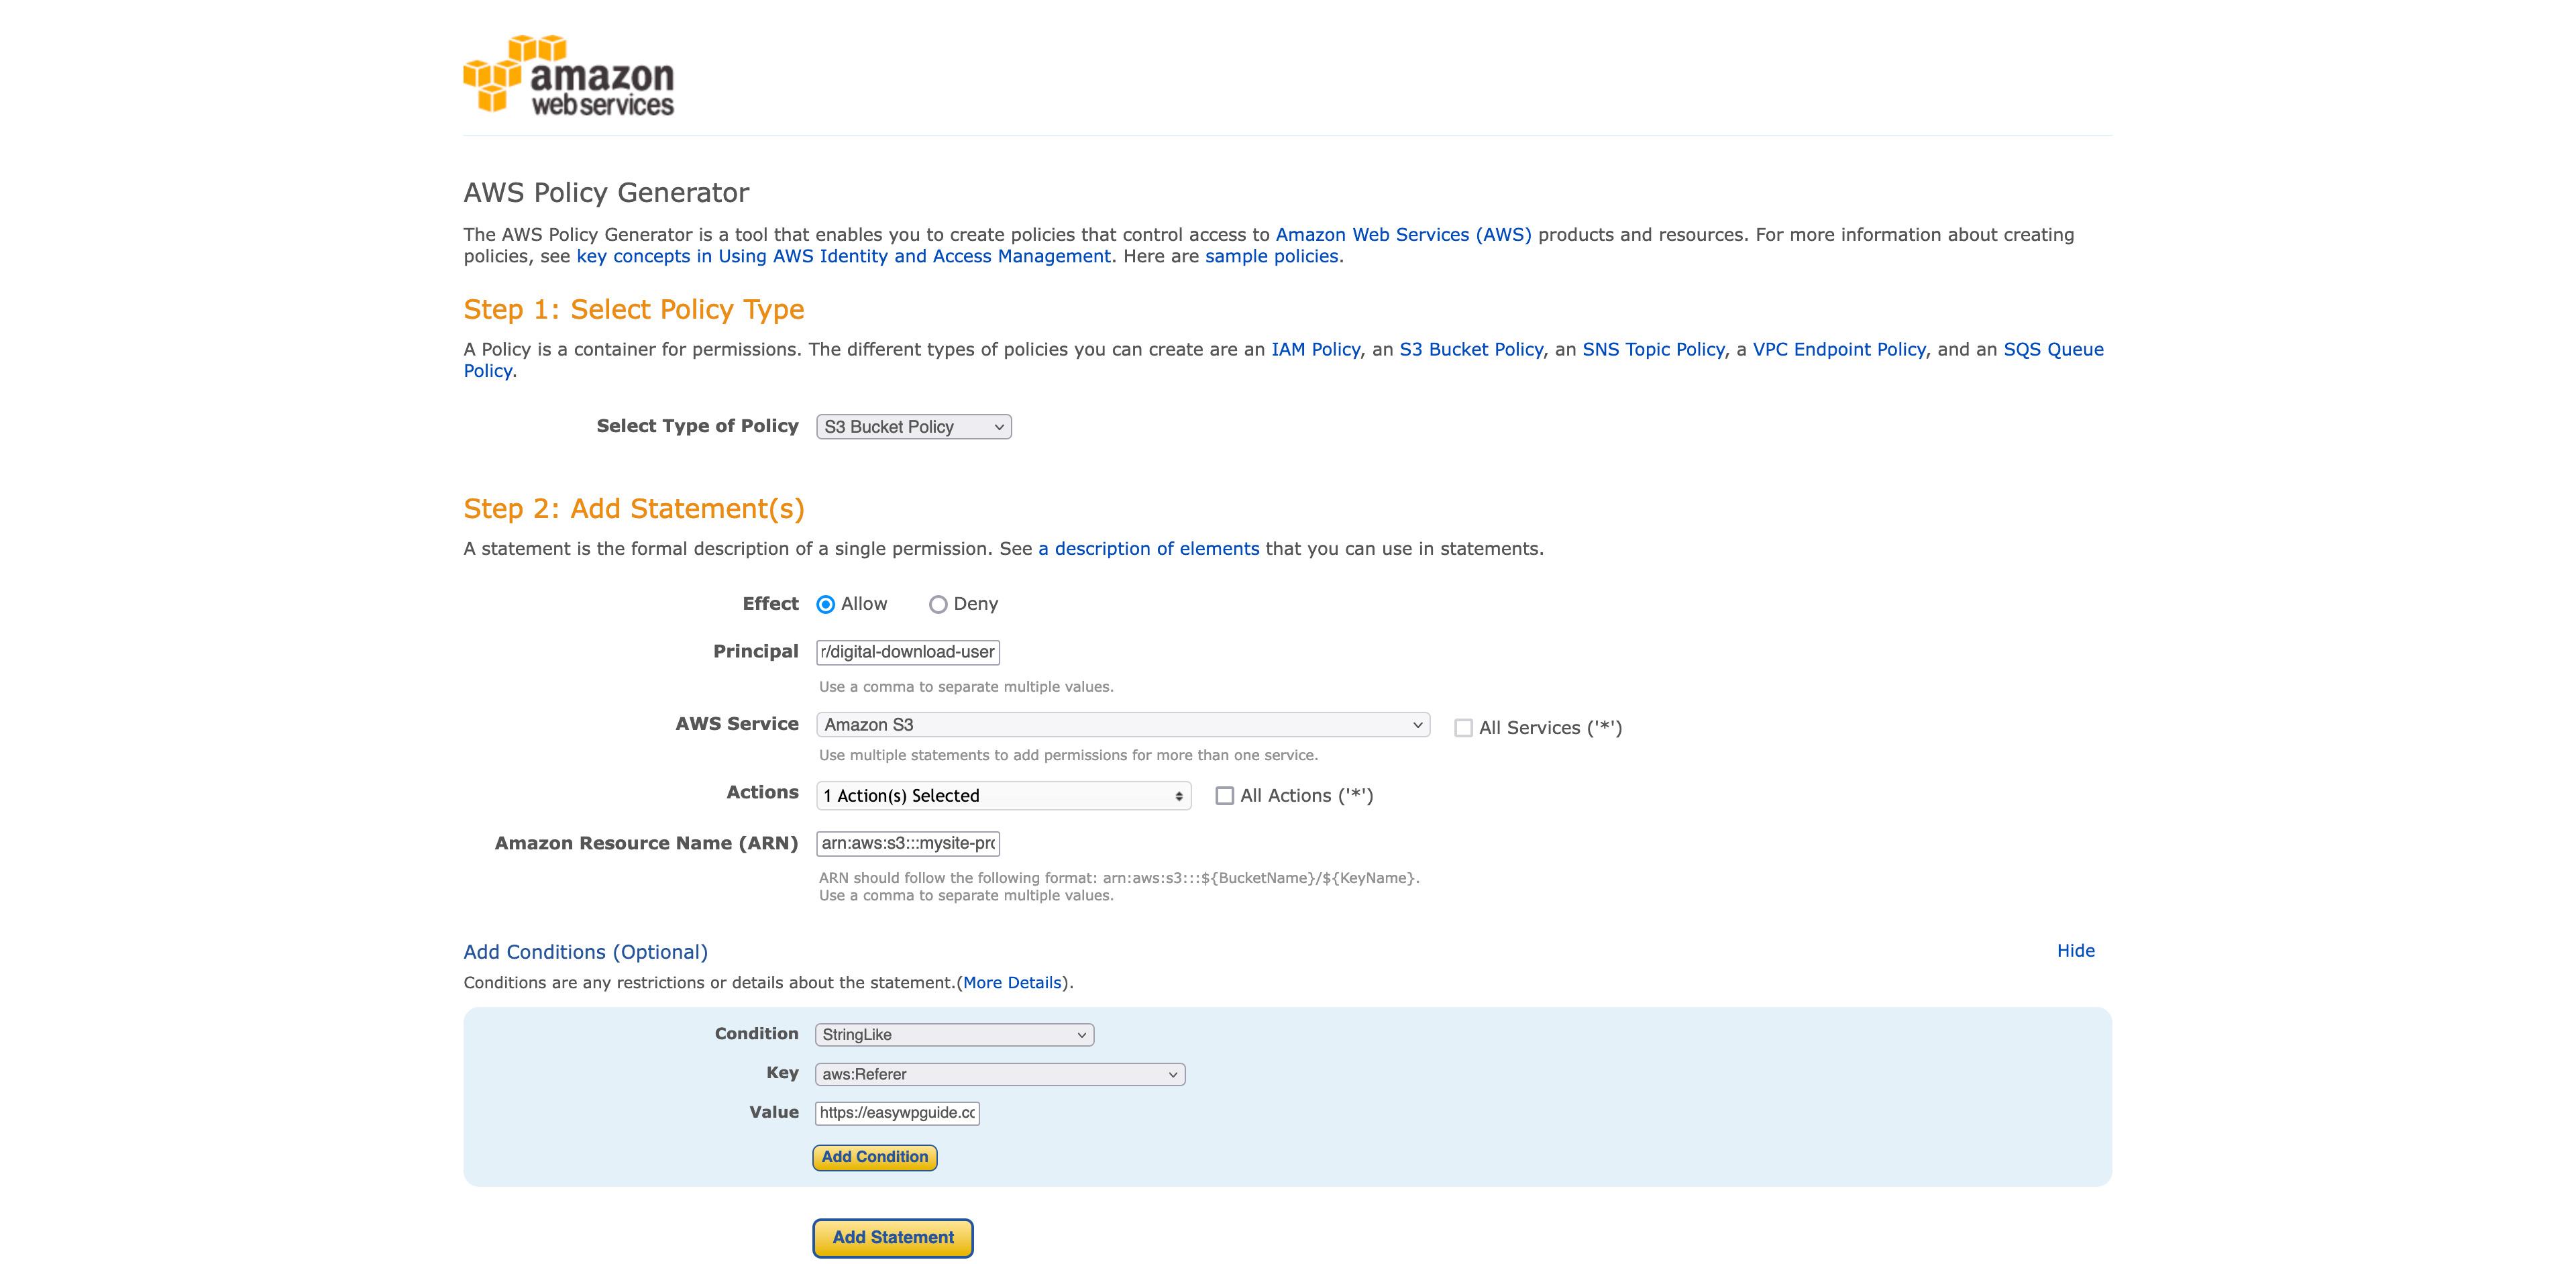
Select S3 Bucket Policy for the Type of Policy option.
Select Allow for the Effect option.
Add your User ARN, which you copied earlier, to the Principal field.
Amazon S3 should already be selected for the AWS Service.
Select GetObject in the Actions dropdown list.
Under Amazon Resource Name (ARN) enter your bucket details in the following format:
arn:aws:s3:::<bucket_name>/*
For our example bucket, the ARN is arn:aws:s3:::mysite-product-downloads/*
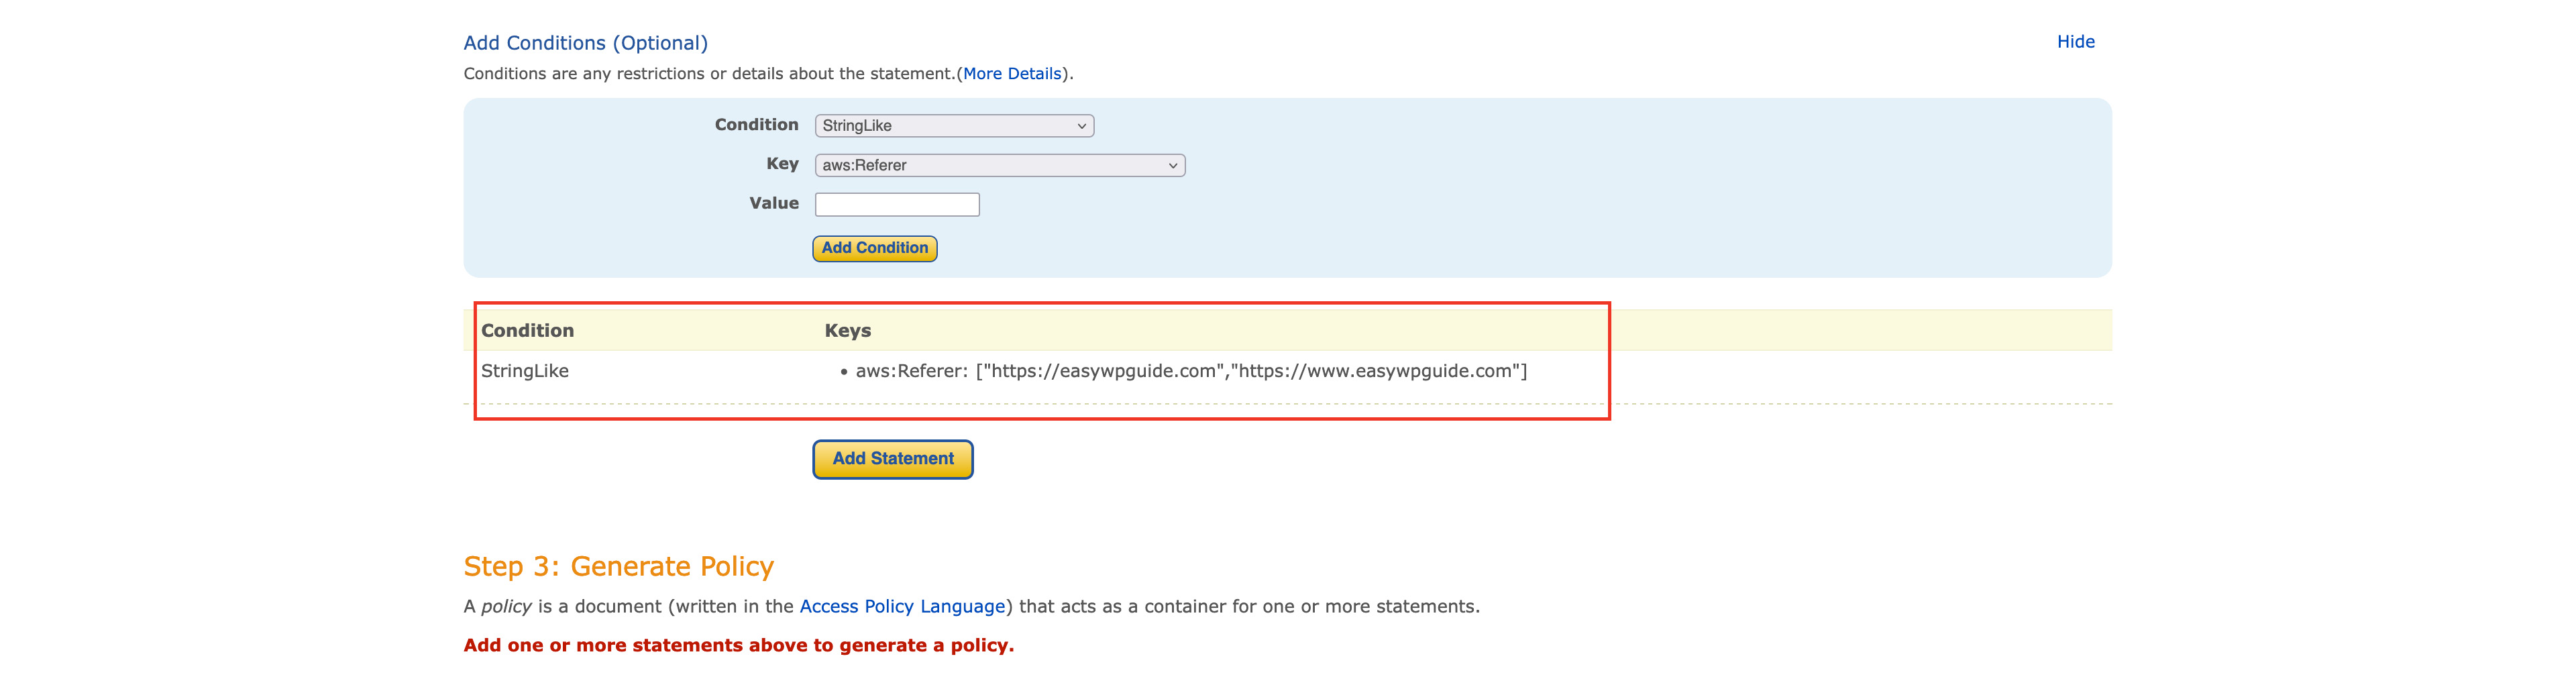
Next, we want to restrict access to our bucket from only our website/domain. To do this, click the Add Conditions (Optional) link.
Set Condition as StringLike
Set Key as aws:Referer
Set Value as https://your-domain.com,https://www.your-domain.com
(Replace ’your-domain.com’ with the domain name of your WooCommerce site
. Add your domain with and without the www, and with a comma separating the two URL's as per the above example)
Once you've double-checked all the above previously entered settings are correct, click the Add Condition button to add your restriction to your Policy. Your new Policy condition should appear just below the fields where you entered your settings. This condition ensures that only users referred from the website url that you entered, are allowed to access your bucket.
Click the Add Statement button to add a statement using all your previously selected options. The new statement should appear just below the Add statement button.

Lastly, click the Generate Policy button to generate your Bucket Policy. The Bucket Policy will appear in a popup window.
Highlight your new Bucket Policy and copy the details to your clipboard.
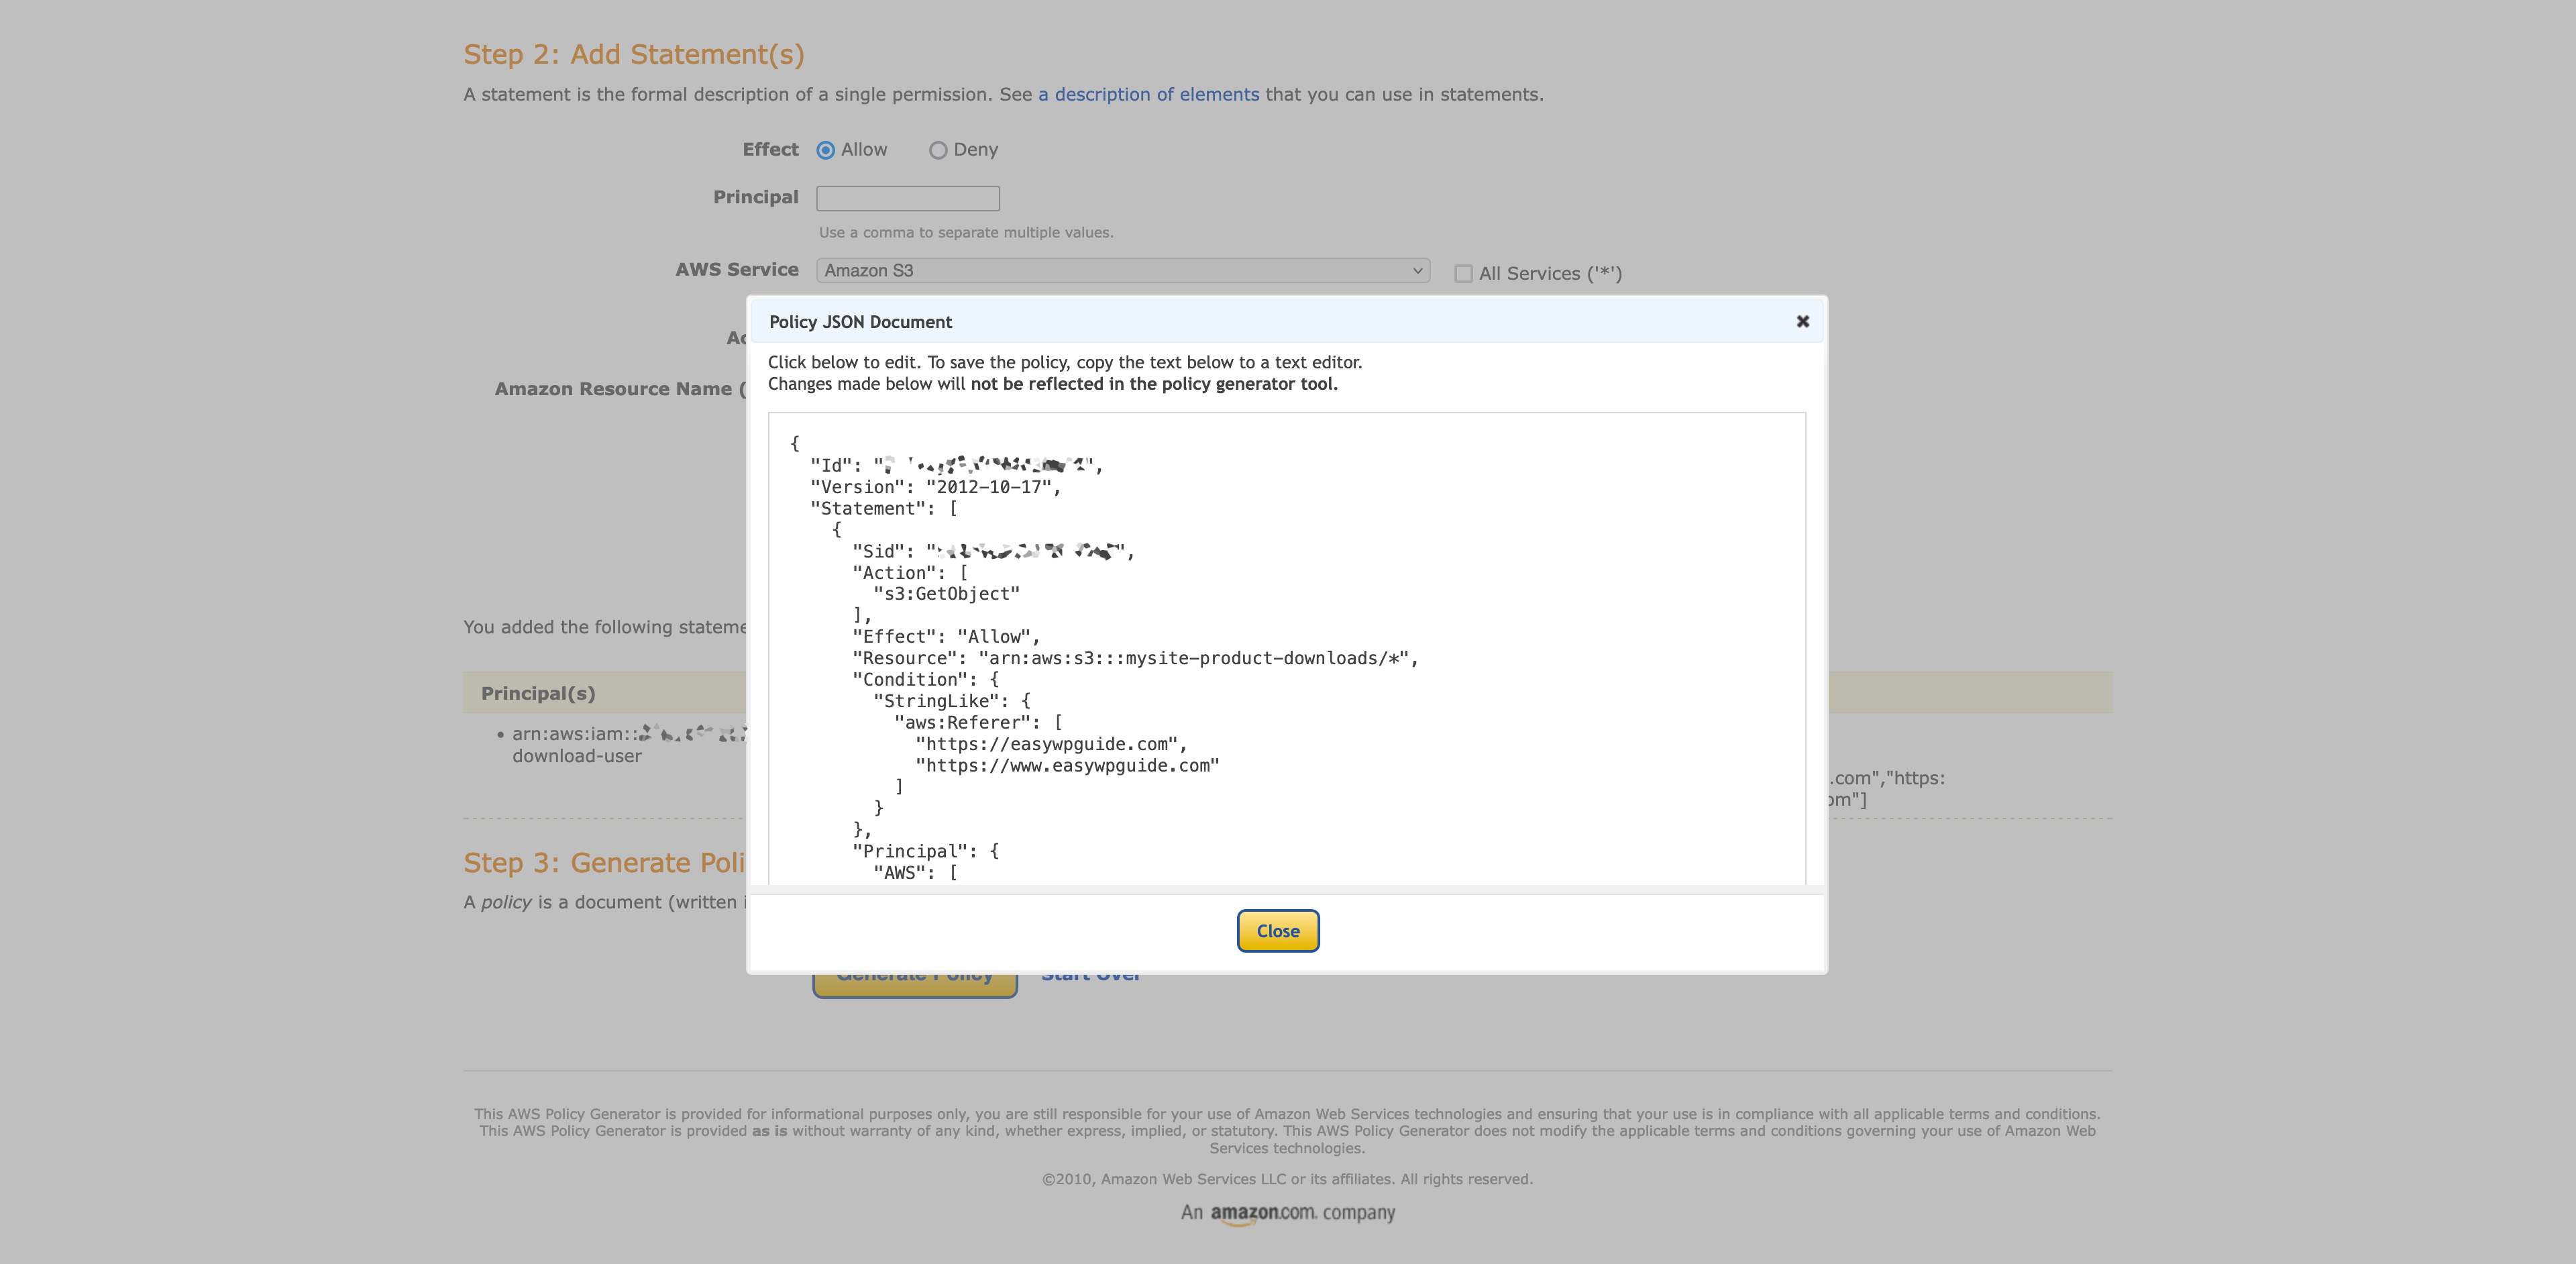
Once your policy is generated and you've copied the text from the above Policy generator popup, return to the Edit bucket policy page in your S3 Management Console browser tab, and paste the details into the Bucket Policy Editor. Ensure that you don't have any extra spaces or other characters either before or after the policy text, when pasting it into the Policy Editor.
After pasting your new Policy into the Policy Editor, click the Save changes button at the bottom of the page to save your new Policy details.
1.4. Uploading your files to S3
Now that your Users and Buckets are configured, it’s time to upload your product files.
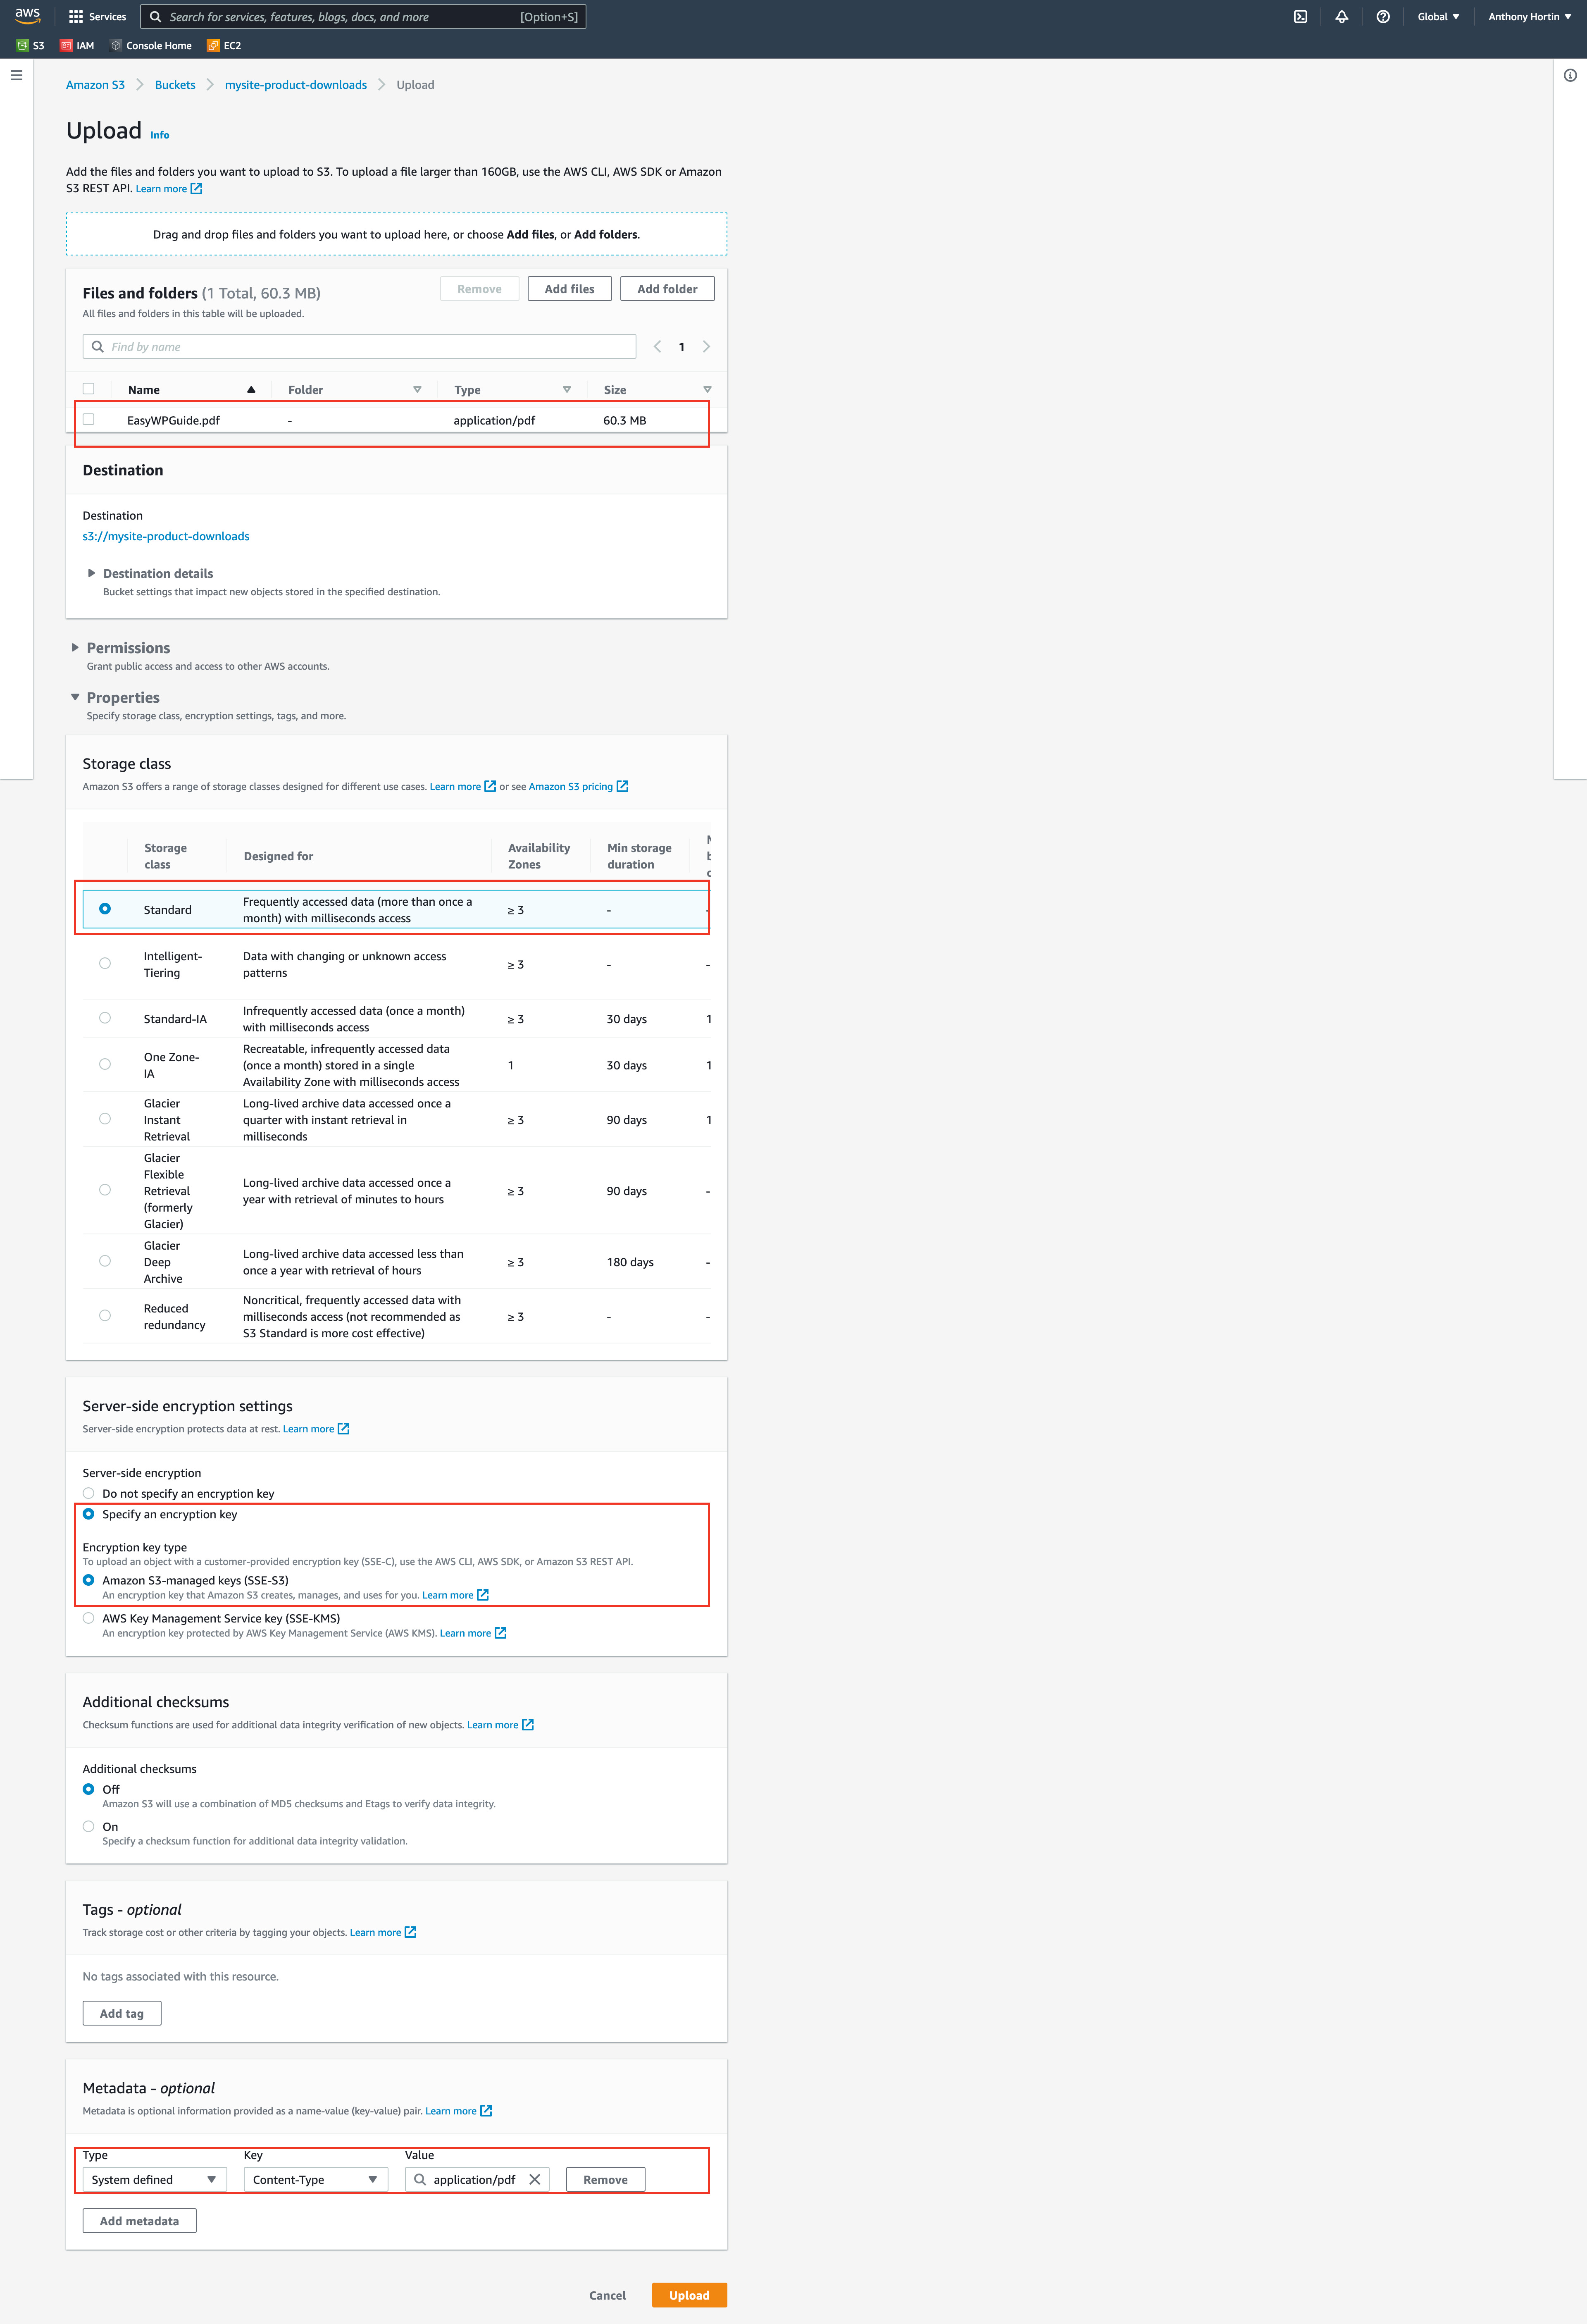
From your list of Buckets, click on your new Bucket name and then click the Upload button to be taken to the Upload page.
Click the Add files button to select your files or simply drag ’n drop your files into the page. The files to be uploaded will be listed in the Files and folders section once you've either selected them or dropped them into the page. You can drag ’n drop as many files as you want into the popup, but I recommend uploading one file type at a time. i.e. Upload all your PDF's, then repeat the process for all your Word Docs, repeat again for all your MP4s etc. etc…
On the Upload page, toggle the Properties panel open by clicking the Properties title.
Select Standard for the Storage class. Standard is the default storage class and recommended for frequently accessed data.
Select Specify an encryption key radio button and then select Amazon S3-managed keys (SSE-S3) for the Encryption key type to help protect your data while it’s residing in AWS.
For each type of file that you upload, you should set the correct metadata. This is why I recommend uploading one file type at a time.
Click the Add metadata button to view extra options.
Select System defined from the Type dropdown list.
Select Content-Type from the Key dropdown list.
Select the type of file from the Value input field. Values used for commonly uploaded files are:
application/pdf for PDF's
application/msword for Word Doc and Word Docx files
application/zip for zip files
image/jpeg for jpg files
image/png for png files
If the correct value doesn't appear in the list, simply type it in the value field manually. Common files that aren't shown in the list of values include:
video/mp4 for mp4 video files
application/x-mobipocket-ebook for .mobi files
application/epub+zip for .epub files
The official IANA (Internet Assigned Numbers Authority) list of Media Types can be found here – https://www.iana.org/assignments/media-types/media-types.xhtml
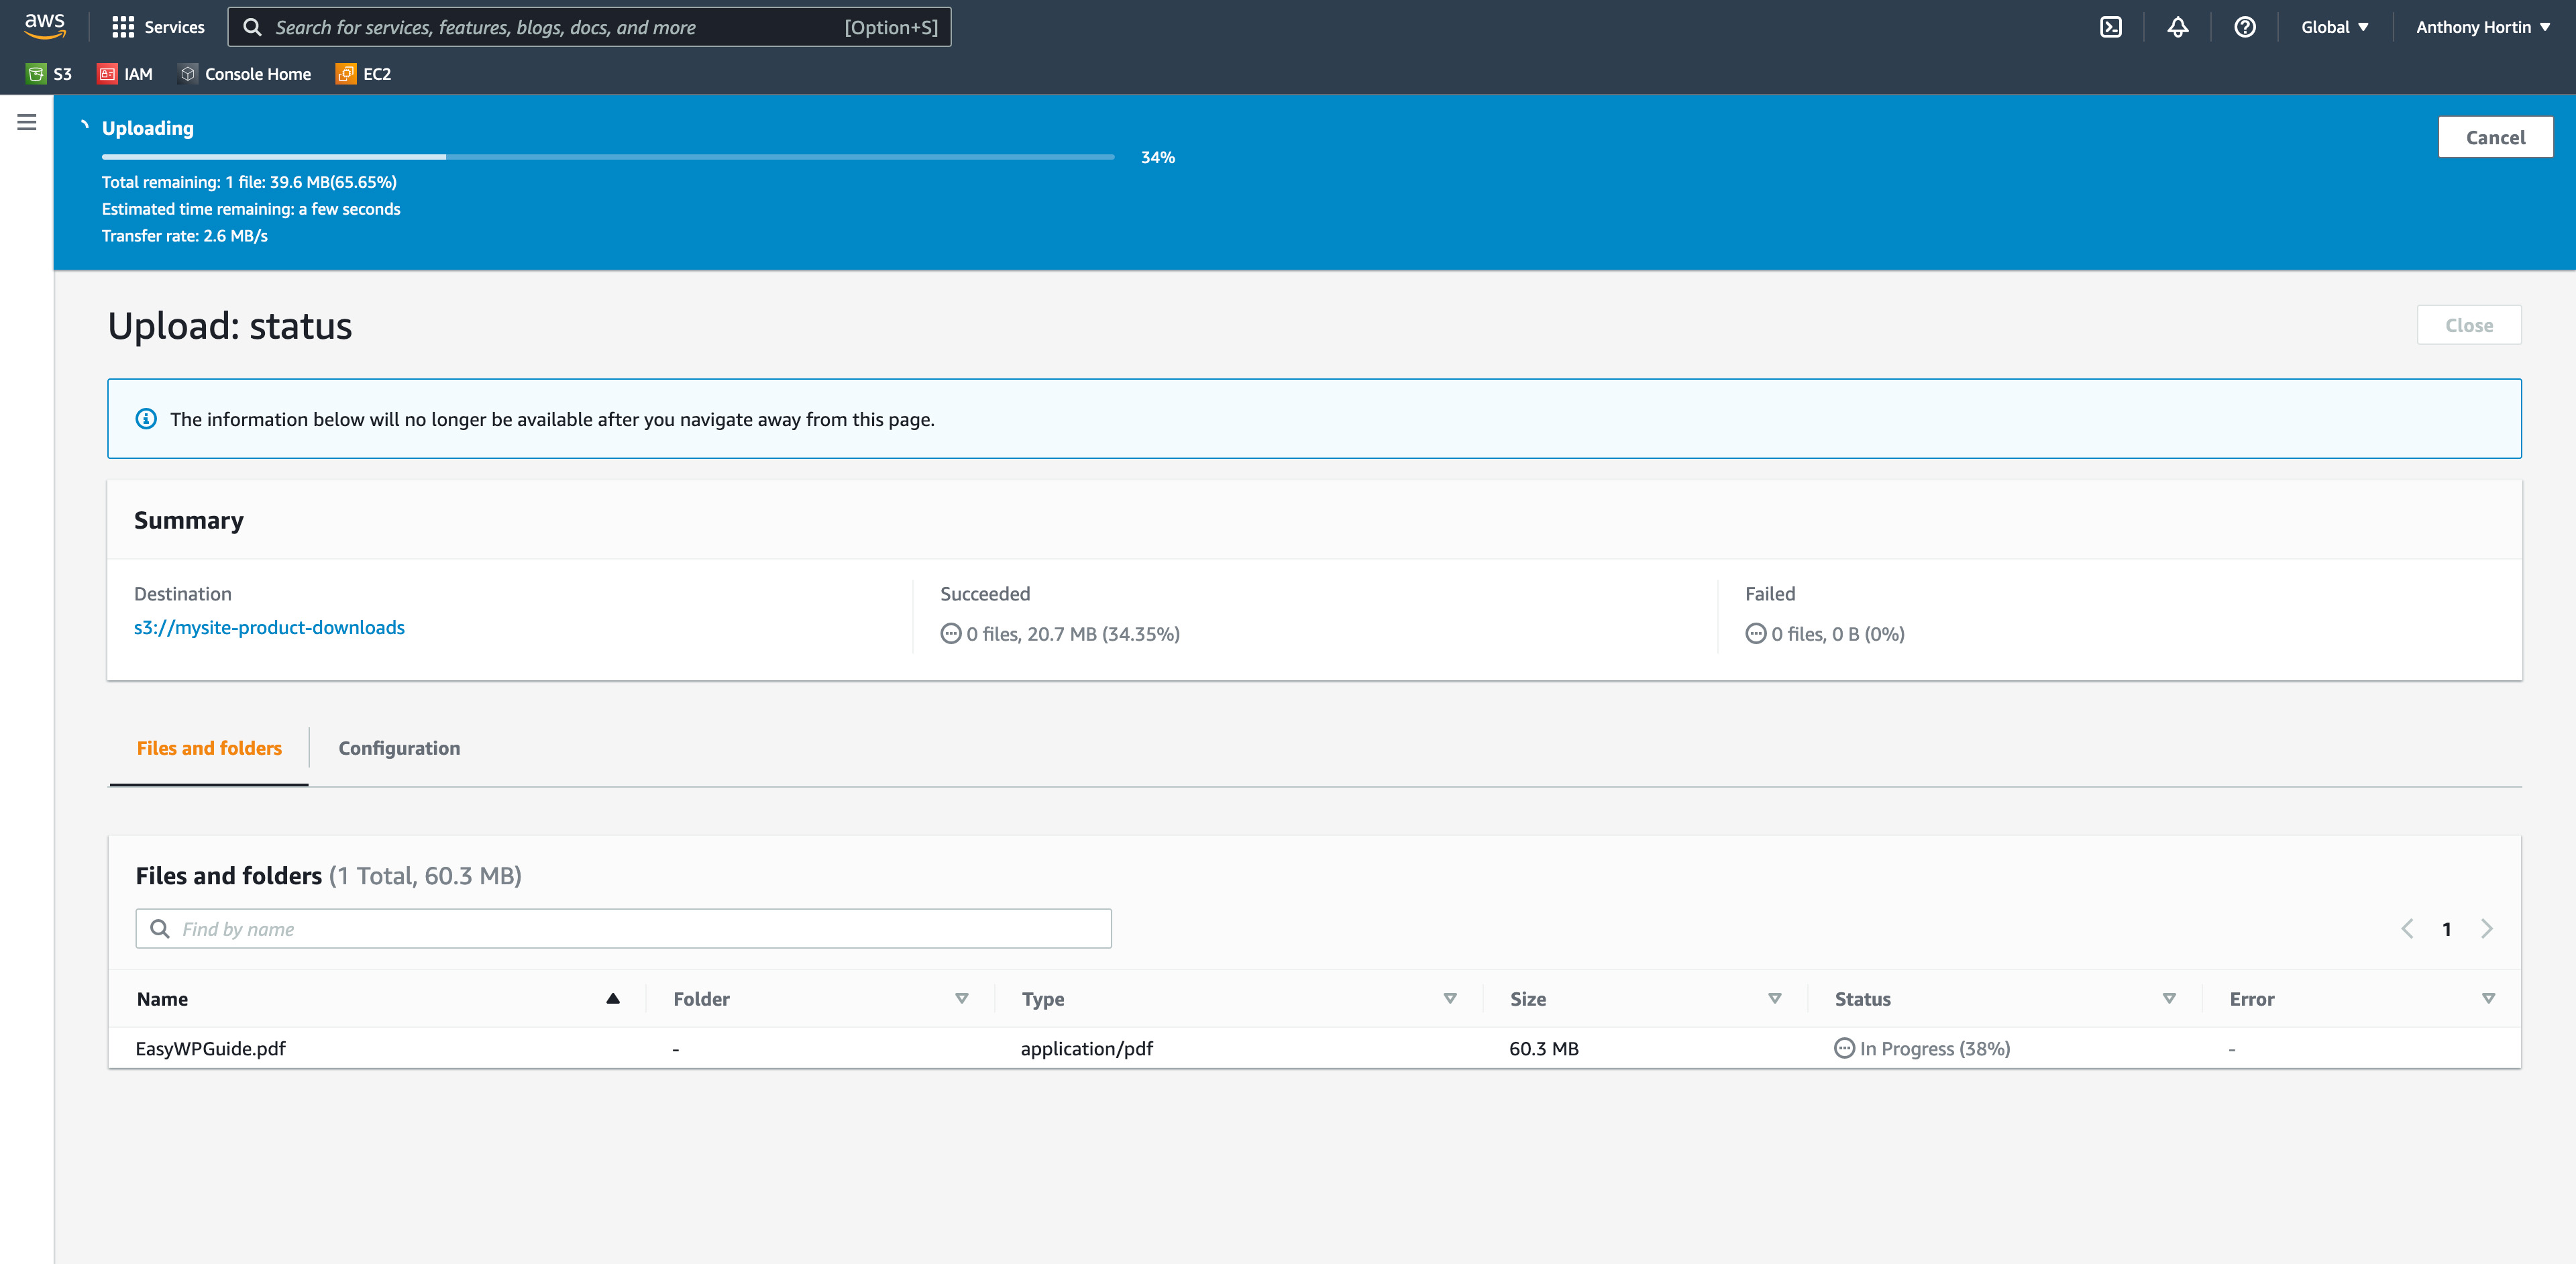
Once you've added all your files that you want to upload, and you've configured all the above options, click the Upload button at the bottom of the page to start uploading your file(s).
After clicking the Upload button, an upload progress counter will appear at the top of the page. Once the upload is complete, you can click the Close button to return to your bucket. You should then see a list of all your files that are currently residing in that S3 bucket.
If you have further files to upload, simply repeat the above process.
02. Setting up WooCommerce
Now that you’ve configured your AWS Users, setup your S3 buckets, and uploaded your files, it’s time to configure WooCommerce.
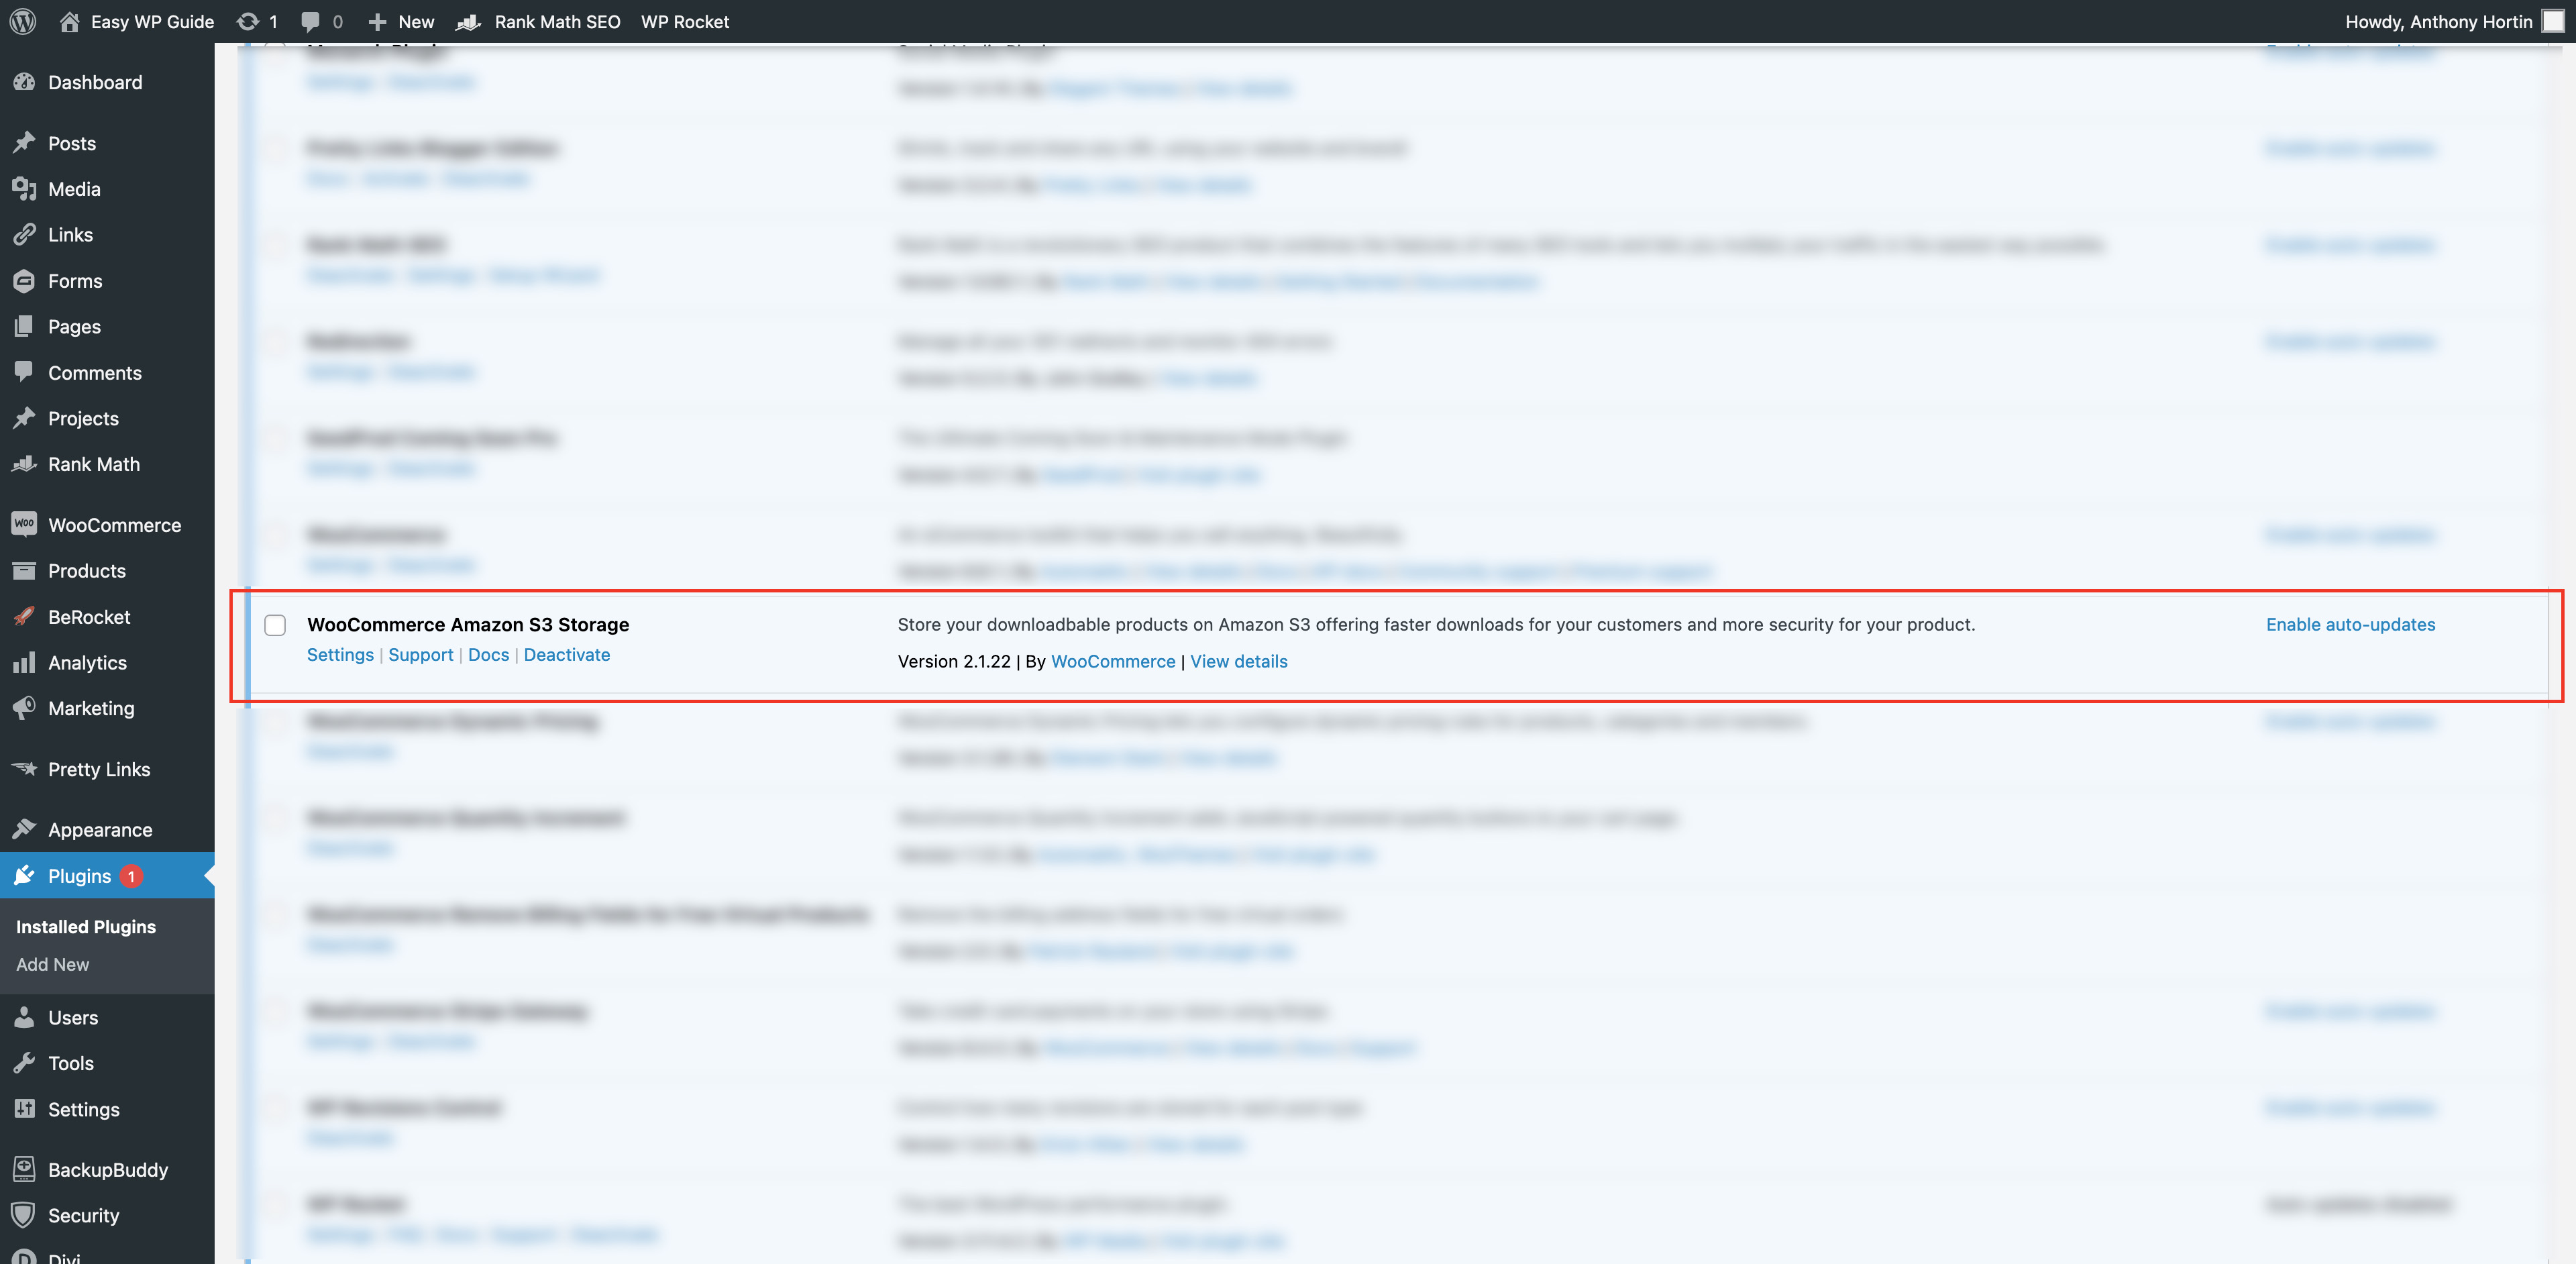
To connect your digital products to your files in S3, we’re going to use the WooCommerce Amazon S3 Storage plugin. It’s a paid plugin from WooCommerce, but it’s fairly inexpensive and is easy to use and configure.
2.1. Installing Amazon S3 plugin
Upload and activate the WooCommerce Amazon S3 Storage plugin, just like you would any other plugin and then click the Settings link to configure the plugin settings.
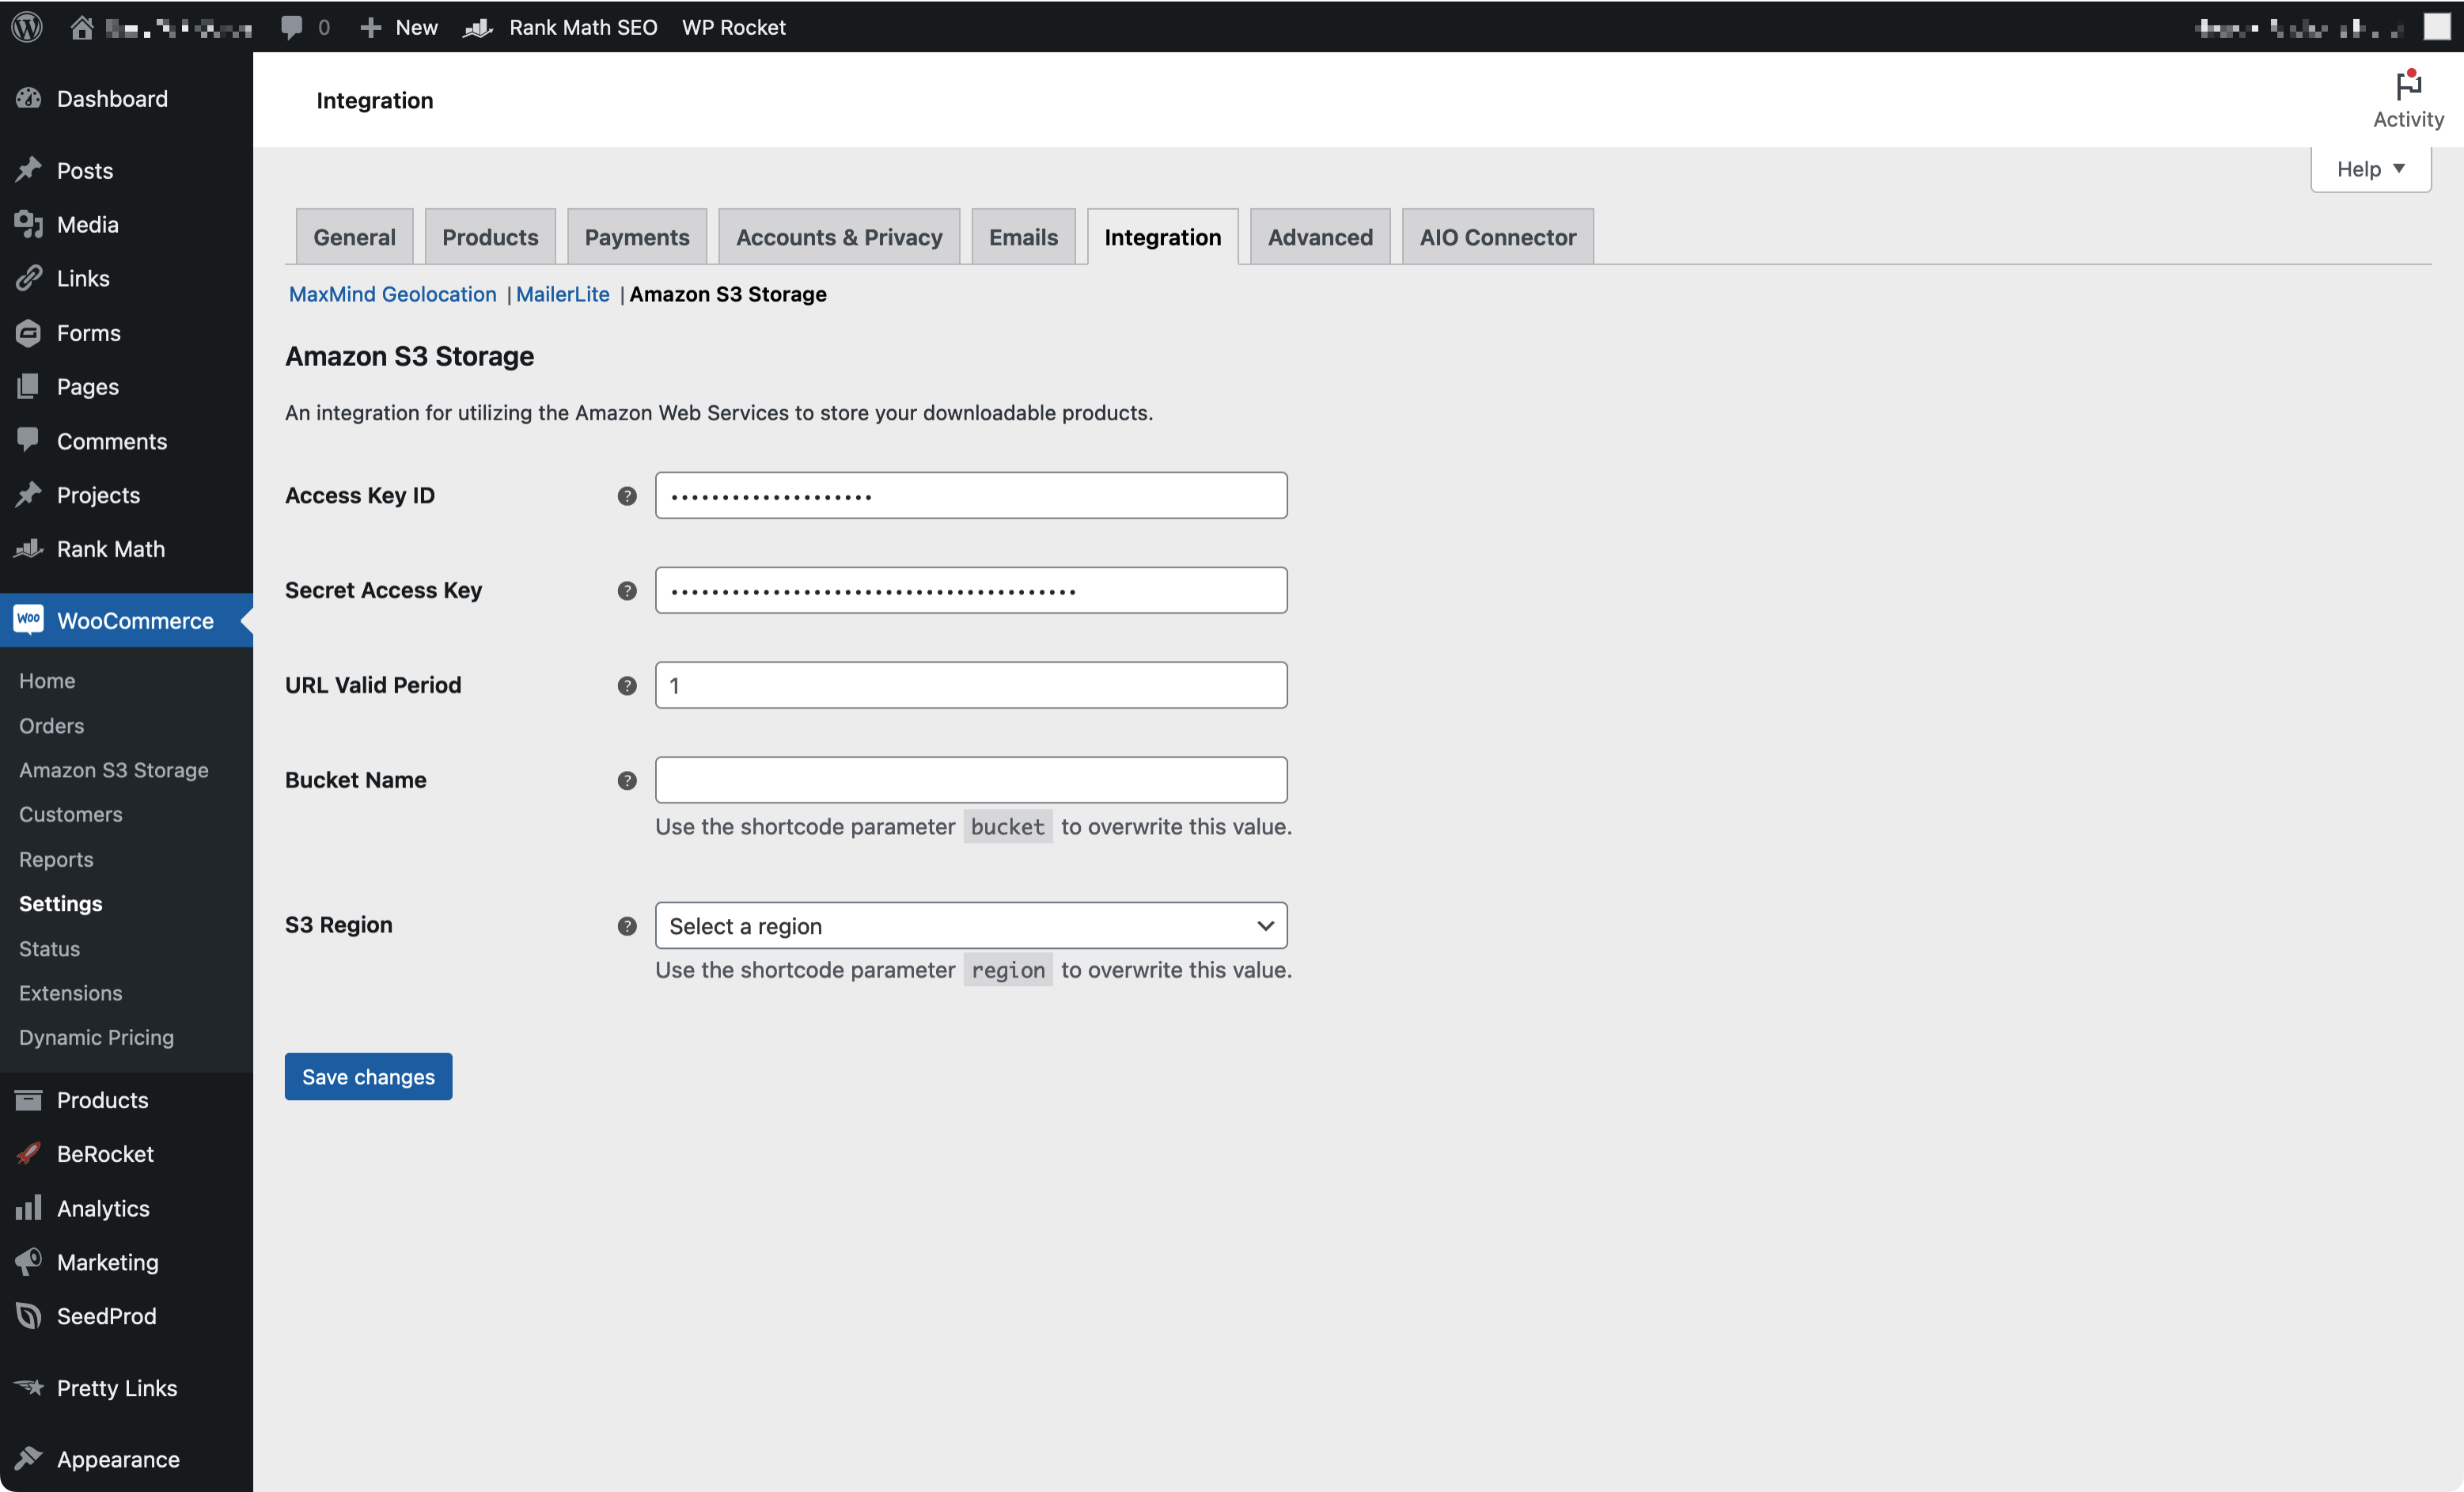
On the Amazon S3 Storage settings page, enter your Access key ID and Secret access key that you copied when setting up your User in AWS, and then click the Save changes button.
A word of caution: DO NOT follow the Configuration instructions in the official plugin documentation!!
Your Access key ID and Secret access key, entered on the plugin settings page, is not encrypted in the WP Database. Generating Access Keys in the manner they describe in the official documentation, could provide someone with unrestricted access to your entire AWS account, if they get access to your Database. Creating a separate user and generating access keys in the way I outlined above, will restrict access for those Keys to be Read Only, and for only one S3 bucket. This means that if anyone does happen to copy your keys, they will only have Read Only access to your one S3 bucket instead of administration access to your whole AWS account. This is a significant safety measure in securing your AWS account.
2.2. Setting up Digital Products to use your S3 files
The final step is to configure your WooCommerce downloadable products to use your file(s) in your S3 Bucket.
When you're editing your WooCommerce product, instead of choosing a file from your Media Library using the provided button, the S3 Plugin provides us with a Shortcode to use instead.
In the Name field, enter a suitable name for your download.
In the File URL field, enter a Shortcode using the following format:
[amazon_s3 bucket=MyBucketName object=MyFileName.ext]
For our example bucket and file, it would be [amazon_s3 bucket=mysite-product-downloads object=EasyWPGuide.pdf]
Finally, don’t forget to Save your product after updating all the details.

Using the Amazon S3 Shortcode, you can even add a download link
to a Page or Post. This is useful if you have a free or sample product. As an example, you could create a link similar to the following:
<a href="[amazon_s3 bucket=MyBucket object=MyFile.mp4]">Download and preview my latest song</a>
The shortcode also supports the region parameter, which allows you to use different bucket regions, if needed.
[amazon_s3 bucket=MyBucketName object=MyFileName.ext region=eu-central-1]
And that’s it! Congrats! You’re done!
Your WooCoommerce Product is now configured correctly! When someone downloads your product, it will now download that file from your Amazon S3 Bucket. Not only will this mean that your files will download really quickly, if your digital files are really large it will save your hosting account from using a huge amount of bandwidth (since the file isn't downloaded from your website).
Hopefully you found this useful and it makes it easier to get your digital products working with your AWS account. I'd love to hear below if you decide to make the switch from hosting your files locally to using AWS.
Thank you so much for this tutorial. This was really helpful. Let me know if you got a way of “buying you a coffee” or something. You saved me a ton of time. For the most part this was spot on, however, the WooCommerce Amazon S3 plugin settings admin page has more fields than your screen shot. It allows you to enter a region, bucket name, and a url valid period on the settings screen now. But that info is straight forward enough.
Hi Doug,
Glad you found this information helpful. Thanks also for letting me know about the WP settings page for that S3 plugin. They’ve obviously added a few more options since I wrote the post, which is handy. I’ve just updated the screenshot in the post so it now shows all those new settings.
Thank you so much for this tutorial. This was really helpful. I have configured my S3 setting and plugin, but it’s not working for me.
I would suggest going back over my post and just double checking that all the Users and S3 Buckets are setup correctly. I know there’s quite a few steps to perform to get this right, so it would be easy to miss something.