There's a lot to do before making your site available to your live audience. Have you installed caching? Do your contact forms work properly? Are your theme and plugins up-to-date? Regardless of whether you're just building your own website or you're developing and supporting websites for numerous clients, it's a great idea to have a plan to make sure you've completed everything.
With that in mind, I've compiled a checklist of 25 steps that you should undertake before launching any of your websites.
01 – Configure your General Settings
On the Settings > General page there are numerous options that you need to configure:
- Update Site Title
- Update Tagline (or remove if not needed)
- Ensure (admin) Email Address is correct
- Set Site Language (if needed)
- Set Timezone
- Set Date Format
- Set Time Format
02 – Install SSL Certificate
Ensure your site is running on HTTPS. Most major browsers now show a warning or “not secure” message when accessing non-https site. Most respectable website hosts provide SSL certs for free. If your host doesn't you may want to consider moving to someone who does. My own site is hosted on Conetix and they provide free Let’s Encrypt SSL Certificates.
SSL/HTTPS is even more important for eCommerce sites. Not only for security, but for customer trust. HTTPS is also a factor in Google rankings.

03 – Rename Default Posts Category
The default Category for Posts is ‘Uncategorized’.
Rename this to ‘News’ or something similar.
You can do this on the Posts > Categories page.
04 – Remove Default Content
Some themes provide you with default content to help you setup your site. This can be handy if you want the same layout as the theme demo site. Ensure you remove any leftover default content that you haven't changed, before going live.
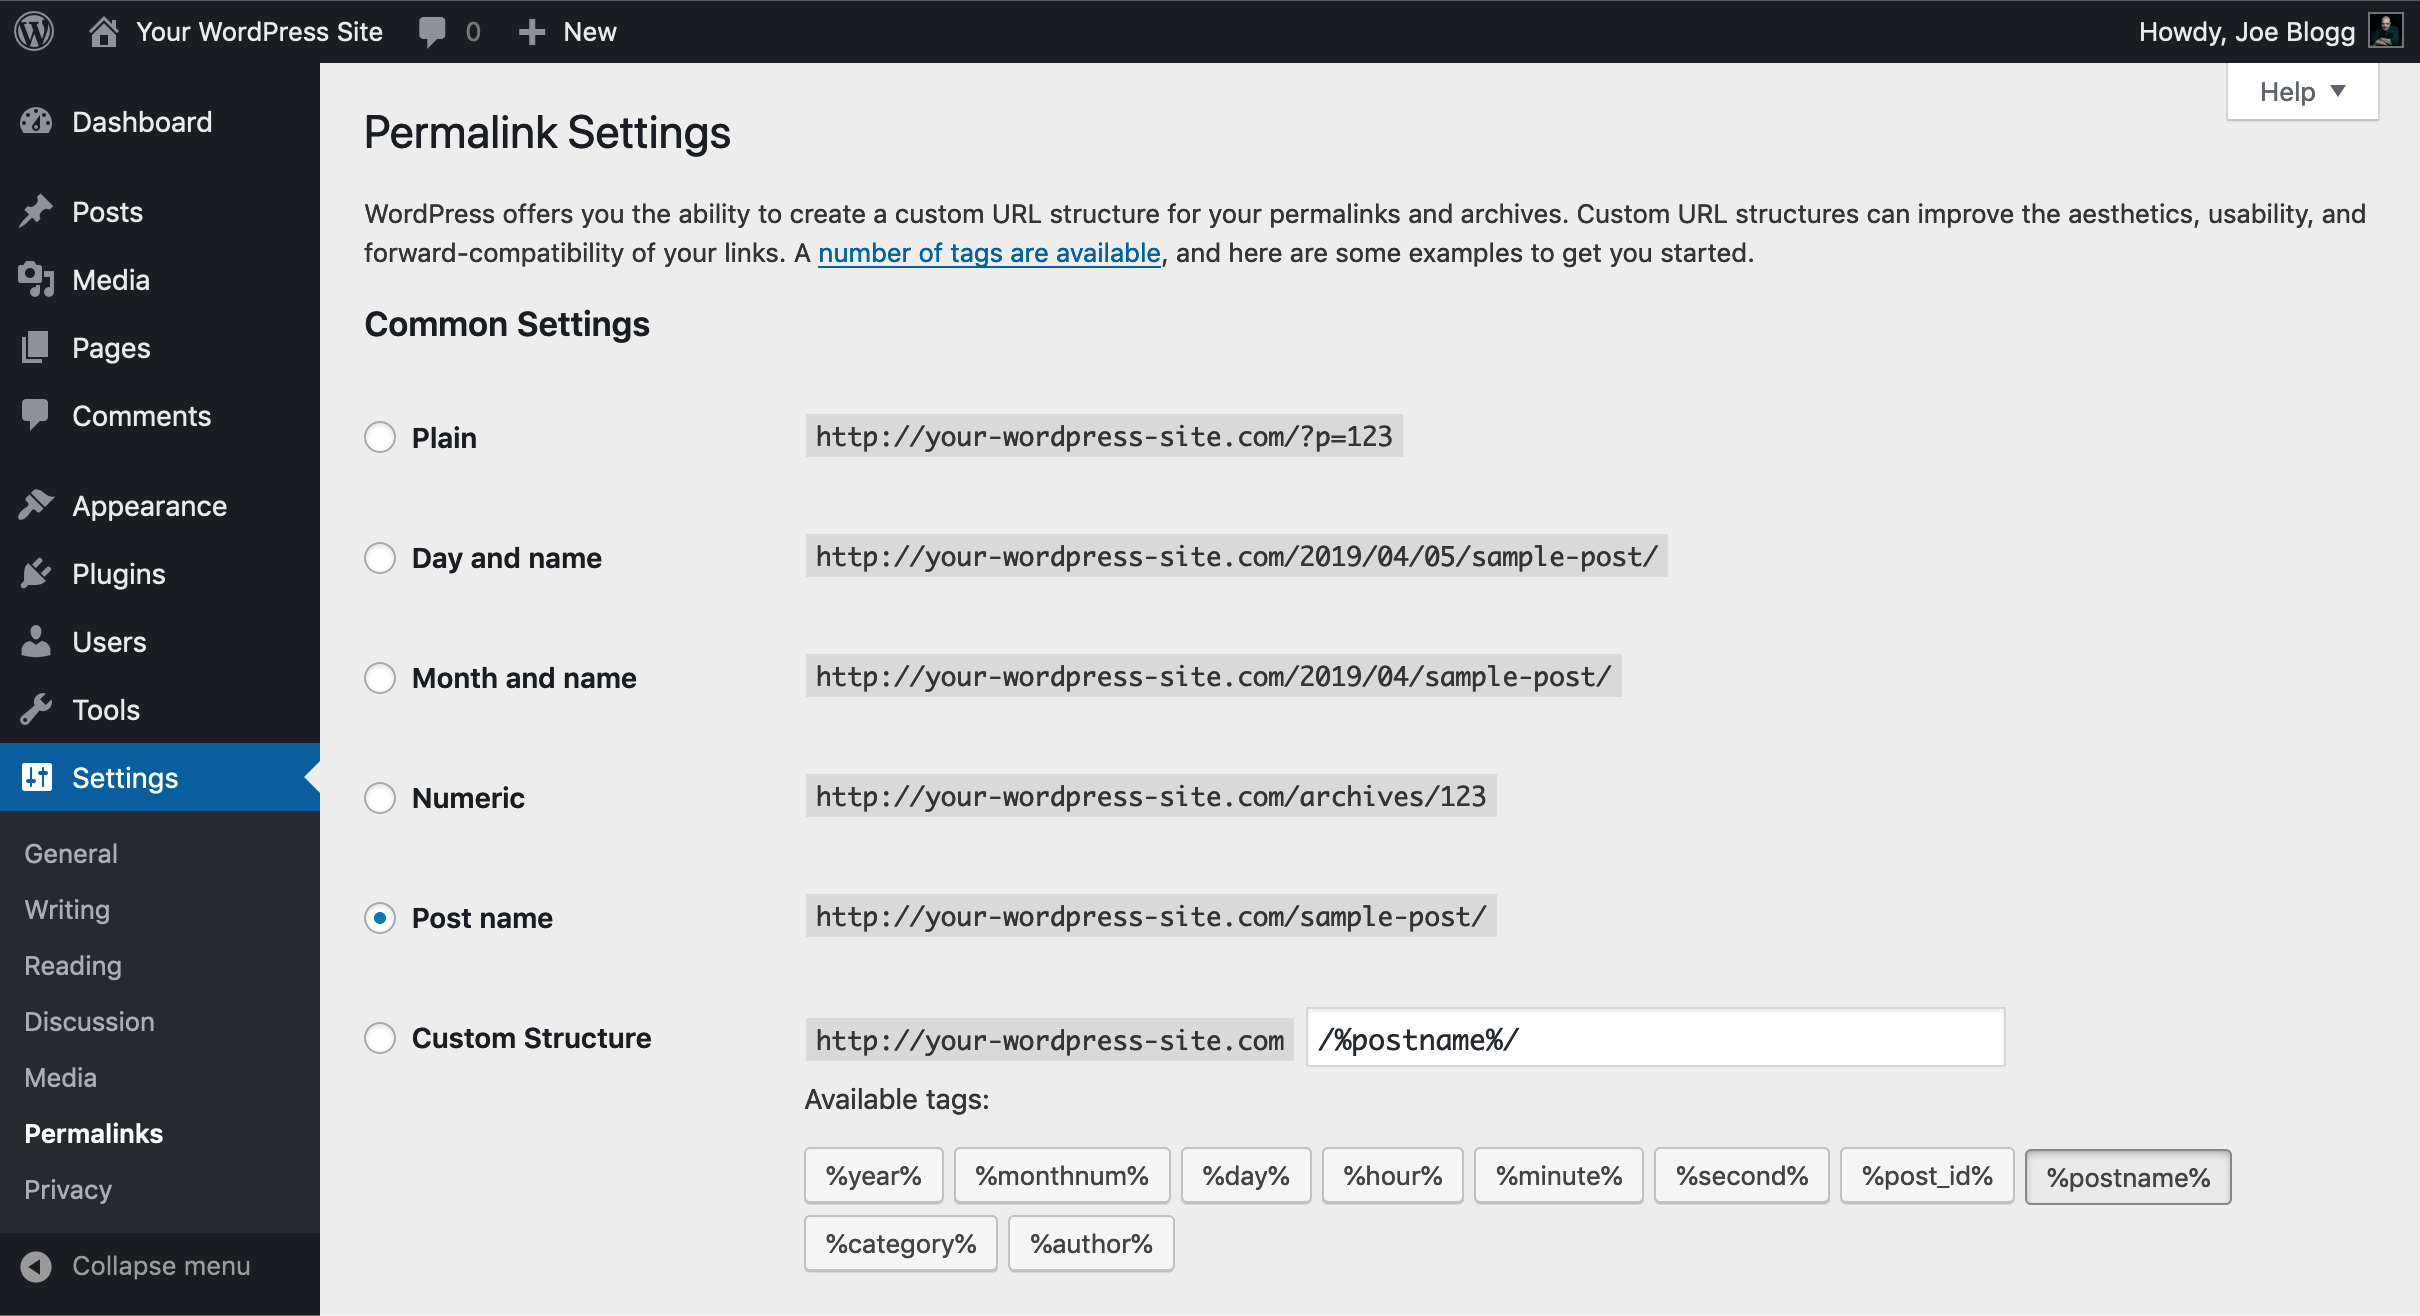
05 – Configure Permalinks
Permalinks (Settings > Permalinks) are your site URL format. It’s a good idea to decide on a Permalink structure before going live.
06 – Setup Redirects
If you’re replacing an existing site or moving domains, ensure you setup redirects for all changed URL’s.
Setting up Redirects is good SEO practice. Redirects will ensure Search Engines and visitors can find your content when the URL has changed. A popular, free, and easy to use Redirection plugin is Redirection.
07 – Optimise your Images
You should always optimise/compress your images before uploading to your site. The best way to do this is by using one of the many online Optimisation tools:
Compress JPEG (jpg)
Compress PNG (png)
TinyPNG (jpg & png)
If you have existing (uploaded) images, you can use EWWW Image Optimizer plugin.
08 – Install Caching
To increase the speed of your site, use a Caching plugin
Free:
WP Super Cache
W3 Total Cache
Swift Performance Lite
Paid:
WP Rocket
09 – Minimise & Concatenate your CSS & JS
To increase site speed and reduce HTTP requests, minimise and concatenate your CSS & JavaScript files.
Minimising files removes excess white space, comments and empty lines. Concatenating files, joins multiple files into one. Most caching plugins can do this for you and usually, it just needs to be turned on in their settings. If your caching plugin doesn’t, try:
10 – Add A Contact Form
It’s always important that your site visitors can get in touch, so make sure you add a contact form to your site. The easiest way to do so is by using a plugin:
Free:
Ninja Forms
Contact Form 7
Paid:
Gravity Forms
11 – Check for Broken Links
No-one likes going to a website and then finding that the link you want, doesn’t actually work. Google hates that too!
While it might seem easy to install a ‘Broken Link Checker’ plugin, these can quite often max out your server CPU & RAM. Use an external service such as:
Broken Link Checker
Dead Link Checker
12 – Install the Classic Editor plugin
With the new Block Editor (Gutenberg) only months old, there are still a huge number of bugs and usability issues that are outstanding. There's also a large number of people who would still prefer to use the Classic Editor (also known as the TinyMCE or Visual Editor). If you prefer to stick with the Classic Editor, install the Classic Editor plugin
If you’re happy using the new Block Editor, then that’s ok too.
13 – Install SEO plugin
There's a number of popular SEO plugins out there nowadays. Two of the most popular plugins are Rank Math SEO and Yoast SEO. WordPress is great for SEO straight-out-of-the-box, but adding an SEO specific plugin makes it even better and will help improve your search engine results, when setup (& used) properly.
If neither Rank Math or Yoast interest you, then you can also try All in One SEO Pack.
14 – Create a Sitemap
A Sitemap is a file that provides information about your site such as pages and files, and the relationship between them. Search Engines like Google read your Sitemap to more intelligently crawl your site.
If you’re using an SEO plugin like Yoast SEO or All in One SEO, you can configure them to create your Sitemap for you. Just make sure you view your Sitemap as well, to ensure it was generated properly.
15 – Setup Google Analytics
To get a deeper understanding of your customers or site visitors, signup for a free Google Analytics account.
After you’ve signed up, you’ll need to add your GA code to your website. There’s lots of Google Analytics plugins available. Some better than others, and some horrible ones with an overabundance of annoying ads!
For a lightweight, and super-easy plugin, use GA Google Analytics.
If you want site analytics but also want to use a GDPR compatible solution, then check out Independent Analytics. It's a free plugin in the official WordPress Plugin Directory. (It's important to know that Google Analytics isn't GDPR compatible)
16 – Setup Security Plugin
To help strengthen the security of your site, setup a security plugin. Security plugins can help strengthen passwords, block and/or lockout suspect IP’s, prevent brute force intrusions, detect file changes, scan for malware and help with a host of other issues that can cause a site harm.
Free:
Wordfence
iThemes Security
Paid:
iThemes Security Pro
17 – Setup Spam Plugin
If you have a Blog on your site where you allow comments, it’s only a matter of time before it attracts spam comments. Install a spam plugin to help catch & reduce spam comments.
Free:
Antispam Bee
Spam Destroyer
Paid:
Akismet (free for personal sites)
18 – Setup Backup Plugin
Just like backing up your home computer, it’s vitally important to backup your website. A good backup plugin should allow you to schedule regular backups. You should also perform regular checks that you can also restore from your backup files.
Free:
UpdraftPlus
BackWPup
Paid:
BackupBuddy
VaultPress
19 – eCommerce & Membership sites
If your site has eCommerce or Membership functionality:
- It’s important your site has an SSL Cert and is configured to use HTTPS, especially if you're taking payments on your site.
- Make sure your Cart & Checkout pages are working.
- Ensure shipping charges are calculating correctly.
- Ensure your Payment Gateway is setup and working properly.
- Ensure Products and/or subscriptions are loaded and displaying correctly.
20 – eCommerce & Membership sites
Make sure your signup & login process is working. This applies to free membership sites as well as paid membership sites.
Pro tip: If your eCommerce/Membership plugin generates usernames based on the customer email address (e.g. WooCommerce), create a dummy ‘admin’ user and assign it the lowest role (or no role). This will ensure a customer email address like ‘admin@yoursite.com' doesn’t automatically generate an ‘admin’ username.
21 – eCommerce & Membership sites
Always test the complete purchase/checkout process using your LIVE payment gateway.
If using a Payment Gateway like Stripe, this means using your LIVE credit card. If using PayPal you may need to get a friend to make a test purchase for you as you can’t make a PayPal payment using your own PayPal account.
22 – Strong Passwords
It should go without saying that ALL account passwords should be strong!
If you’re creating passwords for other users or clients, ensure those passwords are strong. Longer passwords are better. Aim for 10-15+ characters in length. 30 or 60 is even better.

23 – Perform Complete Site Test
Test everything!
- Test all forms submit & form emails are sent
- Ensure navigation menu works properly
- Test your page links
- Test button links
- Test email links and ensure they are obfuscated by using something like the Simple Mail Address Encoder plugin
- Check content for spelling mistakes & grammatical errors
- Test blog comments work
24 – Check Responsiveness
It’s more important now than ever that your site is mobile friendly so make sure your site is responsive.
Check your site on a mobile device & a tablet device, and if possible, even check multiple device types.
Mobile traffic is responsible for 52.2 percent of Internet traffic in 2018
https://hostingfacts.com/internet-facts-stats
57% of consumers said: A business with a poorly designed mobile website is not likely to be recommended
https://www.socpub.com/articles/the-5-mobile-marketing-mistakes-infographic-14849
25 – Update Everything
Ensure all your Plugins and Themes are up-to-date.
Ensure WordPress is up to date.
Using outdated Plugins, Themes and even WordPress core files, can leave your site vulnerable.
GO!
When you’re happy you’ve completed all these steps, then it’s time to launch!
If you’re using a ‘Coming Soon’ plugin, don’t forget to turn if off.
This was a presentation that I made at a recent WordPress Melbourne User Group meetup. You can view and download the slides below.
If you have any other steps that you regularly perform before launching a site, that I haven't included here, let me know in the comments below. I'd love to hear!